> ## Documentation Index
> Fetch the complete documentation index at: https://docs.evolink.ai/llms.txt
> Use this file to discover all available pages before exploring further.
# Codex CLI
> Connect Codex CLI to EvoLink.AI
## Overview
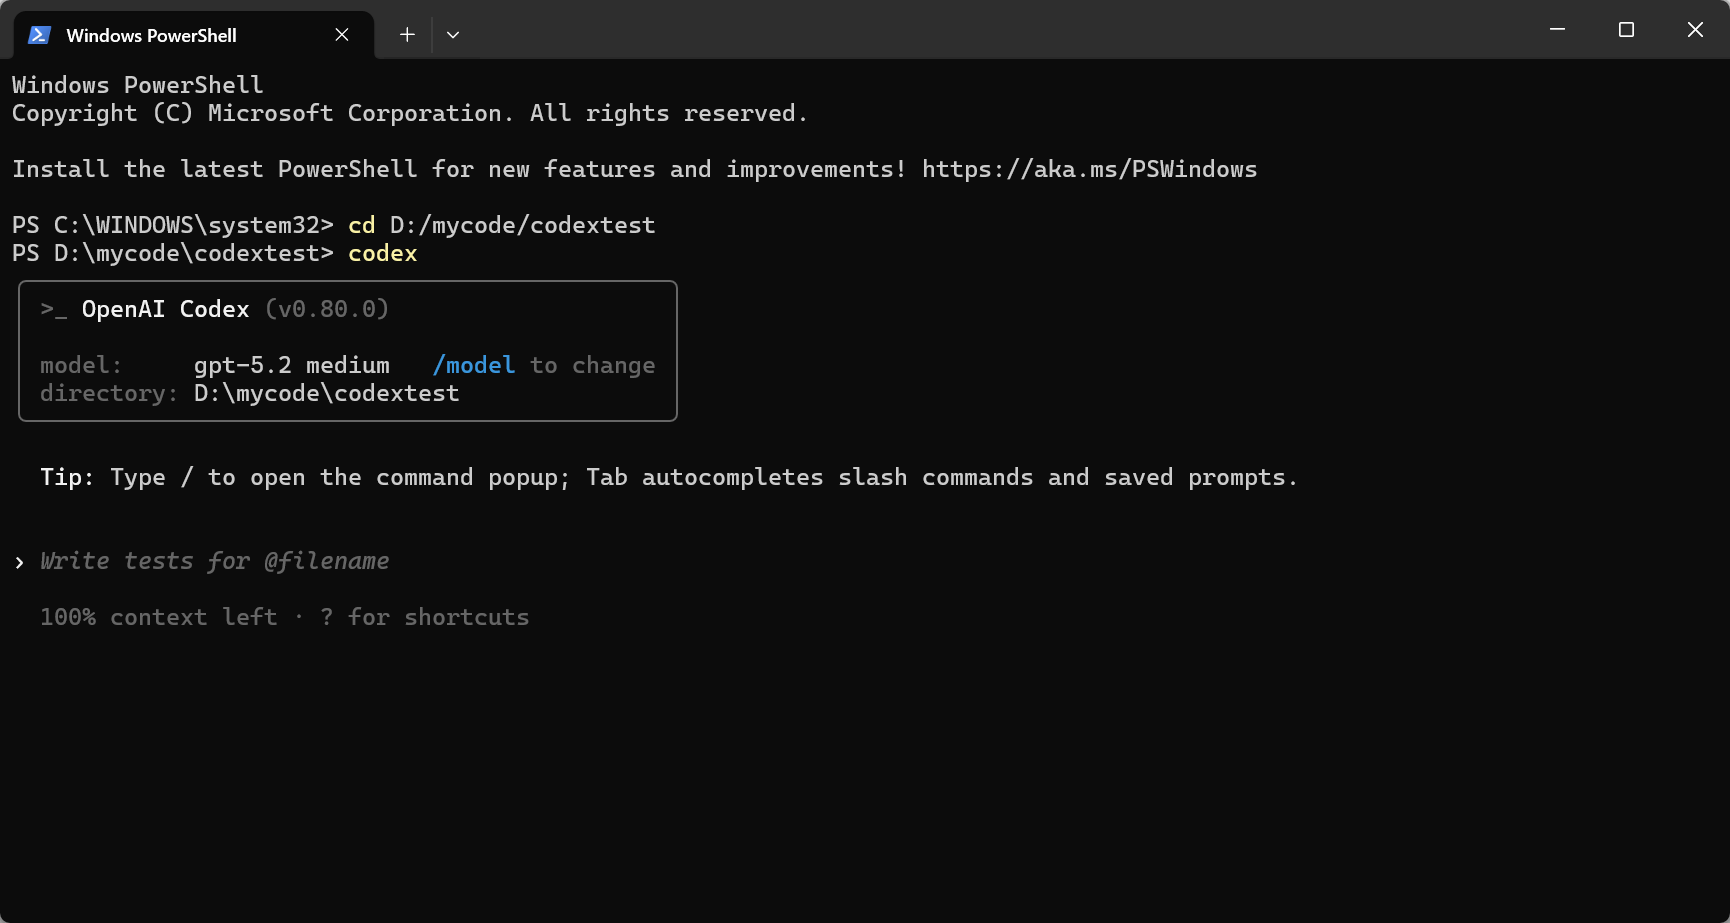 Codex CLI is OpenAI's official command-line tool for code-related tasks in the terminal. Compared to general chat tools, it emphasizes engineering-ready output with clearer, actionable code changes.
By integrating Codex CLI with **EvoLink API**, you can access EvoLink's models (such as **GPT series**) through a unified OpenAI-compatible interface with one key and one base URL.
## Prerequisites
Before configuring, make sure you have:
### 1. Install Node.js and npm
**Why needed?** Node.js is the runtime environment for CLI tools (like installing WeChat on your phone to chat, you need to install Node.js on your computer to run CLI tools).
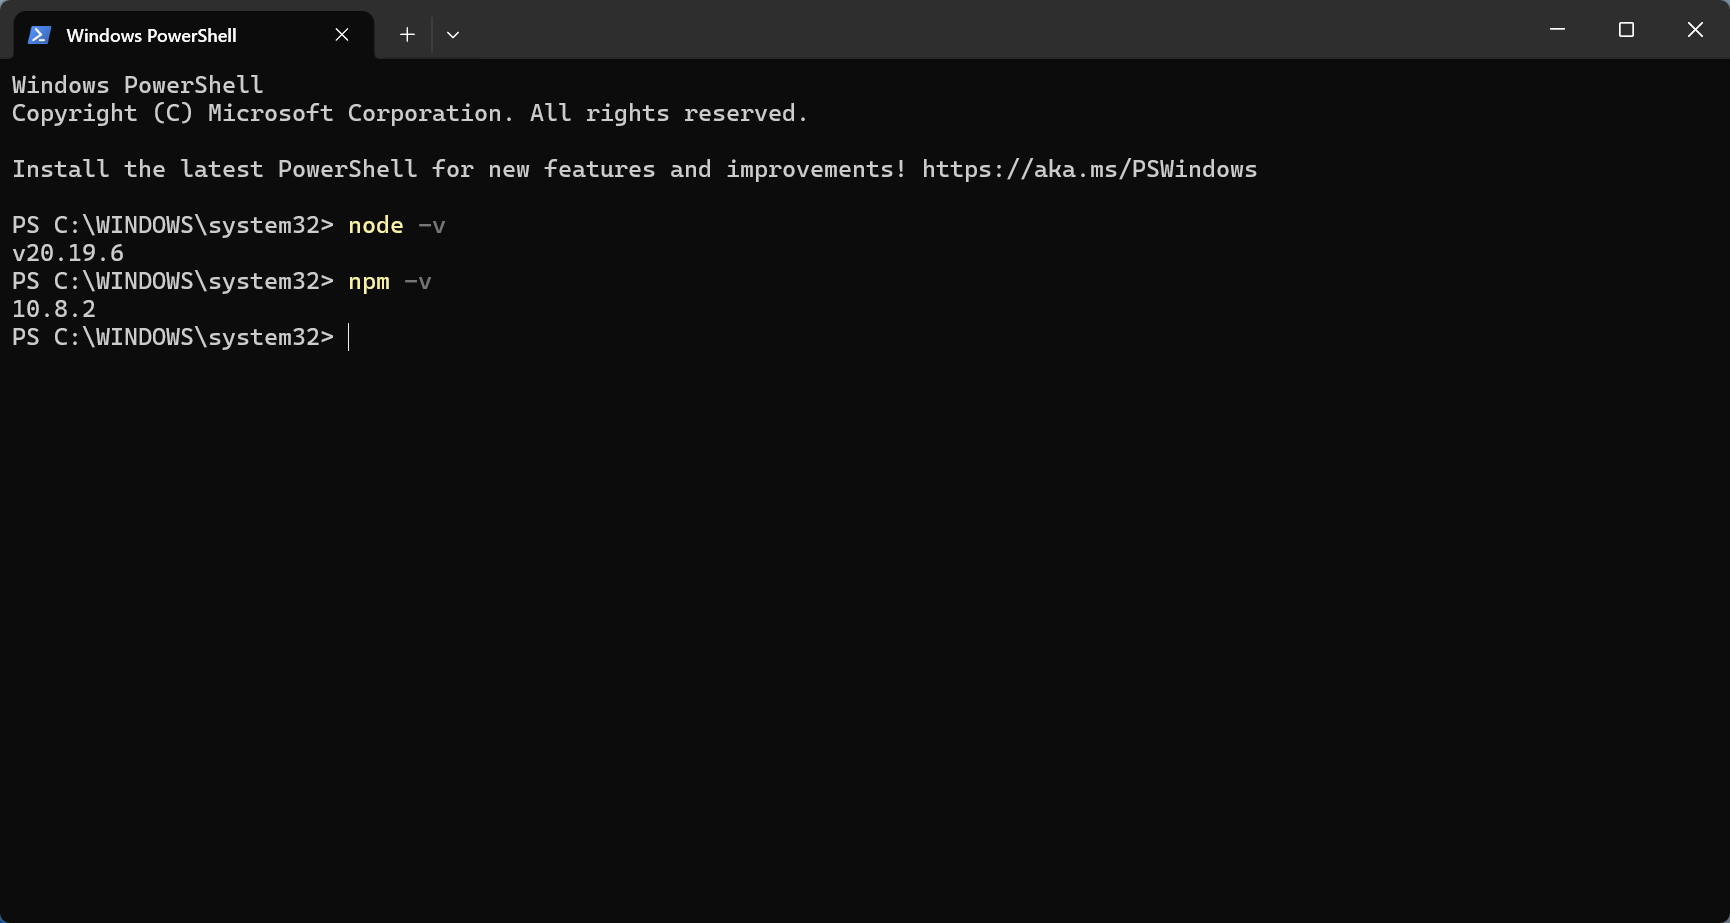
**If already installed:** Run `node -v` and `npm -v` to check version. If v20+, skip this step.
**First-time installation:**
* Download and install from [Node.js official website](https://nodejs.org/) (recommend LTS version)
* If you're unfamiliar with the installation process, refer to [Runoob - Node.js Installation Guide](https://www.runoob.com/nodejs/nodejs-install-setup.html)
* Recommended: **Node.js v20 or higher**
* Verify installation:
```bash theme={null}
node -v
npm -v
```
Codex CLI is OpenAI's official command-line tool for code-related tasks in the terminal. Compared to general chat tools, it emphasizes engineering-ready output with clearer, actionable code changes.
By integrating Codex CLI with **EvoLink API**, you can access EvoLink's models (such as **GPT series**) through a unified OpenAI-compatible interface with one key and one base URL.
## Prerequisites
Before configuring, make sure you have:
### 1. Install Node.js and npm
**Why needed?** Node.js is the runtime environment for CLI tools (like installing WeChat on your phone to chat, you need to install Node.js on your computer to run CLI tools).
**If already installed:** Run `node -v` and `npm -v` to check version. If v20+, skip this step.
**First-time installation:**
* Download and install from [Node.js official website](https://nodejs.org/) (recommend LTS version)
* If you're unfamiliar with the installation process, refer to [Runoob - Node.js Installation Guide](https://www.runoob.com/nodejs/nodejs-install-setup.html)
* Recommended: **Node.js v20 or higher**
* Verify installation:
```bash theme={null}
node -v
npm -v
```
 ### 2. Get EvoLink API Key
* Log in to [EvoLink Dashboard](https://evolink.ai/dashboard)
* Find API Keys in the dashboard, click 'Create New Key' button, then copy the generated Key
* API Key usually starts with `sk-`
## Step 1: Install Codex CLI
**Tip:** If you don't know how to open a command line terminal, see [FAQ - How to open command line terminal](#13-how-to-open-command-line-terminal)
### 1. Global Installation
```bash theme={null}
npm install -g @openai/codex
```
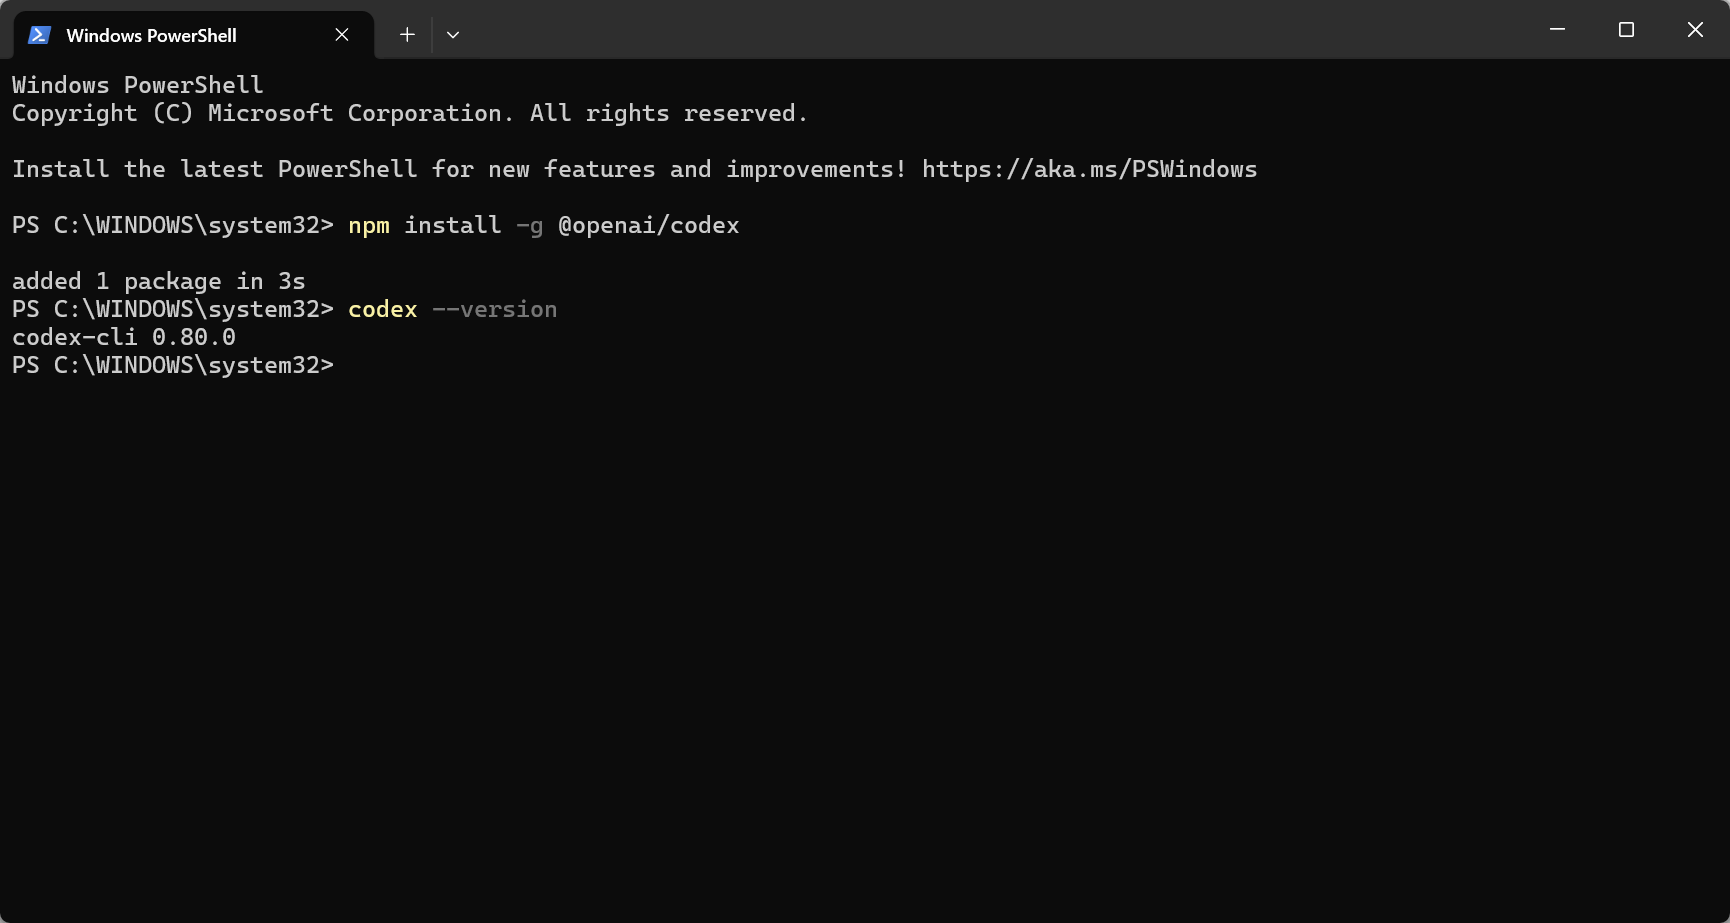
**Expected result:** Download info scrolling, ending with `added XX packages` (takes 1-3 minutes).
**If error occurs:** `permission denied` means Windows needs "Run as administrator" PowerShell, macOS/Linux add `sudo` before command.
### 2. Verify Installation
```bash theme={null}
codex --version
```
**Success indicator:** Shows version number (e.g., `1.x.x`).
### 2. Get EvoLink API Key
* Log in to [EvoLink Dashboard](https://evolink.ai/dashboard)
* Find API Keys in the dashboard, click 'Create New Key' button, then copy the generated Key
* API Key usually starts with `sk-`
## Step 1: Install Codex CLI
**Tip:** If you don't know how to open a command line terminal, see [FAQ - How to open command line terminal](#13-how-to-open-command-line-terminal)
### 1. Global Installation
```bash theme={null}
npm install -g @openai/codex
```
**Expected result:** Download info scrolling, ending with `added XX packages` (takes 1-3 minutes).
**If error occurs:** `permission denied` means Windows needs "Run as administrator" PowerShell, macOS/Linux add `sudo` before command.
### 2. Verify Installation
```bash theme={null}
codex --version
```
**Success indicator:** Shows version number (e.g., `1.x.x`).
 ## Step 2: Configure EvoLink API
Codex CLI supports a custom Provider via config file, no source code modification needed.
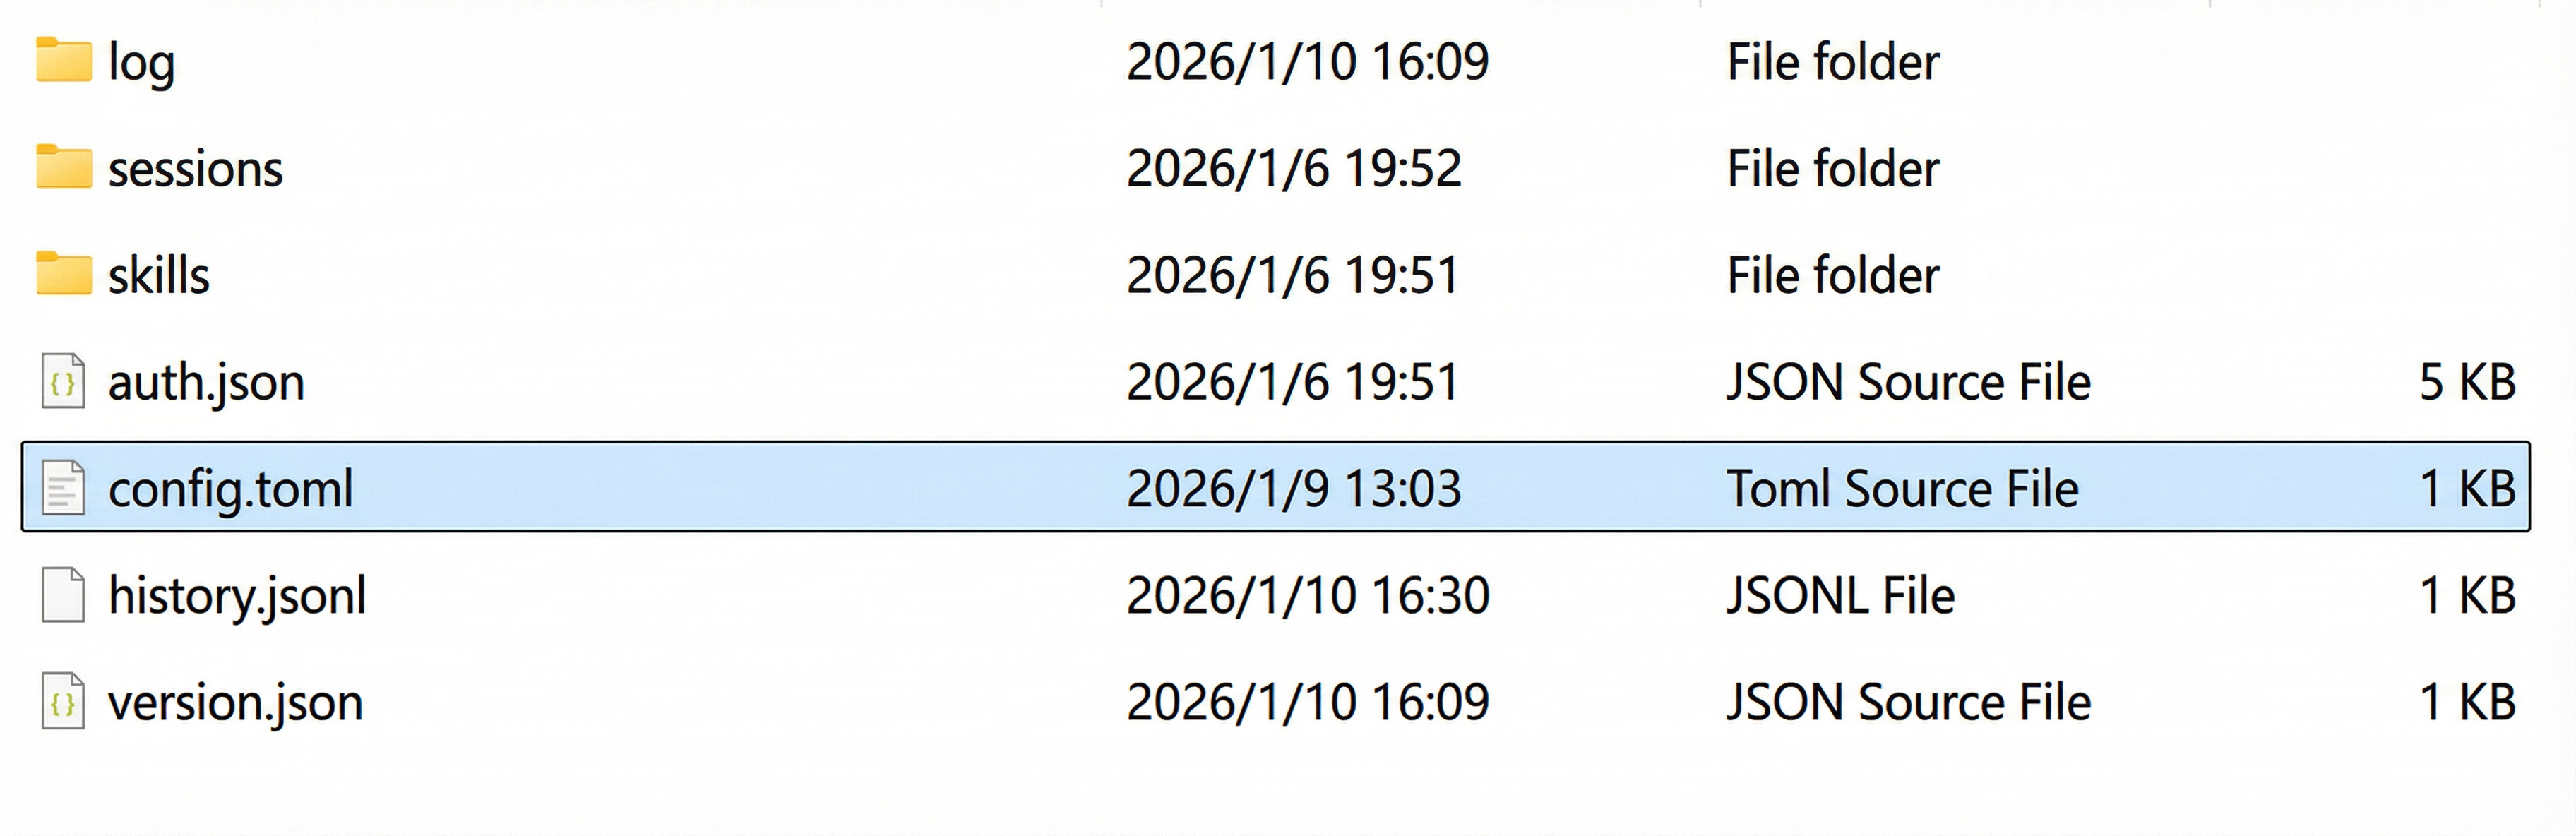
### 1. Open Config Directory
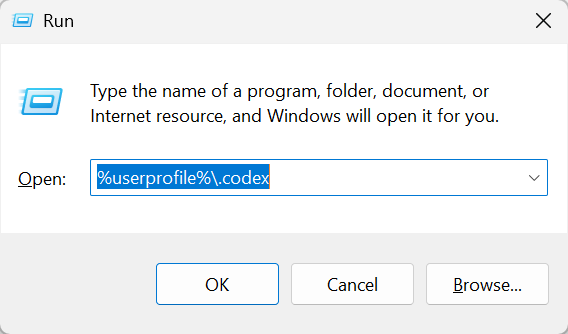
Press `Win + R`, paste the following, then press Enter to open the Codex config directory:
```
%userprofile%\.codex
```
## Step 2: Configure EvoLink API
Codex CLI supports a custom Provider via config file, no source code modification needed.
### 1. Open Config Directory
Press `Win + R`, paste the following, then press Enter to open the Codex config directory:
```
%userprofile%\.codex
```
 In Finder, press `Command + Shift + G`, paste the following path, then press Enter:
```
~/.codex
```
Access the config directory in your file manager:
```
~/.codex
```
In Finder, press `Command + Shift + G`, paste the following path, then press Enter:
```
~/.codex
```
Access the config directory in your file manager:
```
~/.codex
```
 ### 2. Edit config.toml
Find the `config.toml` file in the config directory and edit it with the following content:
```toml theme={null}
model = "gpt-5.2"
model_reasoning_effort = "medium"
model_provider = "evolink"
[model_providers.evolink]
name = "EvoLink API"
base_url = "https://direct.evolink.ai/v1"
env_key = "OPENAI_API_KEY"
wire_api = "responses"
```
**⚠️ Important:**
* **Copy completely** without missing any symbols
* Replace `"your-evolink-api-key"` with actual API Key
* TOML format is sensitive to indentation and symbols
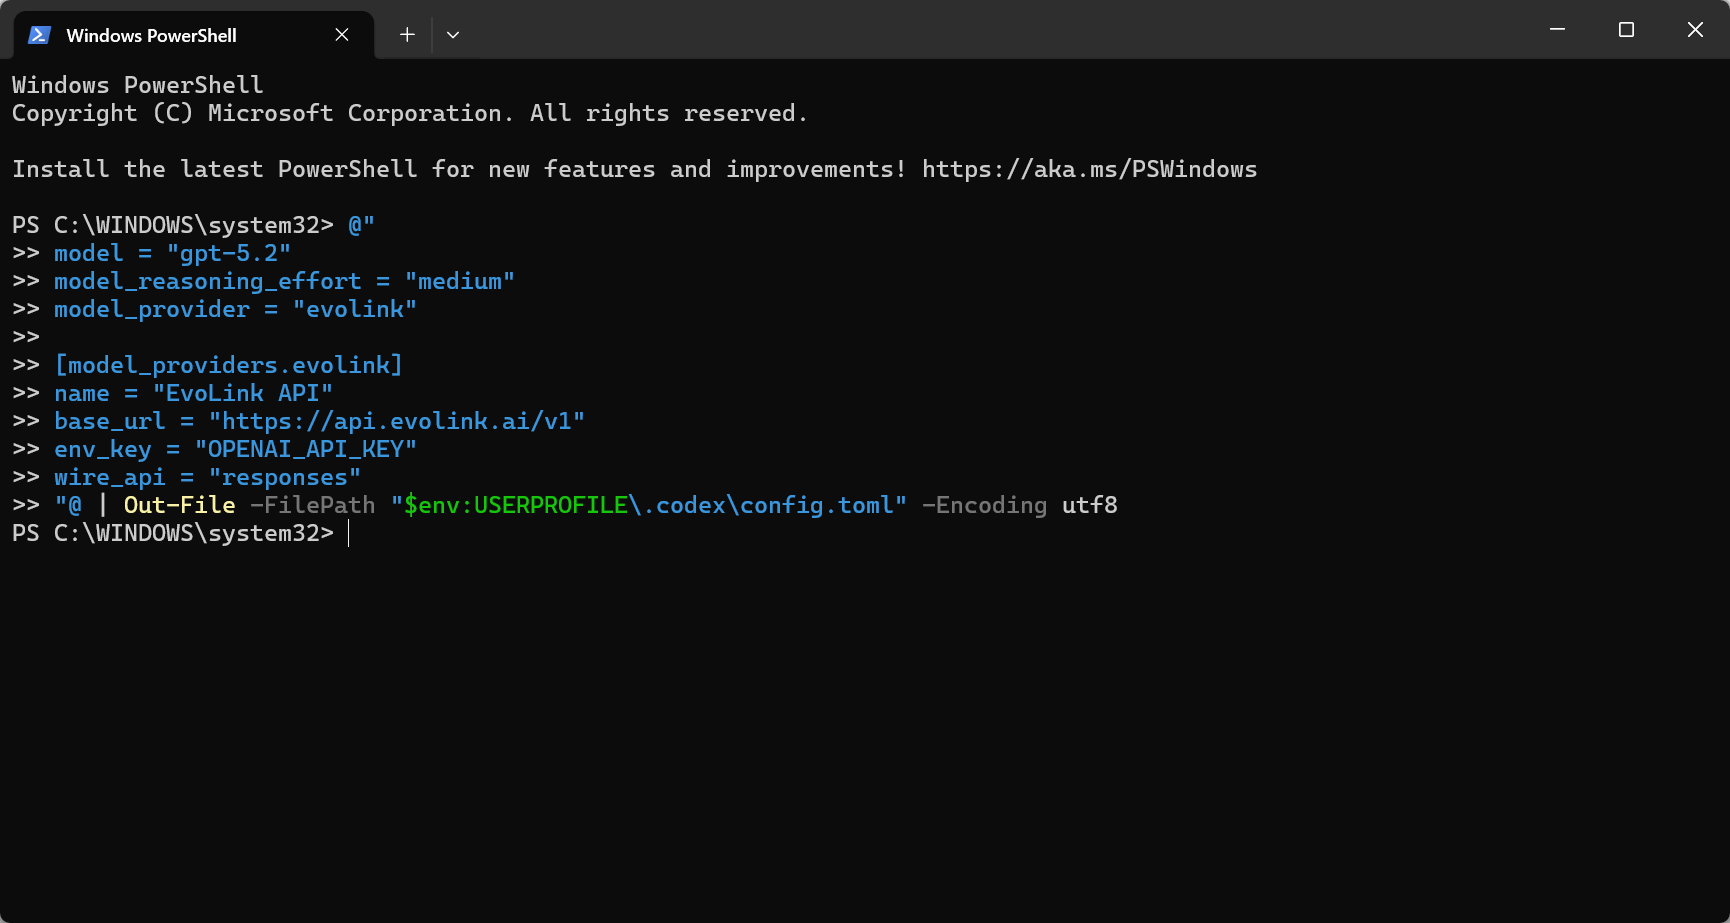
```powershell theme={null}
@"
model = "gpt-5.2"
model_reasoning_effort = "medium"
model_provider = "evolink"
[model_providers.evolink]
name = "EvoLink API"
base_url = "https://direct.evolink.ai/v1"
env_key = "OPENAI_API_KEY"
wire_api = "responses"
"@ | Out-File -FilePath "$env:USERPROFILE\.codex\config.toml" -Encoding utf8
```
### 2. Edit config.toml
Find the `config.toml` file in the config directory and edit it with the following content:
```toml theme={null}
model = "gpt-5.2"
model_reasoning_effort = "medium"
model_provider = "evolink"
[model_providers.evolink]
name = "EvoLink API"
base_url = "https://direct.evolink.ai/v1"
env_key = "OPENAI_API_KEY"
wire_api = "responses"
```
**⚠️ Important:**
* **Copy completely** without missing any symbols
* Replace `"your-evolink-api-key"` with actual API Key
* TOML format is sensitive to indentation and symbols
```powershell theme={null}
@"
model = "gpt-5.2"
model_reasoning_effort = "medium"
model_provider = "evolink"
[model_providers.evolink]
name = "EvoLink API"
base_url = "https://direct.evolink.ai/v1"
env_key = "OPENAI_API_KEY"
wire_api = "responses"
"@ | Out-File -FilePath "$env:USERPROFILE\.codex\config.toml" -Encoding utf8
```
 ```bash theme={null}
cat > ~/.codex/config.toml << 'EOF'
model = "gpt-5.2"
model_reasoning_effort = "medium"
model_provider = "evolink"
[model_providers.evolink]
name = "EvoLink API"
base_url = "https://direct.evolink.ai/v1"
env_key = "OPENAI_API_KEY"
wire_api = "responses"
EOF
```
After running the command, the config file will be automatically created and written.
```toml theme={null}
model = "gpt-5.2"
model_reasoning_effort = "medium"
model_provider = "evolink"
[model_providers.evolink]
name = "EvoLink API"
base_url = "https://direct.evolink.ai/v1"
env_key = "OPENAI_API_KEY"
wire_api = "responses"
```
Config fields:
* `model`: default model name
* `model_reasoning_effort`: reasoning depth (adjust as needed)
* `model_provider`: provider name that matches the section below
* `base_url`: EvoLink API endpoint
* `env_key`: environment variable name for the API key
* `wire_api`: must be `responses`
### 2. Configure API Key
**Temporary (current session only)**
```powershell theme={null}
$env:OPENAI_API_KEY = "your-evolink-api-key"
```
**Permanent**
```powershell theme={null}
[Environment]::SetEnvironmentVariable("OPENAI_API_KEY", "your-evolink-api-key", "User")
```
Restart the terminal for changes to take effect.
**Verify Configuration**
```powershell theme={null}
echo $env:OPENAI_API_KEY
```
```bash theme={null}
cat > ~/.codex/config.toml << 'EOF'
model = "gpt-5.2"
model_reasoning_effort = "medium"
model_provider = "evolink"
[model_providers.evolink]
name = "EvoLink API"
base_url = "https://direct.evolink.ai/v1"
env_key = "OPENAI_API_KEY"
wire_api = "responses"
EOF
```
After running the command, the config file will be automatically created and written.
```toml theme={null}
model = "gpt-5.2"
model_reasoning_effort = "medium"
model_provider = "evolink"
[model_providers.evolink]
name = "EvoLink API"
base_url = "https://direct.evolink.ai/v1"
env_key = "OPENAI_API_KEY"
wire_api = "responses"
```
Config fields:
* `model`: default model name
* `model_reasoning_effort`: reasoning depth (adjust as needed)
* `model_provider`: provider name that matches the section below
* `base_url`: EvoLink API endpoint
* `env_key`: environment variable name for the API key
* `wire_api`: must be `responses`
### 2. Configure API Key
**Temporary (current session only)**
```powershell theme={null}
$env:OPENAI_API_KEY = "your-evolink-api-key"
```
**Permanent**
```powershell theme={null}
[Environment]::SetEnvironmentVariable("OPENAI_API_KEY", "your-evolink-api-key", "User")
```
Restart the terminal for changes to take effect.
**Verify Configuration**
```powershell theme={null}
echo $env:OPENAI_API_KEY
```
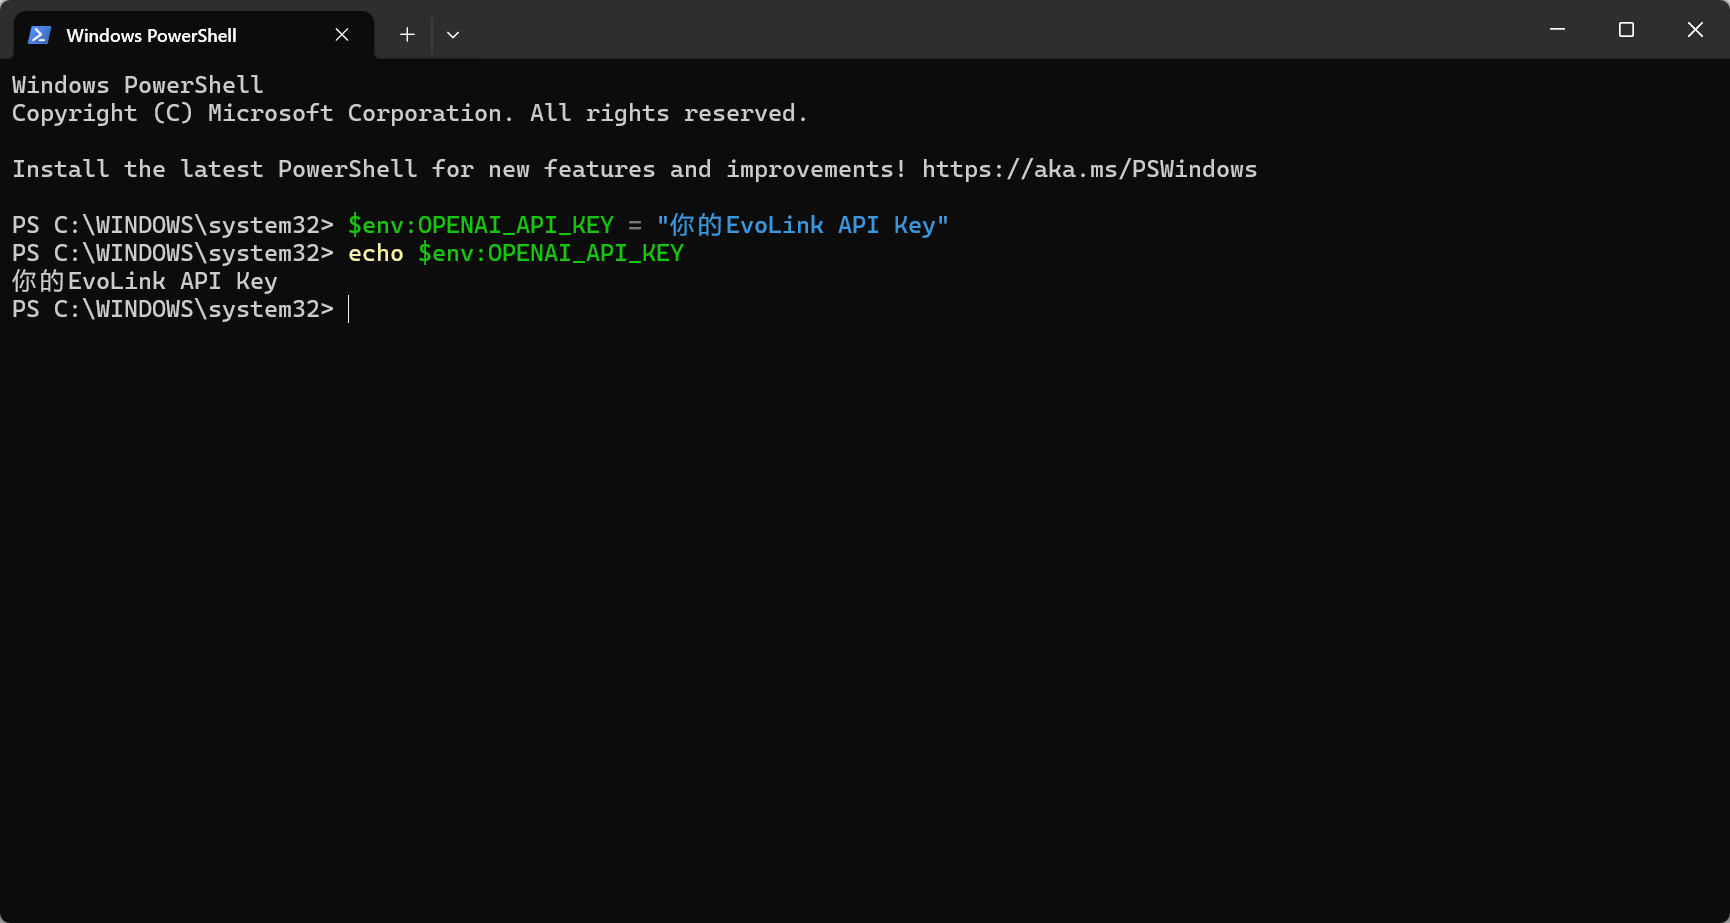 If it outputs your API Key, the configuration is successful.
**Temporary (current session only)**
```bash theme={null}
export OPENAI_API_KEY="your-evolink-api-key"
```
**Permanent**
Edit `~/.bashrc` or `~/.zshrc`, add:
```bash theme={null}
export OPENAI_API_KEY="your-evolink-api-key"
```
Then run `source ~/.bashrc` or `source ~/.zshrc` to apply, or restart the terminal.
**Verify Configuration**
```bash theme={null}
echo $OPENAI_API_KEY
```
If it outputs your API Key, the configuration is successful.
## Step 3: Start Using Codex CLI
### 1. Enter working directory
```shell theme={null}
cd your-working-directory
```
**Note:** Replace `your-working-directory` with actual path
### 2. Interactive mode
```shell theme={null}
codex
```
### 3. Verify configuration
```shell theme={null}
codex "Who are you"
```
**Success indicators:**
* See AI response text (several lines)
* **No** errors like `401`, `403`, `API Key invalid`
**If you see errors:**
* `401 Unauthorized`: API Key not set or invalid → Check environment variable
* `403 Forbidden`: Insufficient API Key permissions → Verify API Key
* `Network error`: Network issue → Check connection
## FAQ
### 1. What is Codex CLI and what is it used for?
Codex CLI is OpenAI's official command-line tool focused on code-related tasks. It emphasizes engineering-ready output with clearer, actionable code changes.
### 2. How do I verify installation and configuration on first use?
Run these commands in sequence:
* `node -v` and `npm -v`: Confirm Node.js and npm are installed
* `codex --version`: Confirm Codex CLI is installed
* `codex "Who are you"`: Confirm API configuration is correct
### 3. What's the difference between interactive mode and single command mode?
* **Interactive mode**: Run `codex` to enter continuous conversation for multi-turn interactions
* **Single command mode**: Run `codex "question"` to get a single response and exit
### 4. Will Codex CLI automatically read or upload my local files and code?
No. Codex CLI only reads file content when you explicitly reference or authorize it. It's recommended to use it in a dedicated project folder.
### 5. How do I use Codex CLI to analyze local file content?
In interactive mode, you can reference files by:
* Typing the file path for Codex to read
* Dragging files into the terminal window
* Copy and pasting file content
### 6. Does Codex CLI support Chinese input and output?
Yes, fully supported.
### 7. No output after execution—what could be the cause?
Common causes include:
* Network connection issues
* Invalid API Key or insufficient balance
* Incorrect `base_url` configuration
* Firewall or proxy blocking requests
### 8. Why don't my config changes take effect?
* Restart your terminal
* Check `config.toml` syntax (TOML format)
* Verify config file path:
* Windows: `C:\Users\{username}\.codex\config.toml`
* macOS / Linux: `~/.codex/config.toml`
### 9. What causes 401/403 errors?
* **401 error**: `OPENAI_API_KEY` not set or invalid
* **403 error**: Insufficient permissions or expired key
* Check that `env_key` matches your environment variable name
### 10. What scenarios is Codex CLI suited for?
**Suited for:**
* Code writing, debugging, and refactoring
* Quick Q\&A in command-line environments
* File content analysis
**Not suited for:**
* Complex GUI interactions
* Real-time collaborative editing
### 11. How do I switch models?
Open the configuration file `config.toml` (located at `~/.codex/config.toml` or `C:\Users\{username}\.codex\config.toml`), and modify the `model` field:
```toml theme={null}
model = "gpt-5.2" # Change to your desired model name
```
Save the file and restart Codex CLI for changes to take effect.
### 12. How do I upload images?
* Option 1: Reference the image path
* Option 2: Drag and drop an image into the terminal
* Option 3: Paste an image directly
All methods require user action—Codex CLI will not automatically read or upload local images.
### 13. How to open command line terminal?
* Method 1: Press `Win + R`, type `cmd` or `powershell`, then press Enter
* Method 2: Search for "Command Prompt" or "PowerShell" in the Start menu
* Method 3: Hold Shift and right-click in a folder, select "Open PowerShell window here"
* Method 1: Press `Command + Space` to open Spotlight, type `Terminal`, then press Enter
* Method 2: Go to "Applications" → "Utilities" → "Terminal"
* Method 1: Press `Ctrl + Alt + T` shortcut
* Method 2: Search for "Terminal" in the application menu
## Notes
Run Codex CLI in a dedicated project folder. Avoid running it in sensitive directories (such as system folders or directories containing credentials). Codex CLI operates starting from the current working directory.
The `wire_api` in config must be set to `"responses"`. `"chat"` is deprecated.
If it outputs your API Key, the configuration is successful.
**Temporary (current session only)**
```bash theme={null}
export OPENAI_API_KEY="your-evolink-api-key"
```
**Permanent**
Edit `~/.bashrc` or `~/.zshrc`, add:
```bash theme={null}
export OPENAI_API_KEY="your-evolink-api-key"
```
Then run `source ~/.bashrc` or `source ~/.zshrc` to apply, or restart the terminal.
**Verify Configuration**
```bash theme={null}
echo $OPENAI_API_KEY
```
If it outputs your API Key, the configuration is successful.
## Step 3: Start Using Codex CLI
### 1. Enter working directory
```shell theme={null}
cd your-working-directory
```
**Note:** Replace `your-working-directory` with actual path
### 2. Interactive mode
```shell theme={null}
codex
```
### 3. Verify configuration
```shell theme={null}
codex "Who are you"
```
**Success indicators:**
* See AI response text (several lines)
* **No** errors like `401`, `403`, `API Key invalid`
**If you see errors:**
* `401 Unauthorized`: API Key not set or invalid → Check environment variable
* `403 Forbidden`: Insufficient API Key permissions → Verify API Key
* `Network error`: Network issue → Check connection
## FAQ
### 1. What is Codex CLI and what is it used for?
Codex CLI is OpenAI's official command-line tool focused on code-related tasks. It emphasizes engineering-ready output with clearer, actionable code changes.
### 2. How do I verify installation and configuration on first use?
Run these commands in sequence:
* `node -v` and `npm -v`: Confirm Node.js and npm are installed
* `codex --version`: Confirm Codex CLI is installed
* `codex "Who are you"`: Confirm API configuration is correct
### 3. What's the difference between interactive mode and single command mode?
* **Interactive mode**: Run `codex` to enter continuous conversation for multi-turn interactions
* **Single command mode**: Run `codex "question"` to get a single response and exit
### 4. Will Codex CLI automatically read or upload my local files and code?
No. Codex CLI only reads file content when you explicitly reference or authorize it. It's recommended to use it in a dedicated project folder.
### 5. How do I use Codex CLI to analyze local file content?
In interactive mode, you can reference files by:
* Typing the file path for Codex to read
* Dragging files into the terminal window
* Copy and pasting file content
### 6. Does Codex CLI support Chinese input and output?
Yes, fully supported.
### 7. No output after execution—what could be the cause?
Common causes include:
* Network connection issues
* Invalid API Key or insufficient balance
* Incorrect `base_url` configuration
* Firewall or proxy blocking requests
### 8. Why don't my config changes take effect?
* Restart your terminal
* Check `config.toml` syntax (TOML format)
* Verify config file path:
* Windows: `C:\Users\{username}\.codex\config.toml`
* macOS / Linux: `~/.codex/config.toml`
### 9. What causes 401/403 errors?
* **401 error**: `OPENAI_API_KEY` not set or invalid
* **403 error**: Insufficient permissions or expired key
* Check that `env_key` matches your environment variable name
### 10. What scenarios is Codex CLI suited for?
**Suited for:**
* Code writing, debugging, and refactoring
* Quick Q\&A in command-line environments
* File content analysis
**Not suited for:**
* Complex GUI interactions
* Real-time collaborative editing
### 11. How do I switch models?
Open the configuration file `config.toml` (located at `~/.codex/config.toml` or `C:\Users\{username}\.codex\config.toml`), and modify the `model` field:
```toml theme={null}
model = "gpt-5.2" # Change to your desired model name
```
Save the file and restart Codex CLI for changes to take effect.
### 12. How do I upload images?
* Option 1: Reference the image path
* Option 2: Drag and drop an image into the terminal
* Option 3: Paste an image directly
All methods require user action—Codex CLI will not automatically read or upload local images.
### 13. How to open command line terminal?
* Method 1: Press `Win + R`, type `cmd` or `powershell`, then press Enter
* Method 2: Search for "Command Prompt" or "PowerShell" in the Start menu
* Method 3: Hold Shift and right-click in a folder, select "Open PowerShell window here"
* Method 1: Press `Command + Space` to open Spotlight, type `Terminal`, then press Enter
* Method 2: Go to "Applications" → "Utilities" → "Terminal"
* Method 1: Press `Ctrl + Alt + T` shortcut
* Method 2: Search for "Terminal" in the application menu
## Notes
Run Codex CLI in a dedicated project folder. Avoid running it in sensitive directories (such as system folders or directories containing credentials). Codex CLI operates starting from the current working directory.
The `wire_api` in config must be set to `"responses"`. `"chat"` is deprecated.