> ## Documentation Index
> Fetch the complete documentation index at: https://docs.evolink.ai/llms.txt
> Use this file to discover all available pages before exploring further.
# OpenClaw Auto Install
> Install and manage OpenClaw instances with OpenClaw Manager
## Overview
OpenClaw Manager is a visual management tool that helps you quickly install, configure, and manage OpenClaw instances. No manual config editing required — just 3 steps to deploy.
Two messaging channels are supported:
| | Telegram | Feishu (Lark) |
| ------------------ | ------------------------------------------------- | --------------------------------------------- |
| Connection | Bot API (long polling) | WebSocket persistent connection |
| Credentials needed | Bot Token + your User ID | App ID + App Secret |
| Platform setup | Create a Bot only | Create an app + enable WebSocket subscription |
| User auth | Bound by User ID — only authorized users can chat | Any user who can message the Bot can chat |
| Best for | Personal use, international users | Team collaboration, users in China |
## System Environment Check
Before installation, it's recommended to run the environment checker tool to ensure your system meets OpenClaw's requirements.
### Download Checker Tool
Download the checker tool for your platform from [GitHub Releases](https://github.com/suuuuuu-1/openclaw-env-checker/releases):
| Platform | Filename |
| --------------------- | ------------------------------ |
| Windows | `openclaw-checker-win-x64.exe` |
| macOS (Intel) | `openclaw-checker-macos-x64` |
| macOS (Apple Silicon) | `openclaw-checker-macos-arm64` |
| Linux | `openclaw-checker-linux-x64` |
### Check Items
The tool automatically checks the following:
* ✅ Node.js version (requires >= 22.12.0)
* ✅ npm available
* ✅ Git available
* ✅ Network connectivity (github.com, npmjs.org, evolink.ai)
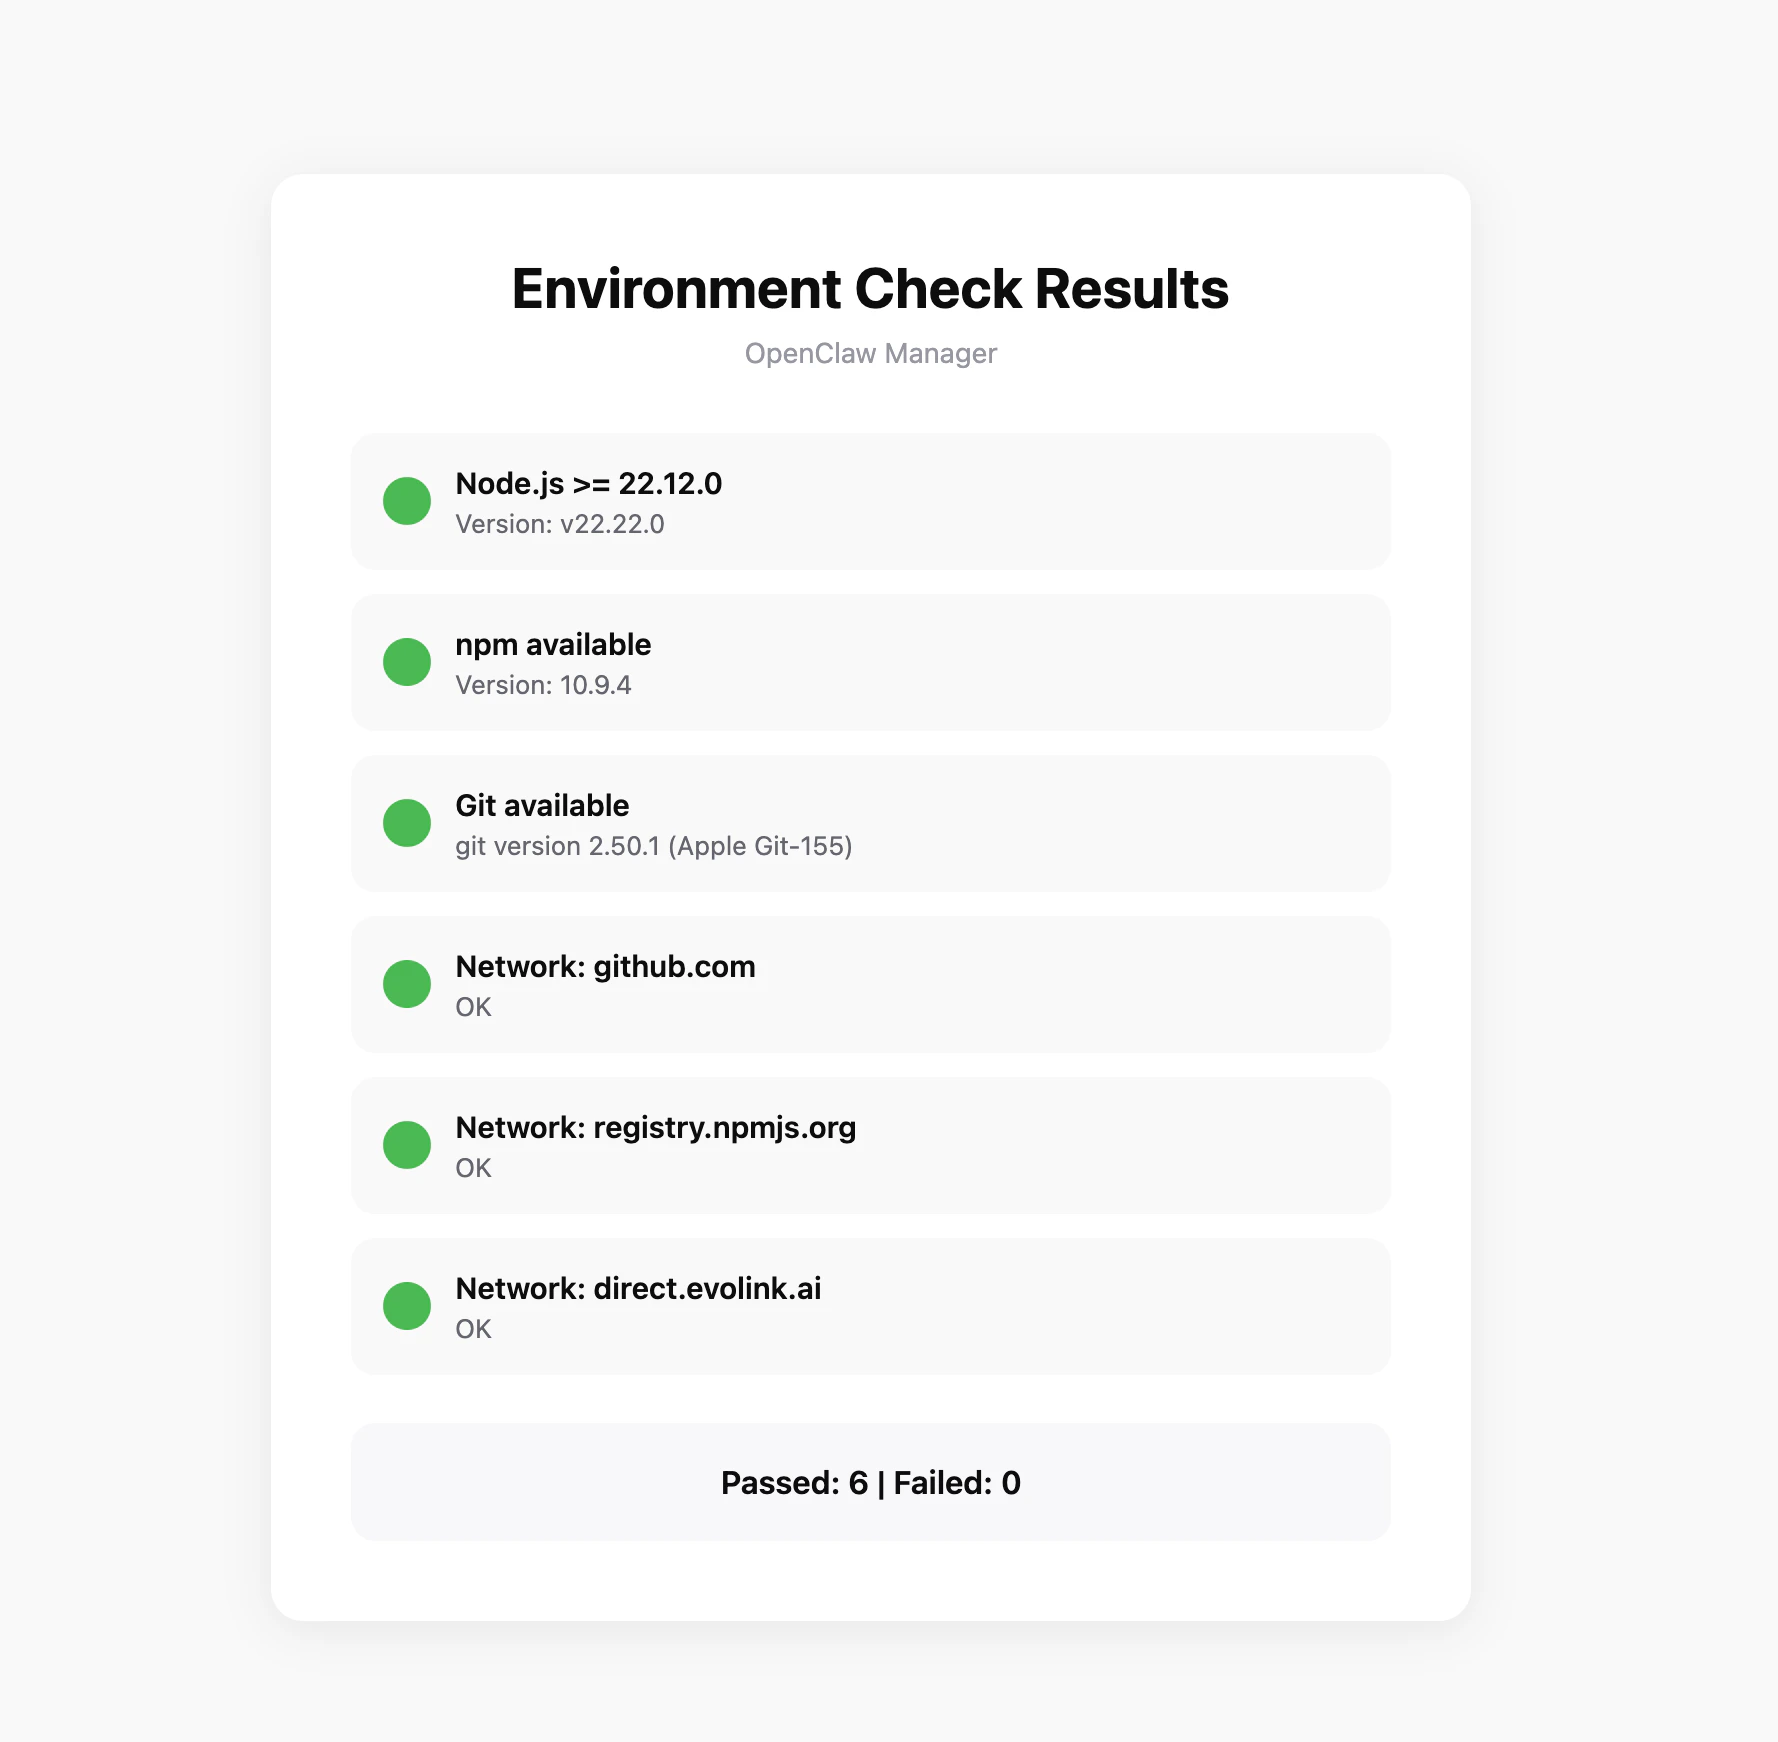 If the check fails, the tool will provide specific fix suggestions.
## Prerequisites
### 1. Install Node.js
OpenClaw Manager requires Node.js 22 or higher.
Visit [Node.js official website](https://nodejs.org/en/download), download the Windows installer (.msi file), and run the installation program.
After installation, open PowerShell to verify:
```bash theme={null}
node --version
npm --version
```
It's recommended to run PowerShell as administrator to avoid permission issues during installation.
**Method 1: Using Installer**
Visit [Node.js official website](https://nodejs.org/en/download), download the macOS installer (.pkg file), and run the installation program.
**Method 2: Using Homebrew**
```bash theme={null}
brew install node
```
After installation, open Terminal to verify:
```bash theme={null}
node --version
npm --version
```
If you encounter permission issues during installation, you may need to add `sudo` before the command.
### 2. Install Git
OpenClaw depends on Git for version management and plugin installation.
Visit [Git official website](https://git-scm.com/downloads), download the Windows installer, run the installation program, and complete the installation with default options.
After installation, open PowerShell to verify:
```bash theme={null}
git --version
```
**Method 1: Using Homebrew (Recommended)**
```bash theme={null}
brew install git
```
**Method 2: Using Xcode Command Line Tools**
```bash theme={null}
xcode-select --install
```
After installation, open Terminal to verify:
```bash theme={null}
git --version
```
### 3. Get EvoLink API Key
* Log in to [EvoLink Console](https://evolink.ai/dashboard)
* Find API Keys in the console, click "Create New Key", then copy the generated Key
* API Key usually starts with `sk-`, please keep it safe
### 4. Channel Credentials
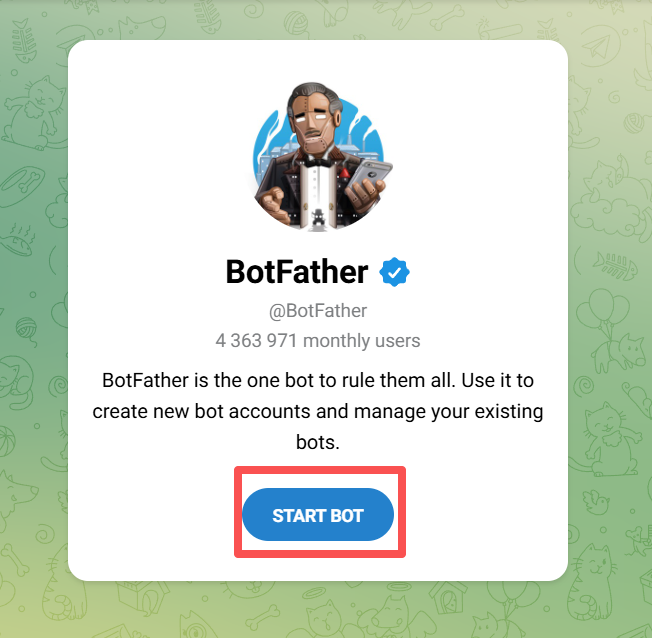
1. Search for [@BotFather](https://t.me/BotFather) on Telegram, click **START BOT**
If the check fails, the tool will provide specific fix suggestions.
## Prerequisites
### 1. Install Node.js
OpenClaw Manager requires Node.js 22 or higher.
Visit [Node.js official website](https://nodejs.org/en/download), download the Windows installer (.msi file), and run the installation program.
After installation, open PowerShell to verify:
```bash theme={null}
node --version
npm --version
```
It's recommended to run PowerShell as administrator to avoid permission issues during installation.
**Method 1: Using Installer**
Visit [Node.js official website](https://nodejs.org/en/download), download the macOS installer (.pkg file), and run the installation program.
**Method 2: Using Homebrew**
```bash theme={null}
brew install node
```
After installation, open Terminal to verify:
```bash theme={null}
node --version
npm --version
```
If you encounter permission issues during installation, you may need to add `sudo` before the command.
### 2. Install Git
OpenClaw depends on Git for version management and plugin installation.
Visit [Git official website](https://git-scm.com/downloads), download the Windows installer, run the installation program, and complete the installation with default options.
After installation, open PowerShell to verify:
```bash theme={null}
git --version
```
**Method 1: Using Homebrew (Recommended)**
```bash theme={null}
brew install git
```
**Method 2: Using Xcode Command Line Tools**
```bash theme={null}
xcode-select --install
```
After installation, open Terminal to verify:
```bash theme={null}
git --version
```
### 3. Get EvoLink API Key
* Log in to [EvoLink Console](https://evolink.ai/dashboard)
* Find API Keys in the console, click "Create New Key", then copy the generated Key
* API Key usually starts with `sk-`, please keep it safe
### 4. Channel Credentials
1. Search for [@BotFather](https://t.me/BotFather) on Telegram, click **START BOT**
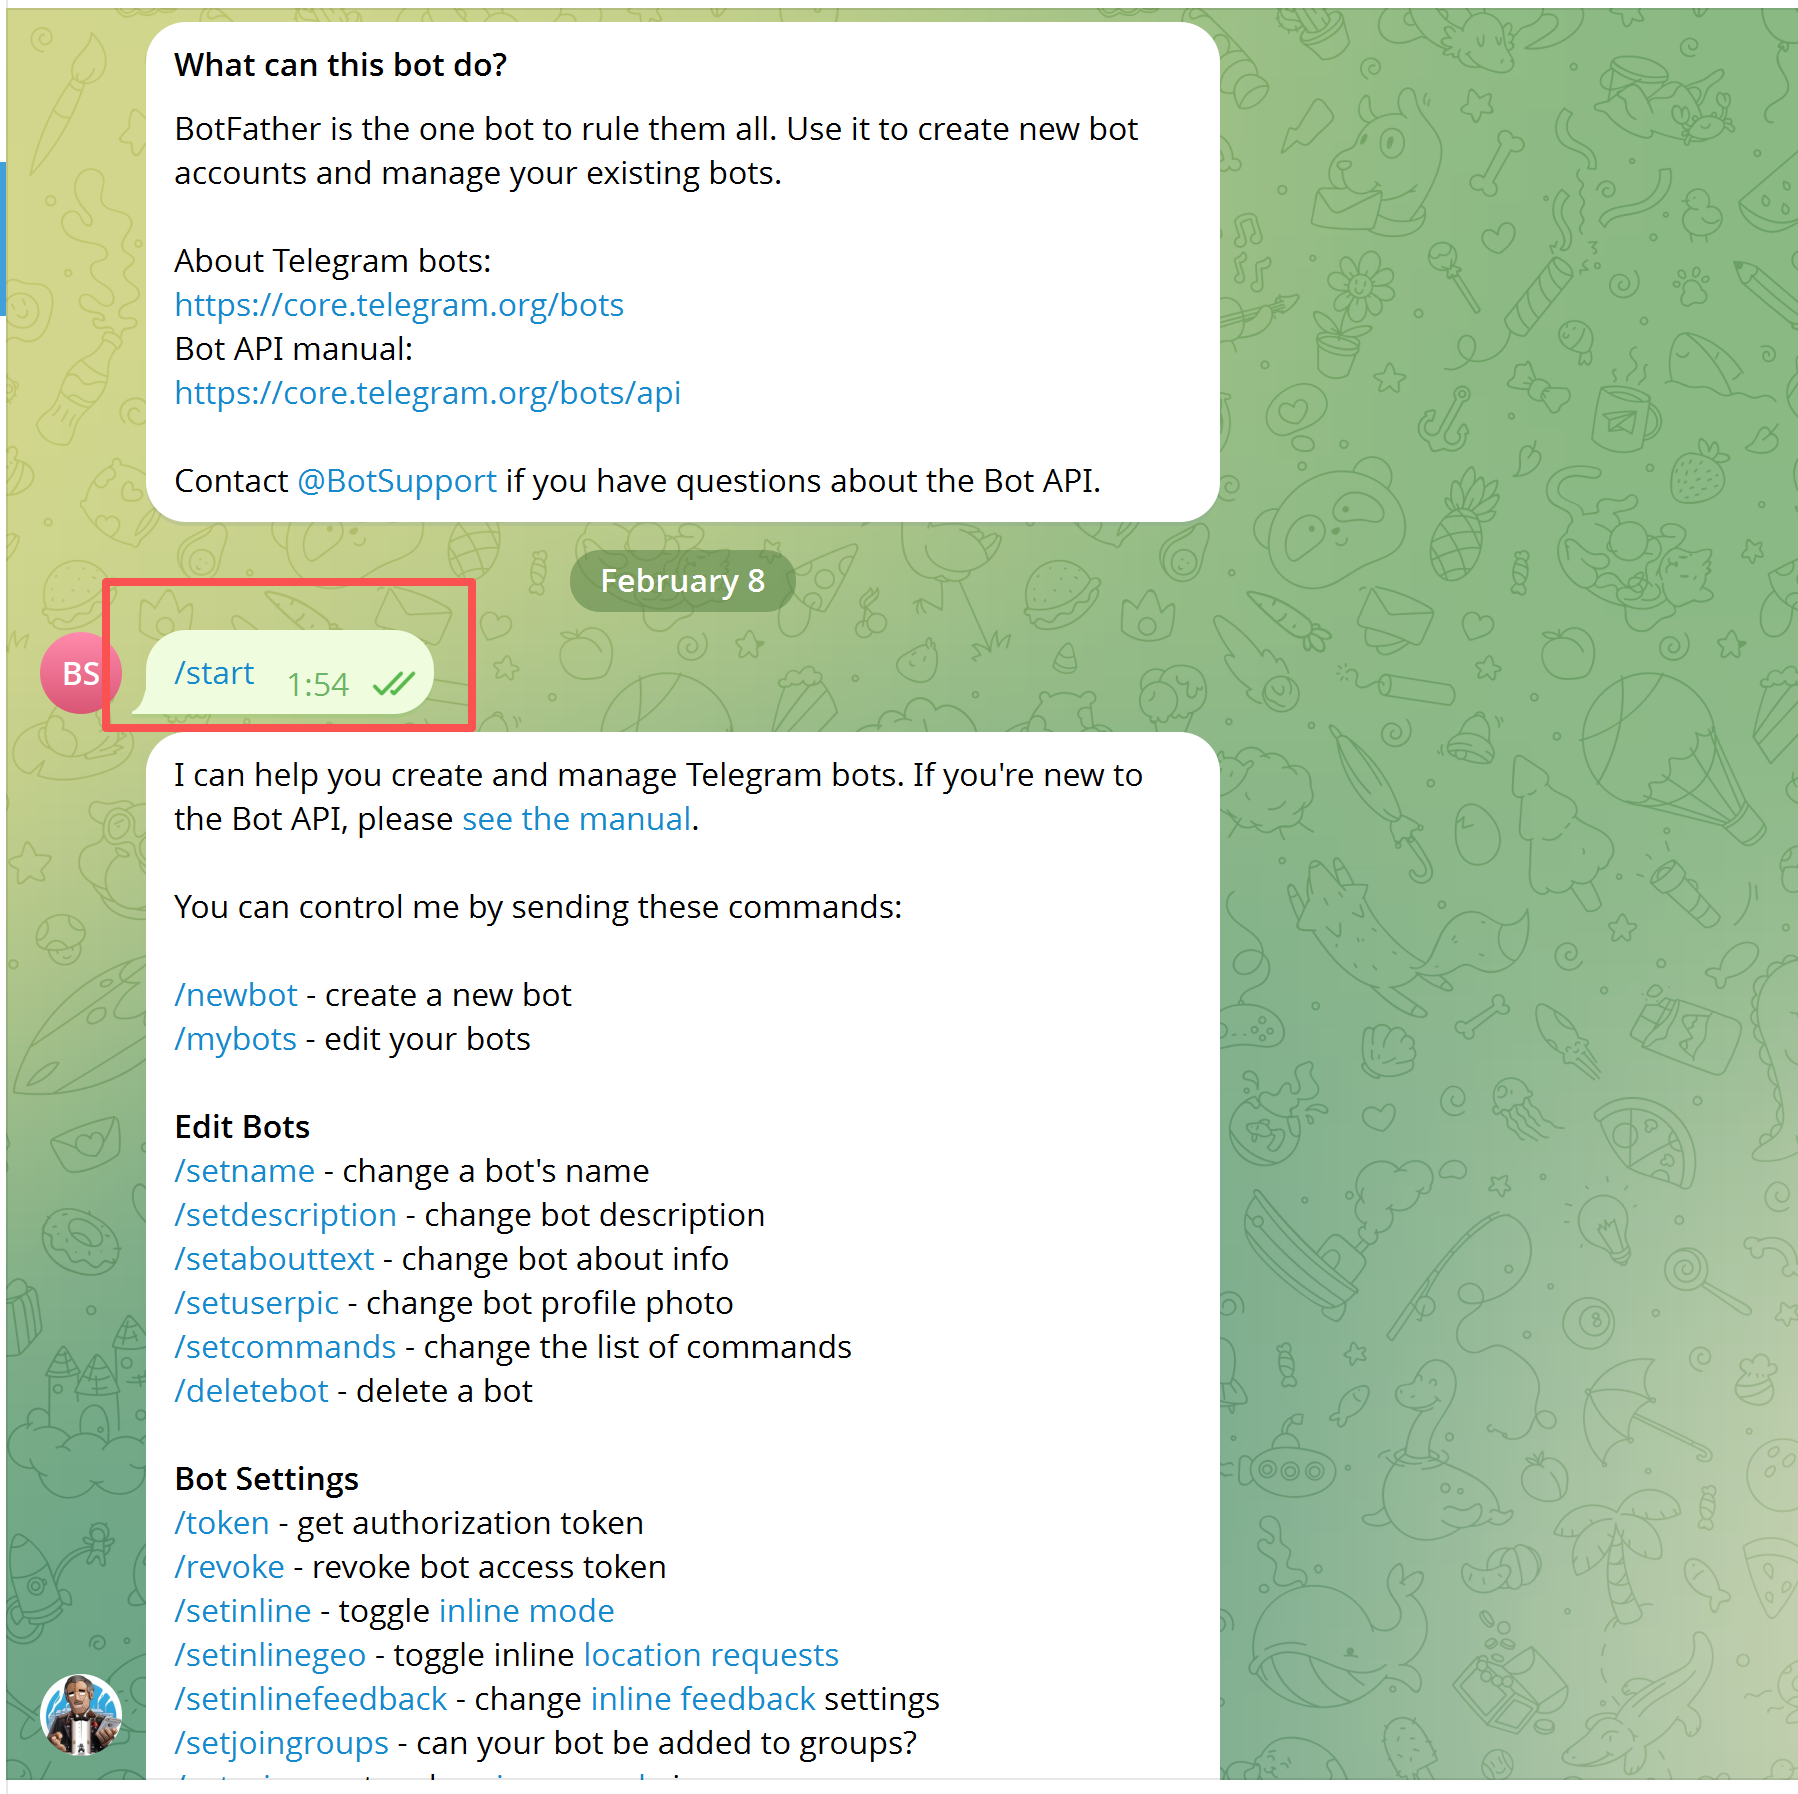
 2. Send `/newbot`, follow the prompts to set a name and get your **Bot Token** (format: `123456789:ABCdef...`)
 3. Get your **Telegram User ID**: send `/start` to [@userinfobot](https://t.me/userinfobot) and note the numeric ID
1. Go to [Feishu Open Platform](https://open.feishu.cn/app) and create a custom enterprise app
3. Get your **Telegram User ID**: send `/start` to [@userinfobot](https://t.me/userinfobot) and note the numeric ID
1. Go to [Feishu Open Platform](https://open.feishu.cn/app) and create a custom enterprise app
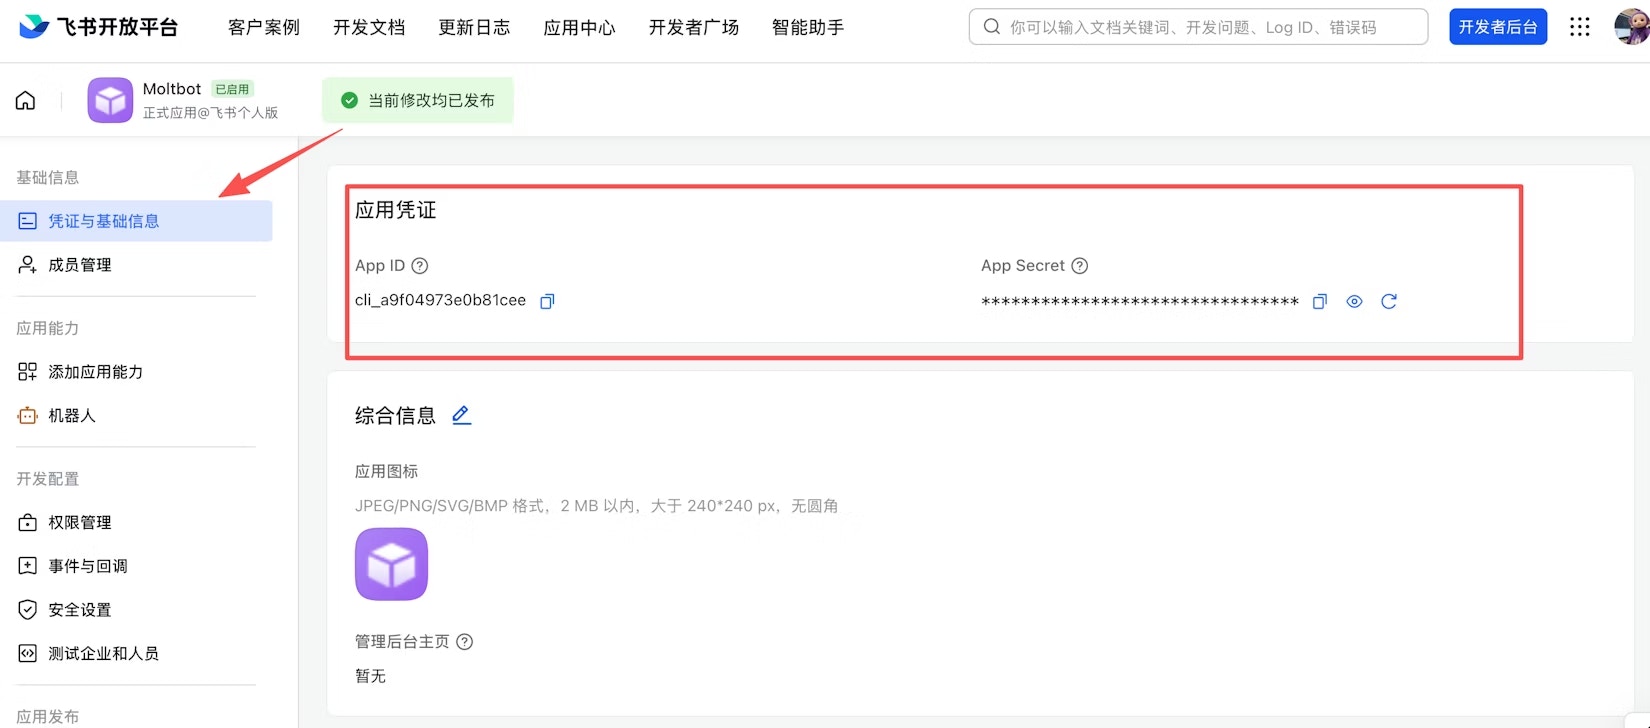
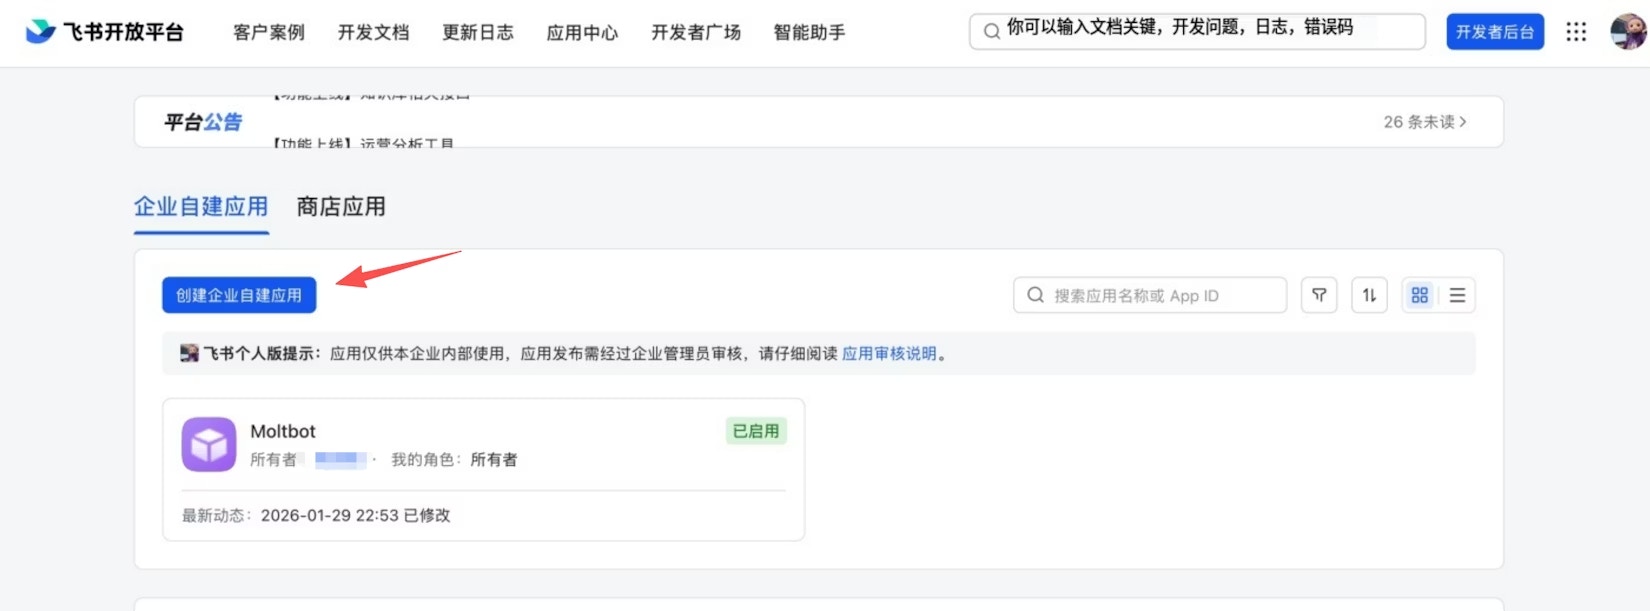 2. Get the **App ID** and **App Secret** from the "Credentials & Basic Info" page
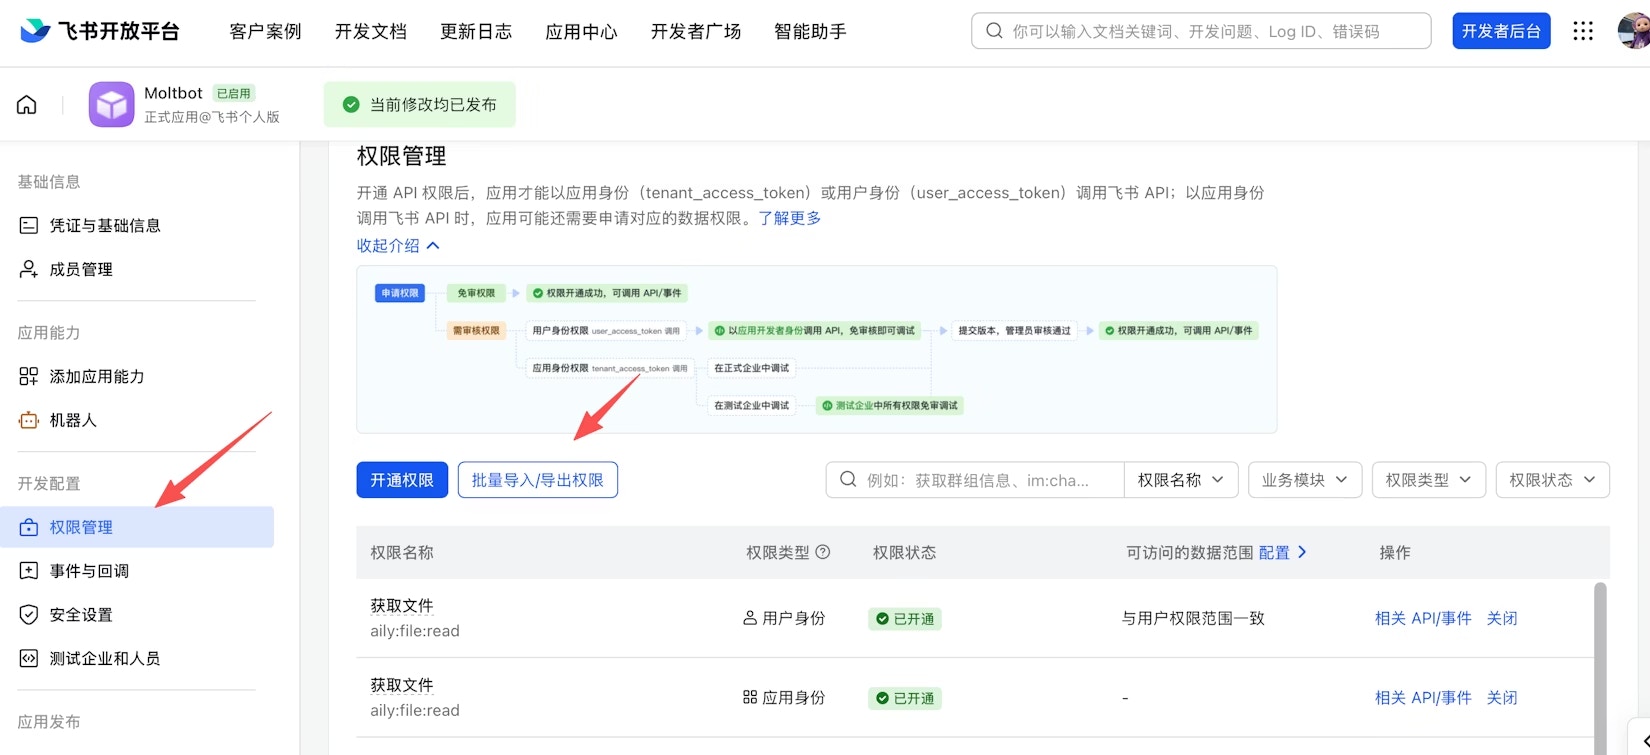
 3. Under "Permissions & Scopes", click **Batch Import** and paste the following JSON to import all required permissions:
```json theme={null}
{
"scopes": {
"tenant": [
"aily:file:read",
"aily:file:write",
"application:application.app_message_stats.overview:readonly",
"application:application:self_manage",
"application:bot.menu:write",
"cardkit:card:write",
"contact:contact.base:readonly",
"contact:user.employee_id:readonly",
"corehr:file:download",
"docs:document.content:read",
"event:ip_list",
"im:chat",
"im:chat.access_event.bot_p2p_chat:read",
"im:chat.members:bot_access",
"im:message",
"im:message.group_at_msg:readonly",
"im:message.group_msg",
"im:message.p2p_msg:readonly",
"im:message:readonly",
"im:message:send_as_bot",
"im:resource",
"sheets:spreadsheet",
"wiki:wiki:readonly"
],
"user": [
"aily:file:read",
"aily:file:write",
"im:chat.access_event.bot_p2p_chat:read"
]
}
}
```
3. Under "Permissions & Scopes", click **Batch Import** and paste the following JSON to import all required permissions:
```json theme={null}
{
"scopes": {
"tenant": [
"aily:file:read",
"aily:file:write",
"application:application.app_message_stats.overview:readonly",
"application:application:self_manage",
"application:bot.menu:write",
"cardkit:card:write",
"contact:contact.base:readonly",
"contact:user.employee_id:readonly",
"corehr:file:download",
"docs:document.content:read",
"event:ip_list",
"im:chat",
"im:chat.access_event.bot_p2p_chat:read",
"im:chat.members:bot_access",
"im:message",
"im:message.group_at_msg:readonly",
"im:message.group_msg",
"im:message.p2p_msg:readonly",
"im:message:readonly",
"im:message:send_as_bot",
"im:resource",
"sheets:spreadsheet",
"wiki:wiki:readonly"
],
"user": [
"aily:file:read",
"aily:file:write",
"im:chat.access_event.bot_p2p_chat:read"
]
}
}
```
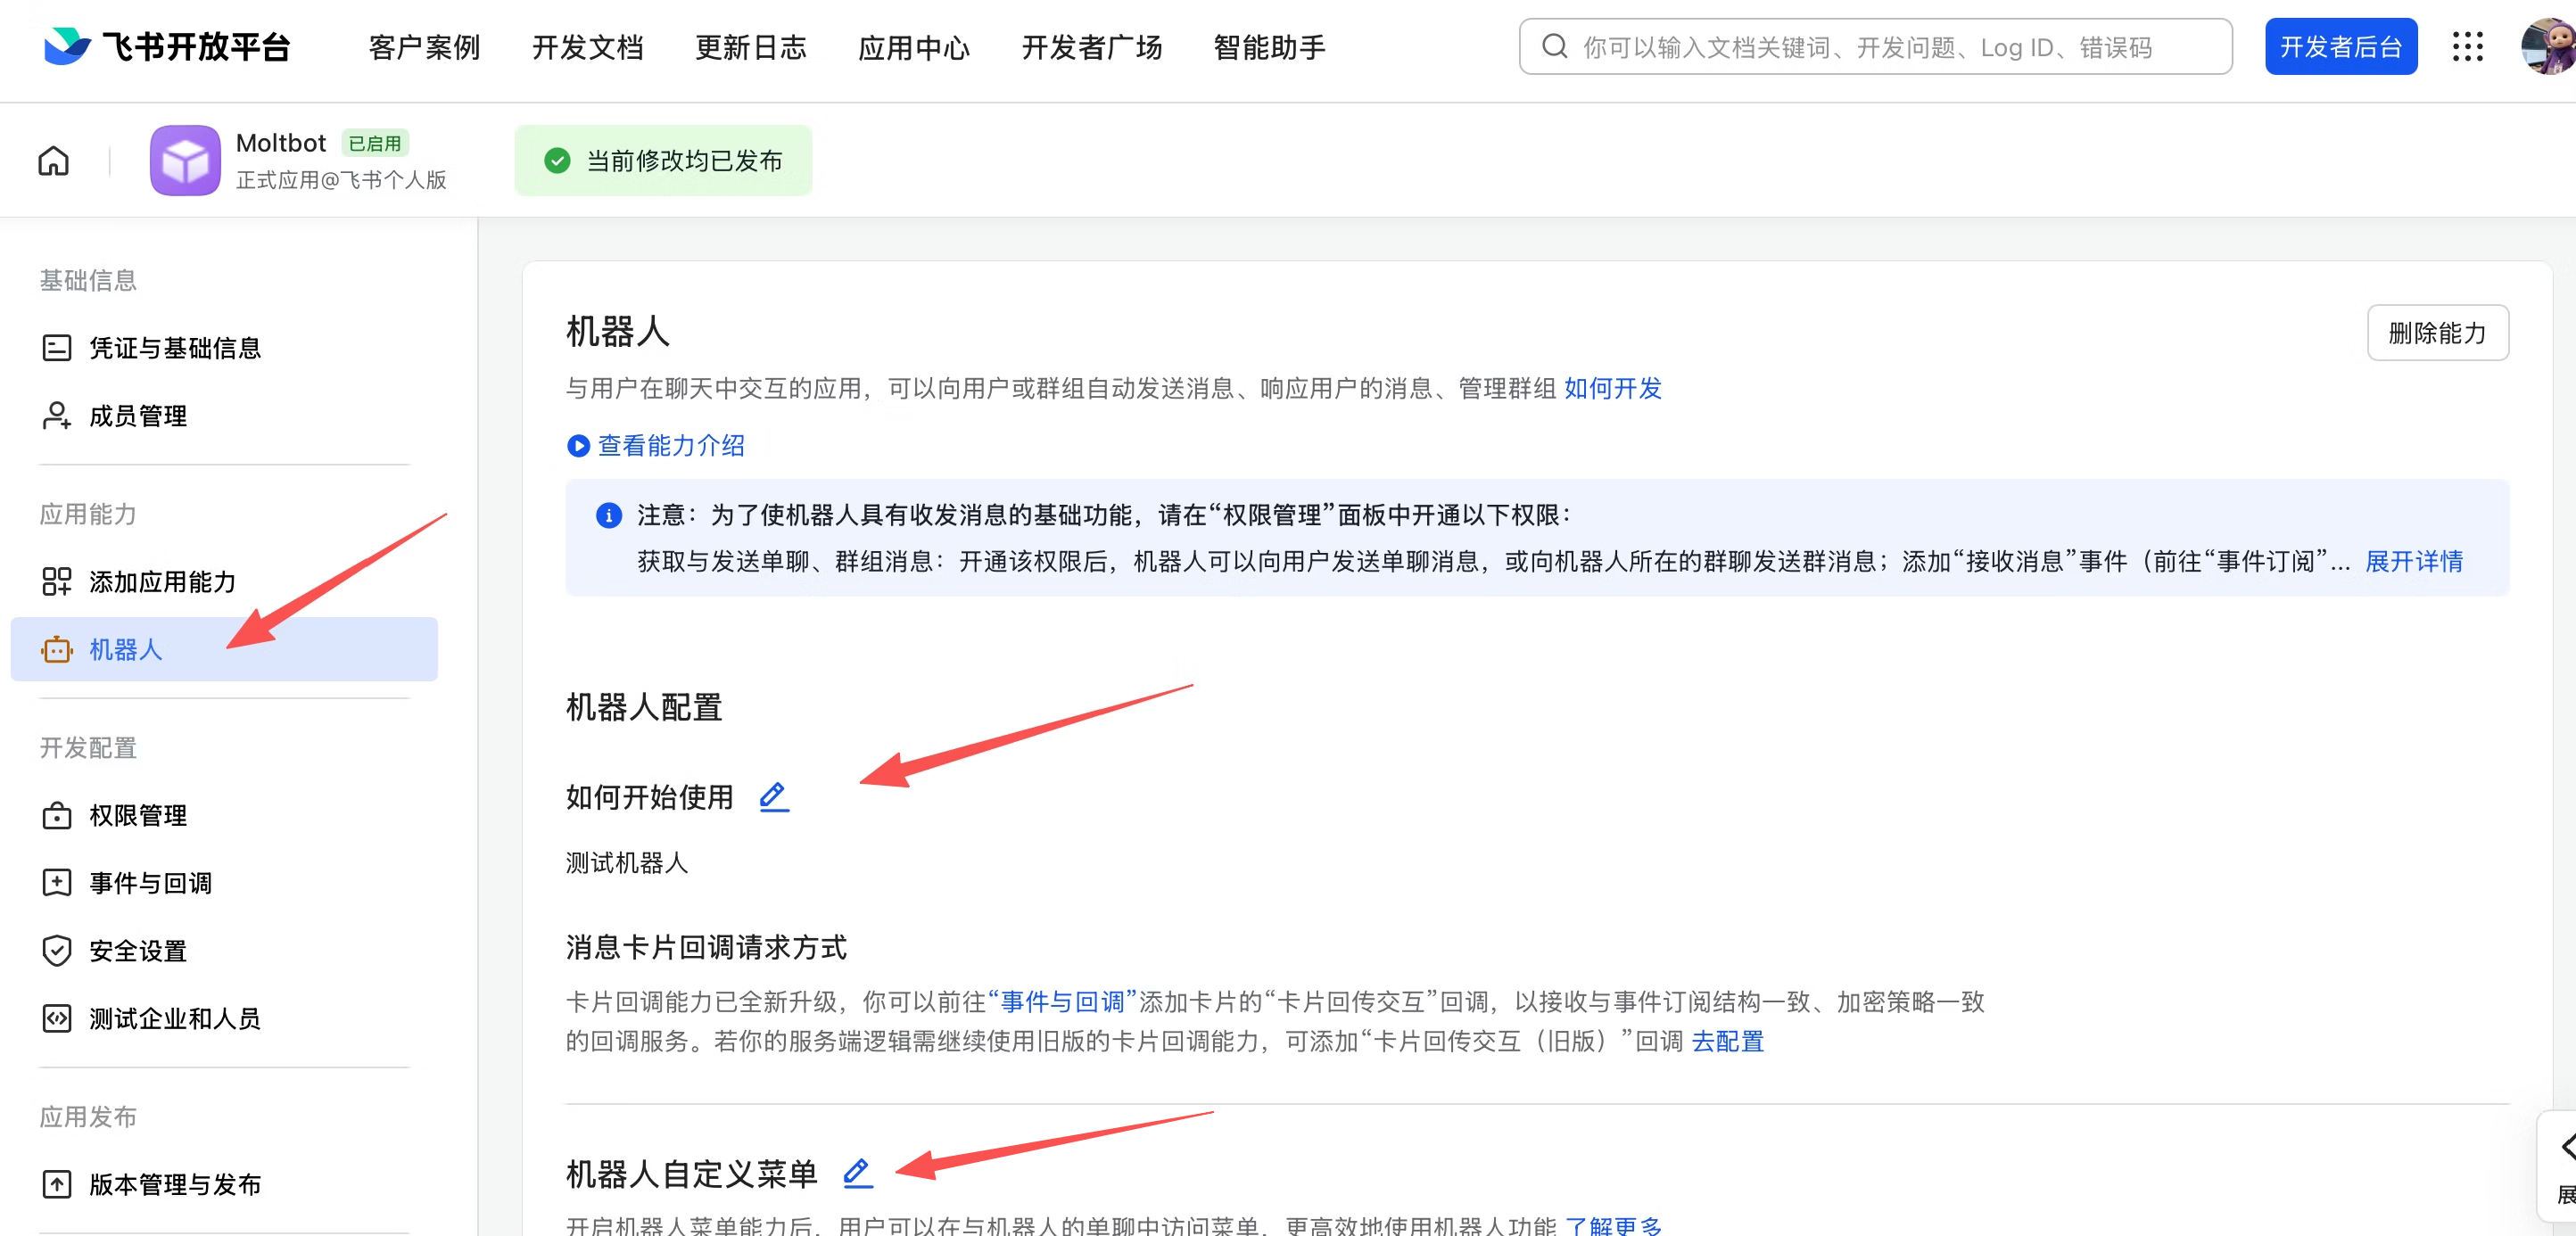
 4. Under "App Capabilities > Bot", enable the bot capability and set the bot name
 Feishu app basic setup is now complete. The remaining steps — event subscription and version release — must be done after the gateway is deployed and running, otherwise the long connection settings will fail to save. Complete Step 1 and Step 2 below first, then return to Feishu Open Platform to continue.
## Step 1: Download & Run
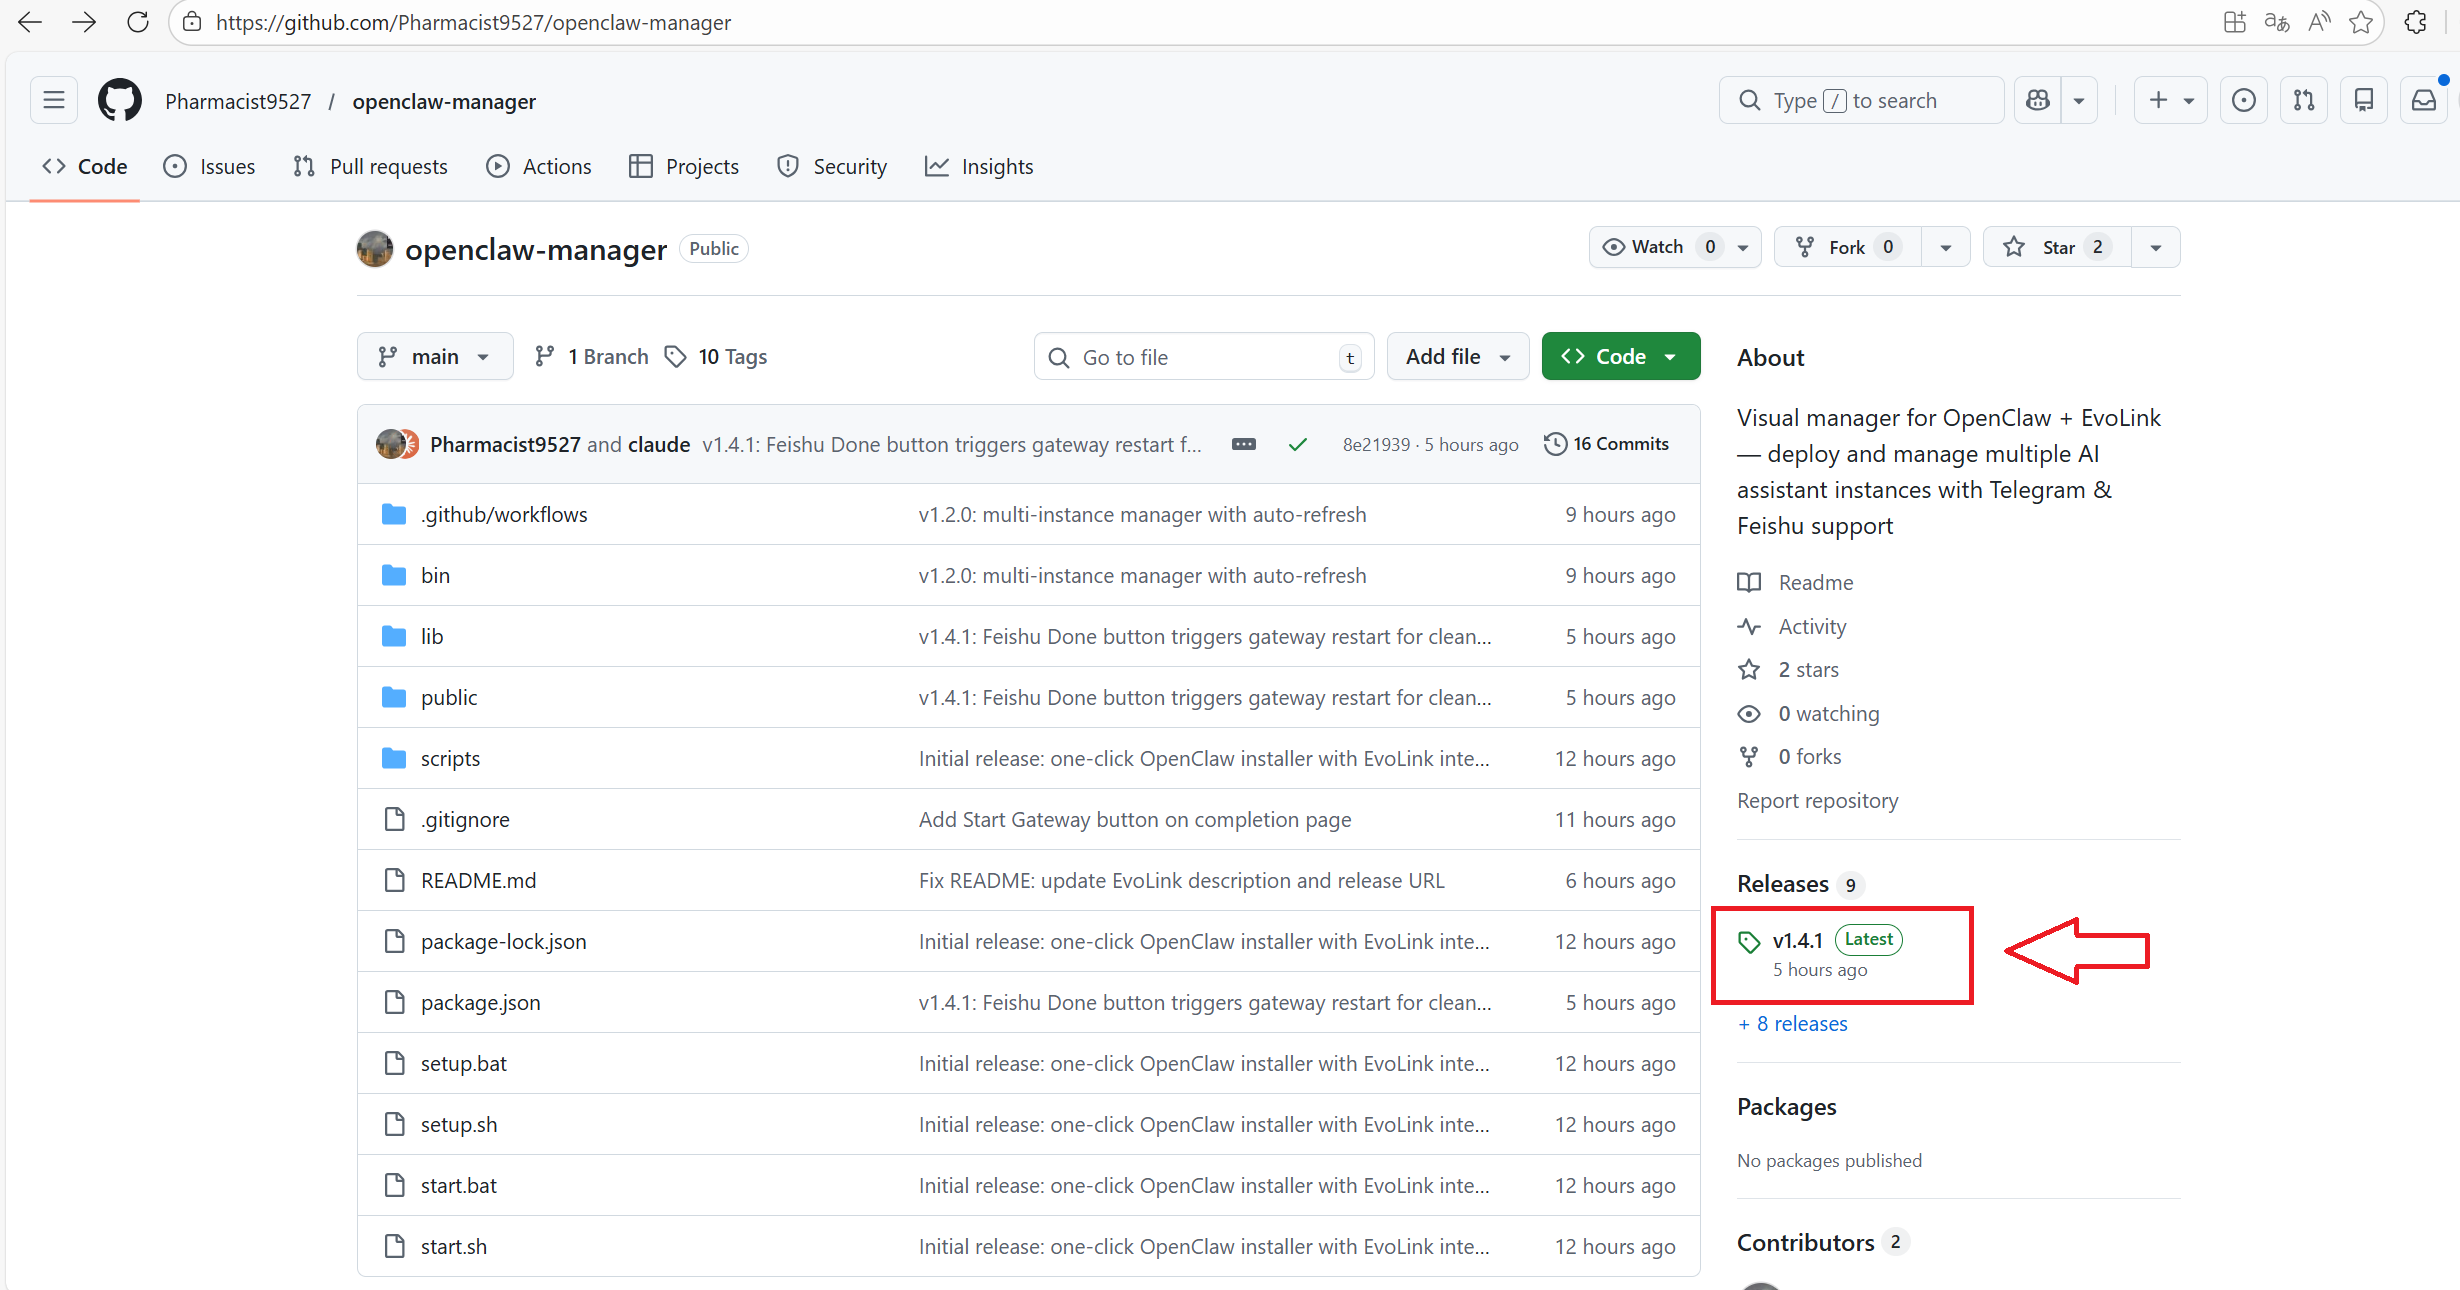
Download the executable for your platform from [Releases](https://github.com/Pharmacist9527/openclaw-manager/releases):
Feishu app basic setup is now complete. The remaining steps — event subscription and version release — must be done after the gateway is deployed and running, otherwise the long connection settings will fail to save. Complete Step 1 and Step 2 below first, then return to Feishu Open Platform to continue.
## Step 1: Download & Run
Download the executable for your platform from [Releases](https://github.com/Pharmacist9527/openclaw-manager/releases):
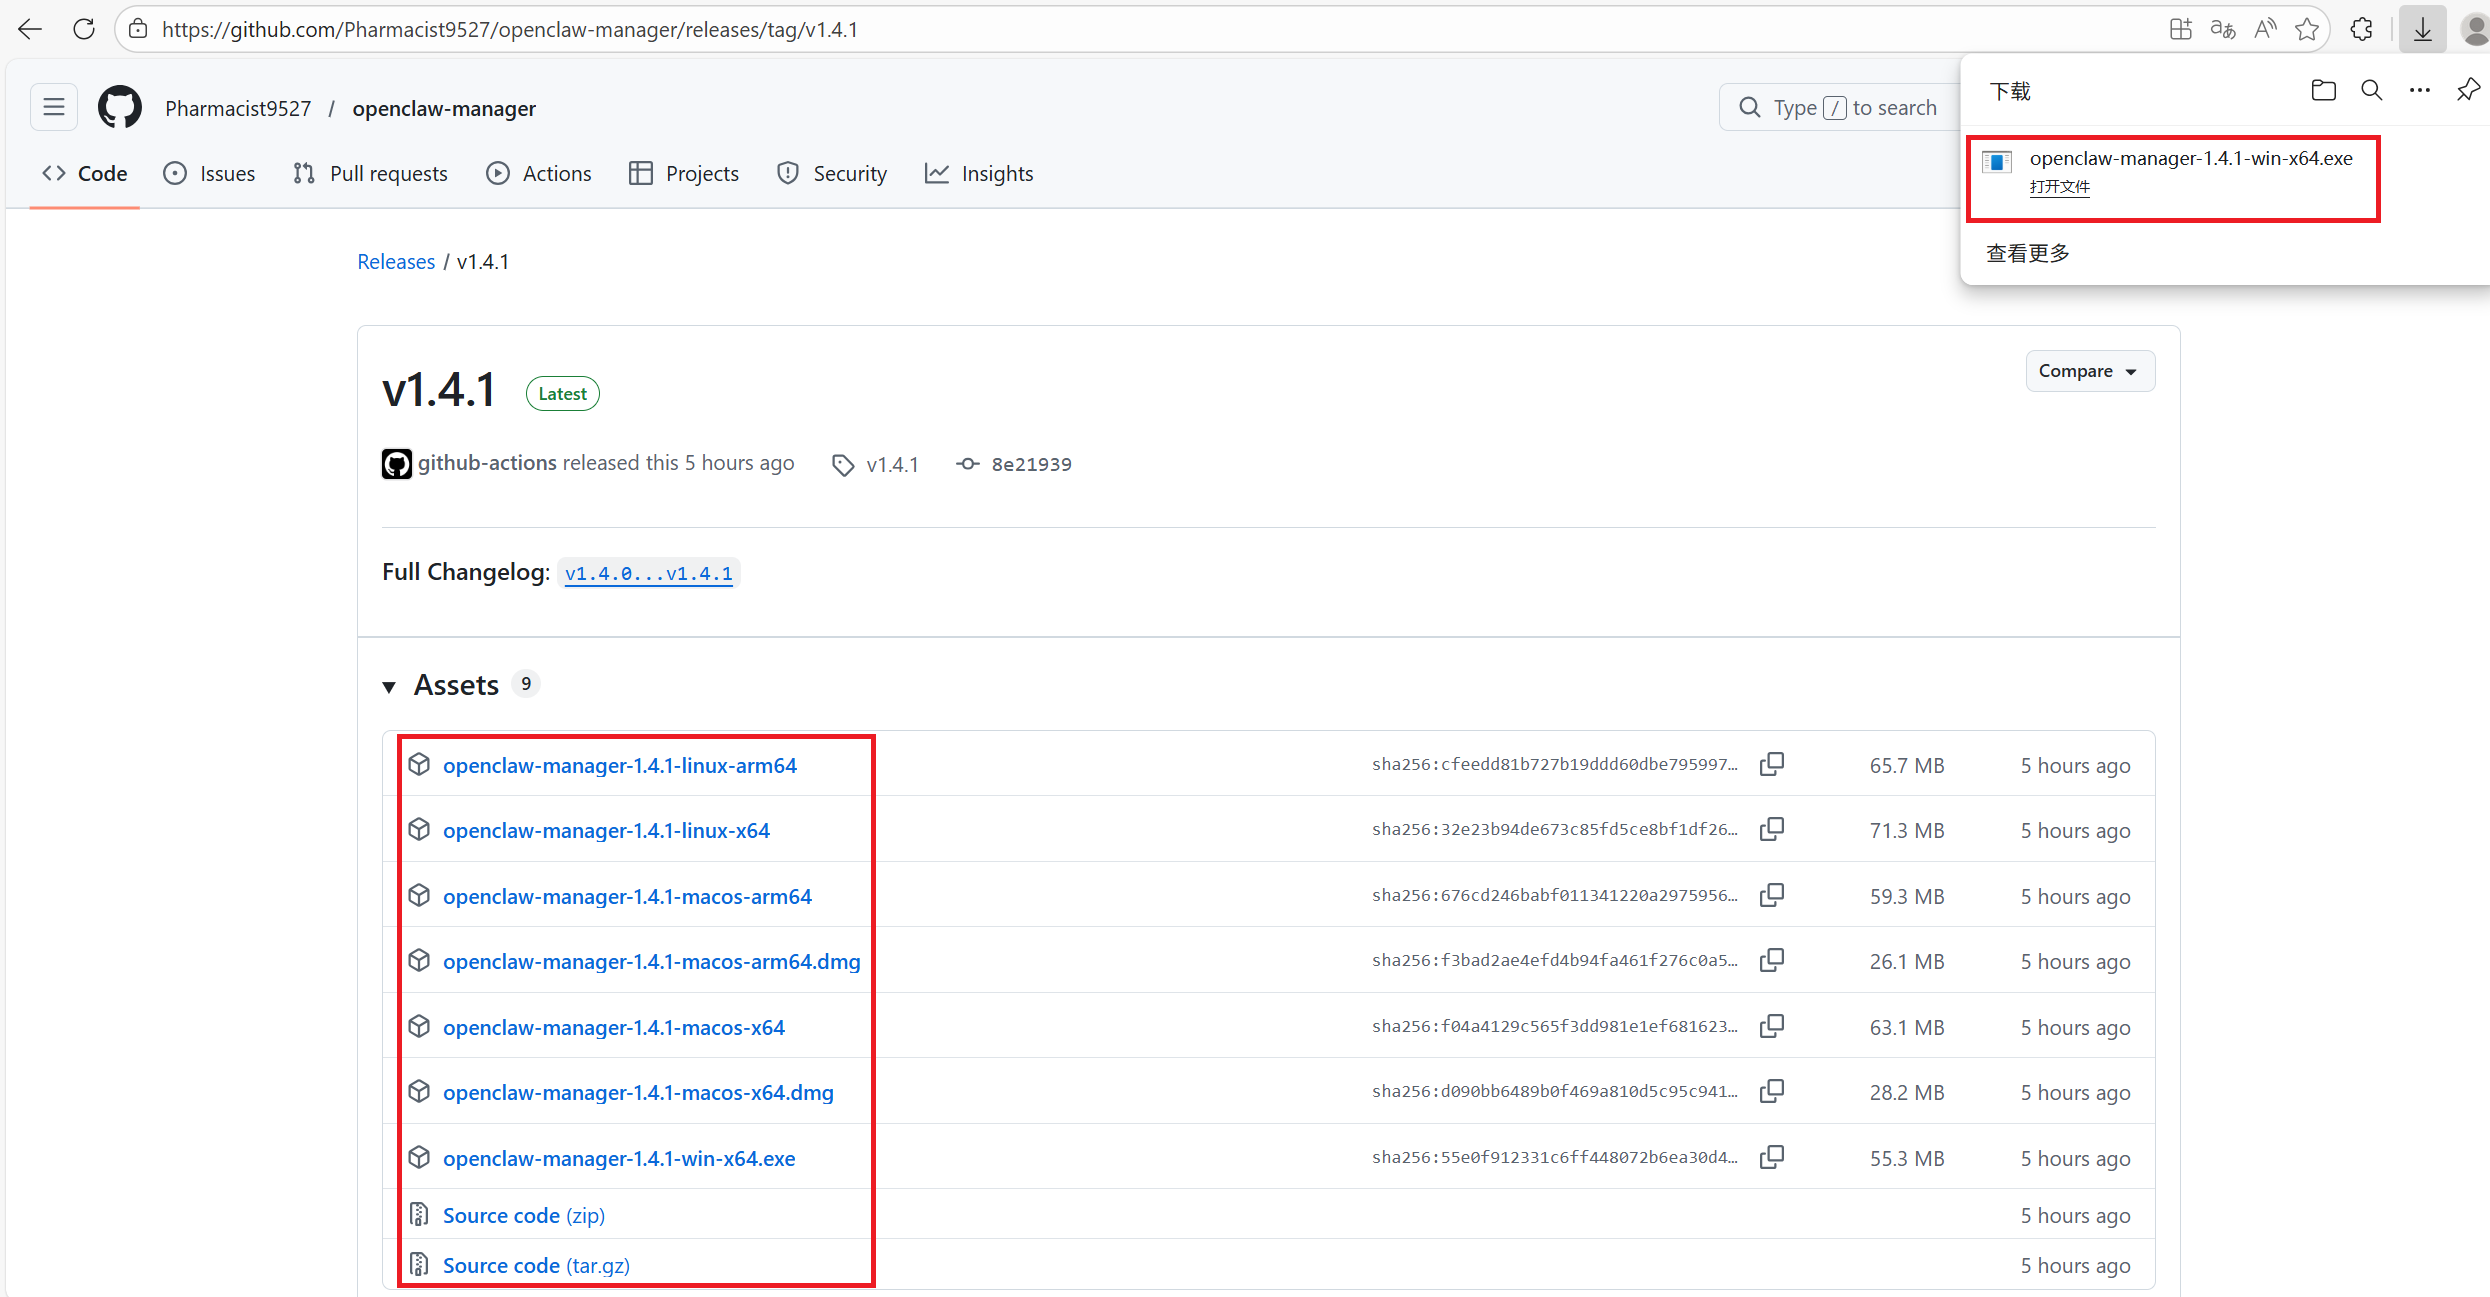 | Platform | File |
| --------------------- | ------------------------------ |
| Windows | `openclaw-manager-win-x64.exe` |
| macOS (Intel) | `openclaw-manager-macos-x64` |
| macOS (Apple Silicon) | `openclaw-manager-macos-arm64` |
| Linux | `openclaw-manager-linux-x64` |
Make sure [Node.js 22+](https://nodejs.org/en/download) is installed.
Windows users right-click and run as administrator. macOS / Linux users run with `sudo` in terminal:
```bash theme={null}
chmod +x ./openclaw-manager && sudo ./openclaw-manager
```
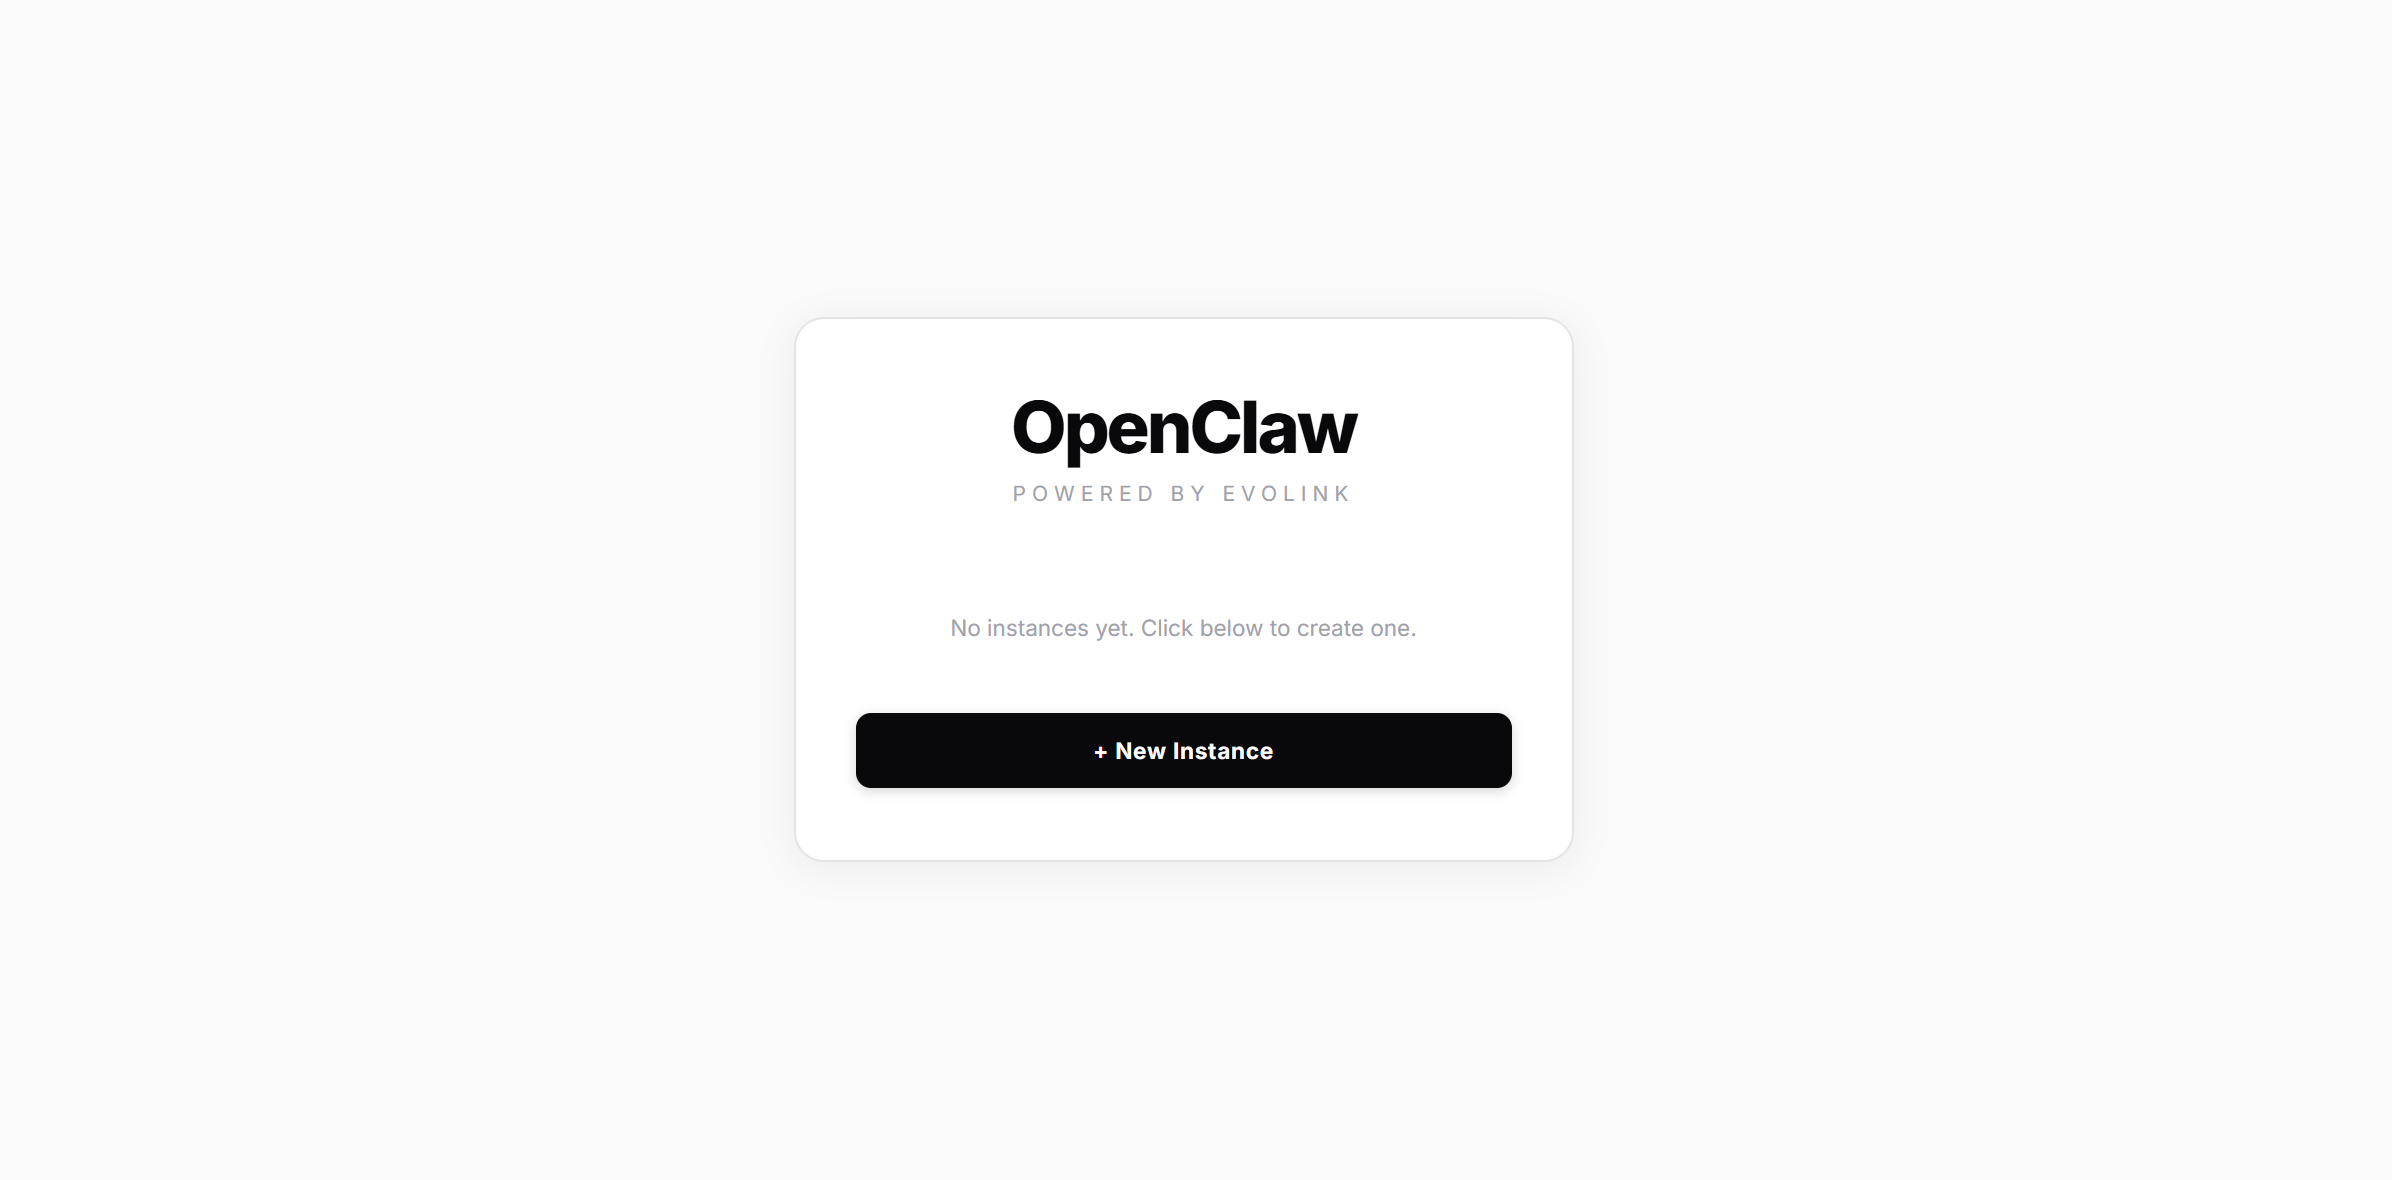
The script will check for and install OpenClaw if needed, then start the local web management interface and open your browser.
| Platform | File |
| --------------------- | ------------------------------ |
| Windows | `openclaw-manager-win-x64.exe` |
| macOS (Intel) | `openclaw-manager-macos-x64` |
| macOS (Apple Silicon) | `openclaw-manager-macos-arm64` |
| Linux | `openclaw-manager-linux-x64` |
Make sure [Node.js 22+](https://nodejs.org/en/download) is installed.
Windows users right-click and run as administrator. macOS / Linux users run with `sudo` in terminal:
```bash theme={null}
chmod +x ./openclaw-manager && sudo ./openclaw-manager
```
The script will check for and install OpenClaw if needed, then start the local web management interface and open your browser.
 ## Step 2: Create an Instance
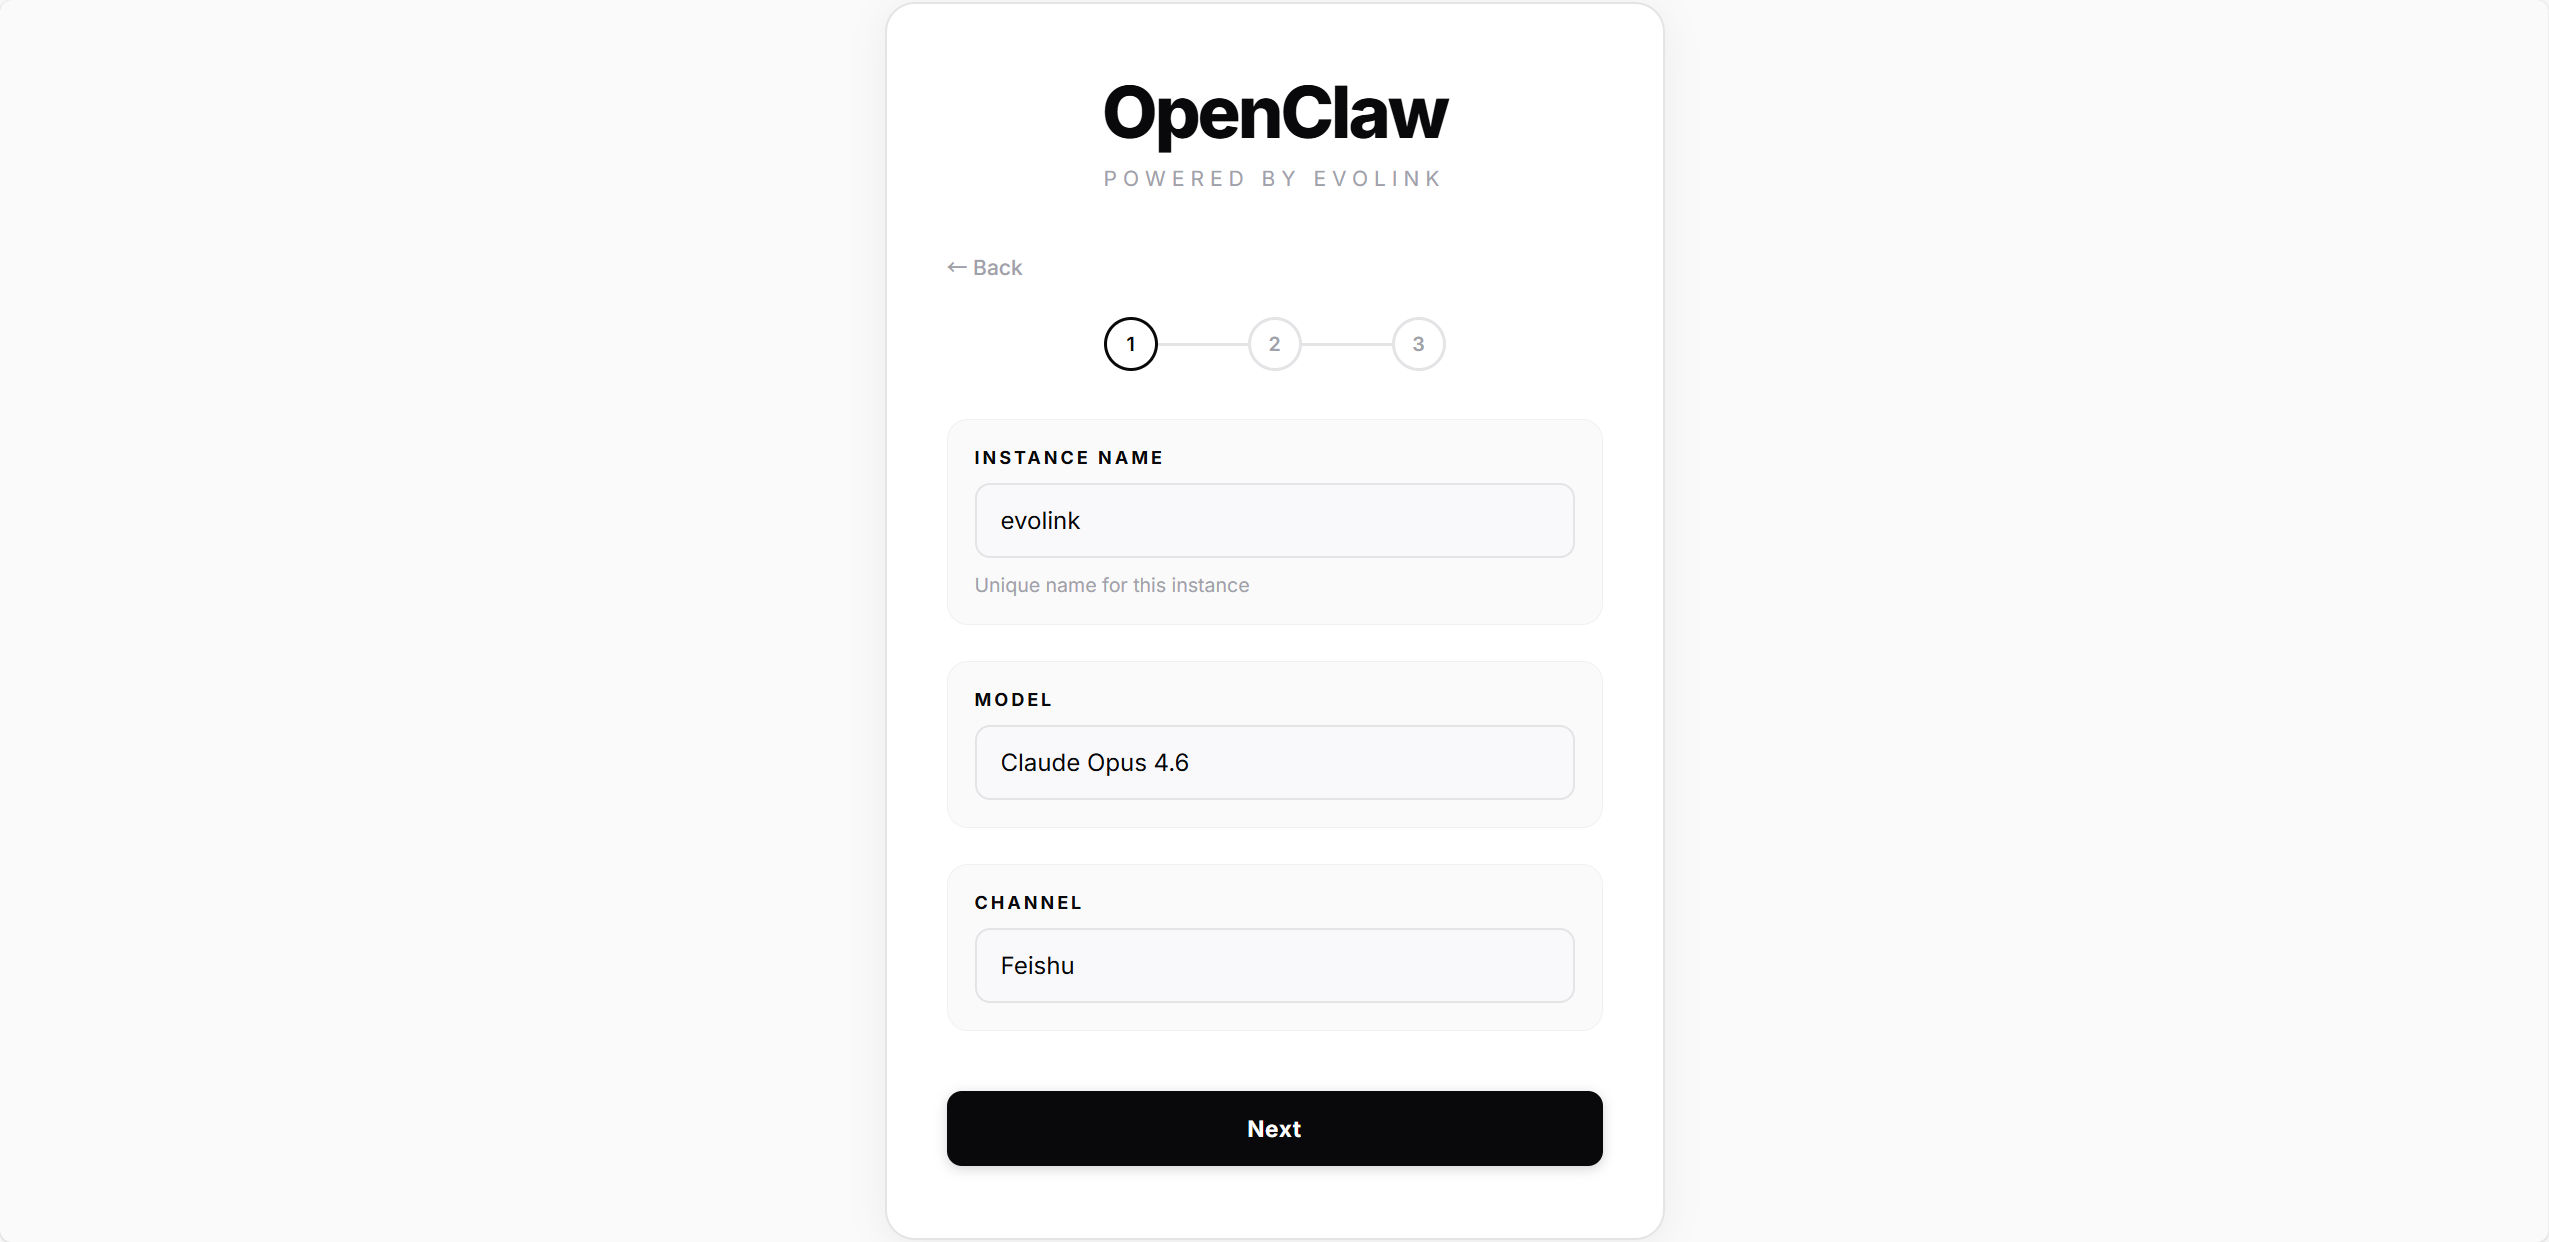
### 2.1 — Basic Info
| Field | Description |
| ------------- | --------------------------------------------------------------------- |
| Instance Name | Name for your instance (e.g. `mybot`), must be unique on this machine |
| Model | Choose a model: Haiku 4.5 / Sonnet 4.5 / Opus 4.5 / Opus 4.6 |
| Channel | Choose a channel: Telegram or Feishu |
## Step 2: Create an Instance
### 2.1 — Basic Info
| Field | Description |
| ------------- | --------------------------------------------------------------------- |
| Instance Name | Name for your instance (e.g. `mybot`), must be unique on this machine |
| Model | Choose a model: Haiku 4.5 / Sonnet 4.5 / Opus 4.5 / Opus 4.6 |
| Channel | Choose a channel: Telegram or Feishu |
 ### 2.2 — Credentials & Deploy
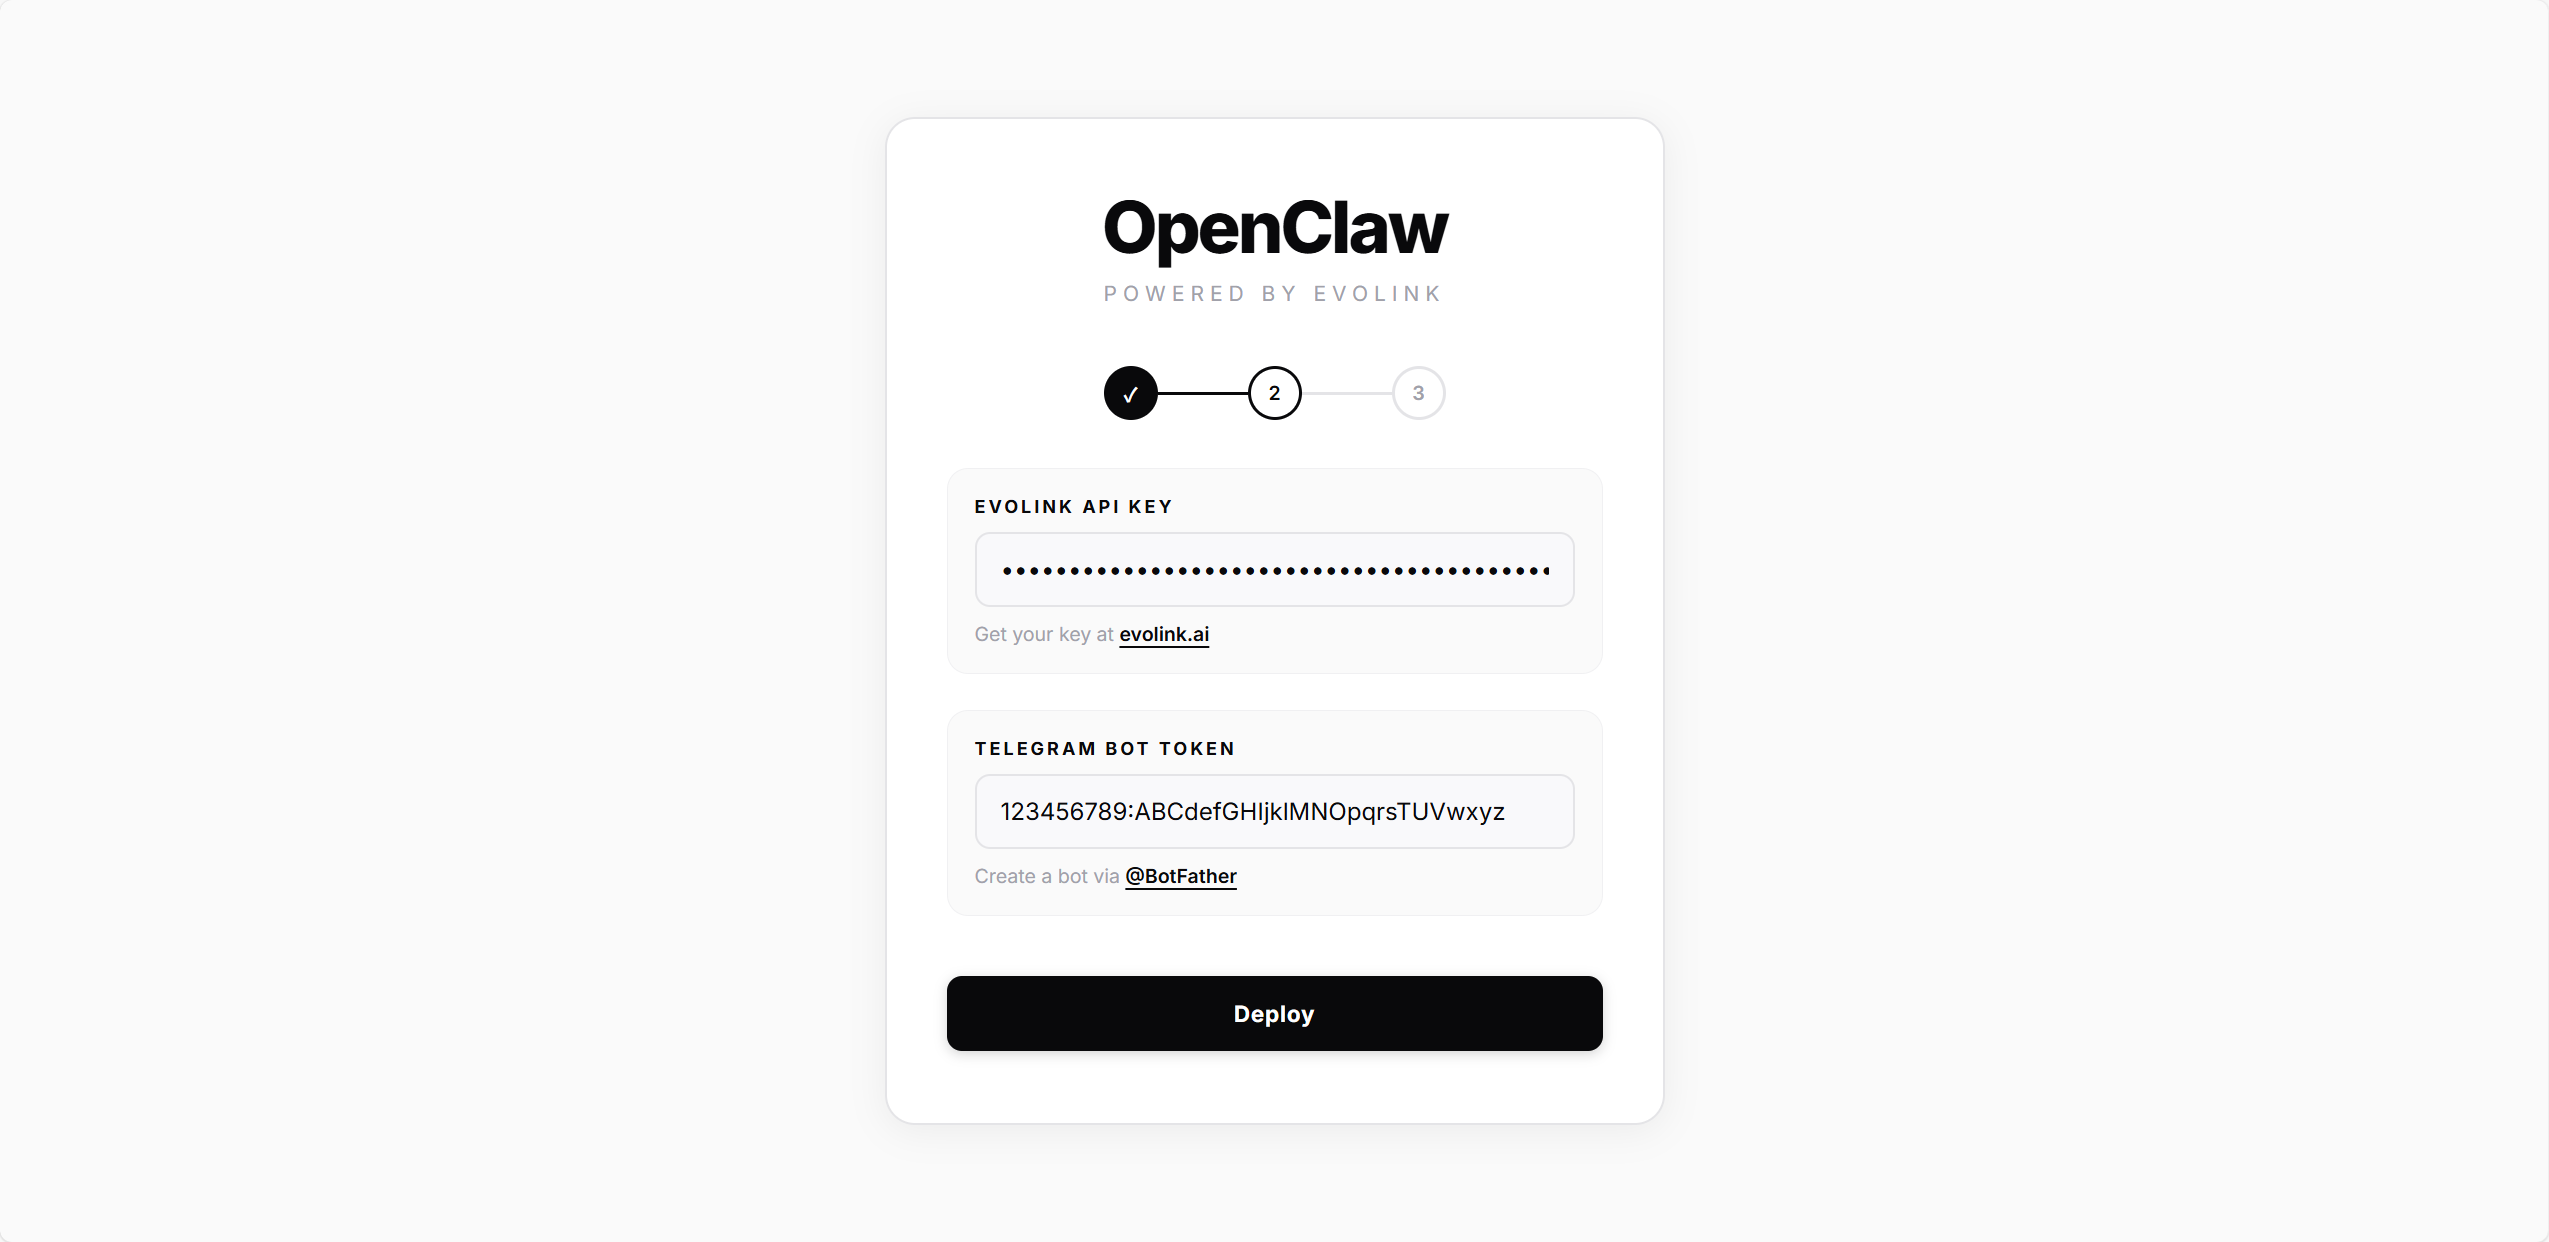
All channels require an **EvoLink API Key**.
Enter the **Bot Token** from @BotFather, then click **Deploy**.
The script will automatically:
1. Create the OpenClaw config file
2. Write model and API Key settings
3. Configure and enable the Telegram plugin
4. Install and start the gateway service
### 2.2 — Credentials & Deploy
All channels require an **EvoLink API Key**.
Enter the **Bot Token** from @BotFather, then click **Deploy**.
The script will automatically:
1. Create the OpenClaw config file
2. Write model and API Key settings
3. Configure and enable the Telegram plugin
4. Install and start the gateway service
 Enter the **App ID** and **App Secret** from Feishu Open Platform, then click **Deploy**.
The script will automatically:
1. Create the OpenClaw config file
2. Write model and API Key settings
3. Configure the Feishu plugin (write App ID / App Secret) and enable it
4. Install and start the gateway service
Enter the **App ID** and **App Secret** from Feishu Open Platform, then click **Deploy**.
The script will automatically:
1. Create the OpenClaw config file
2. Write model and API Key settings
3. Configure the Feishu plugin (write App ID / App Secret) and enable it
4. Install and start the gateway service
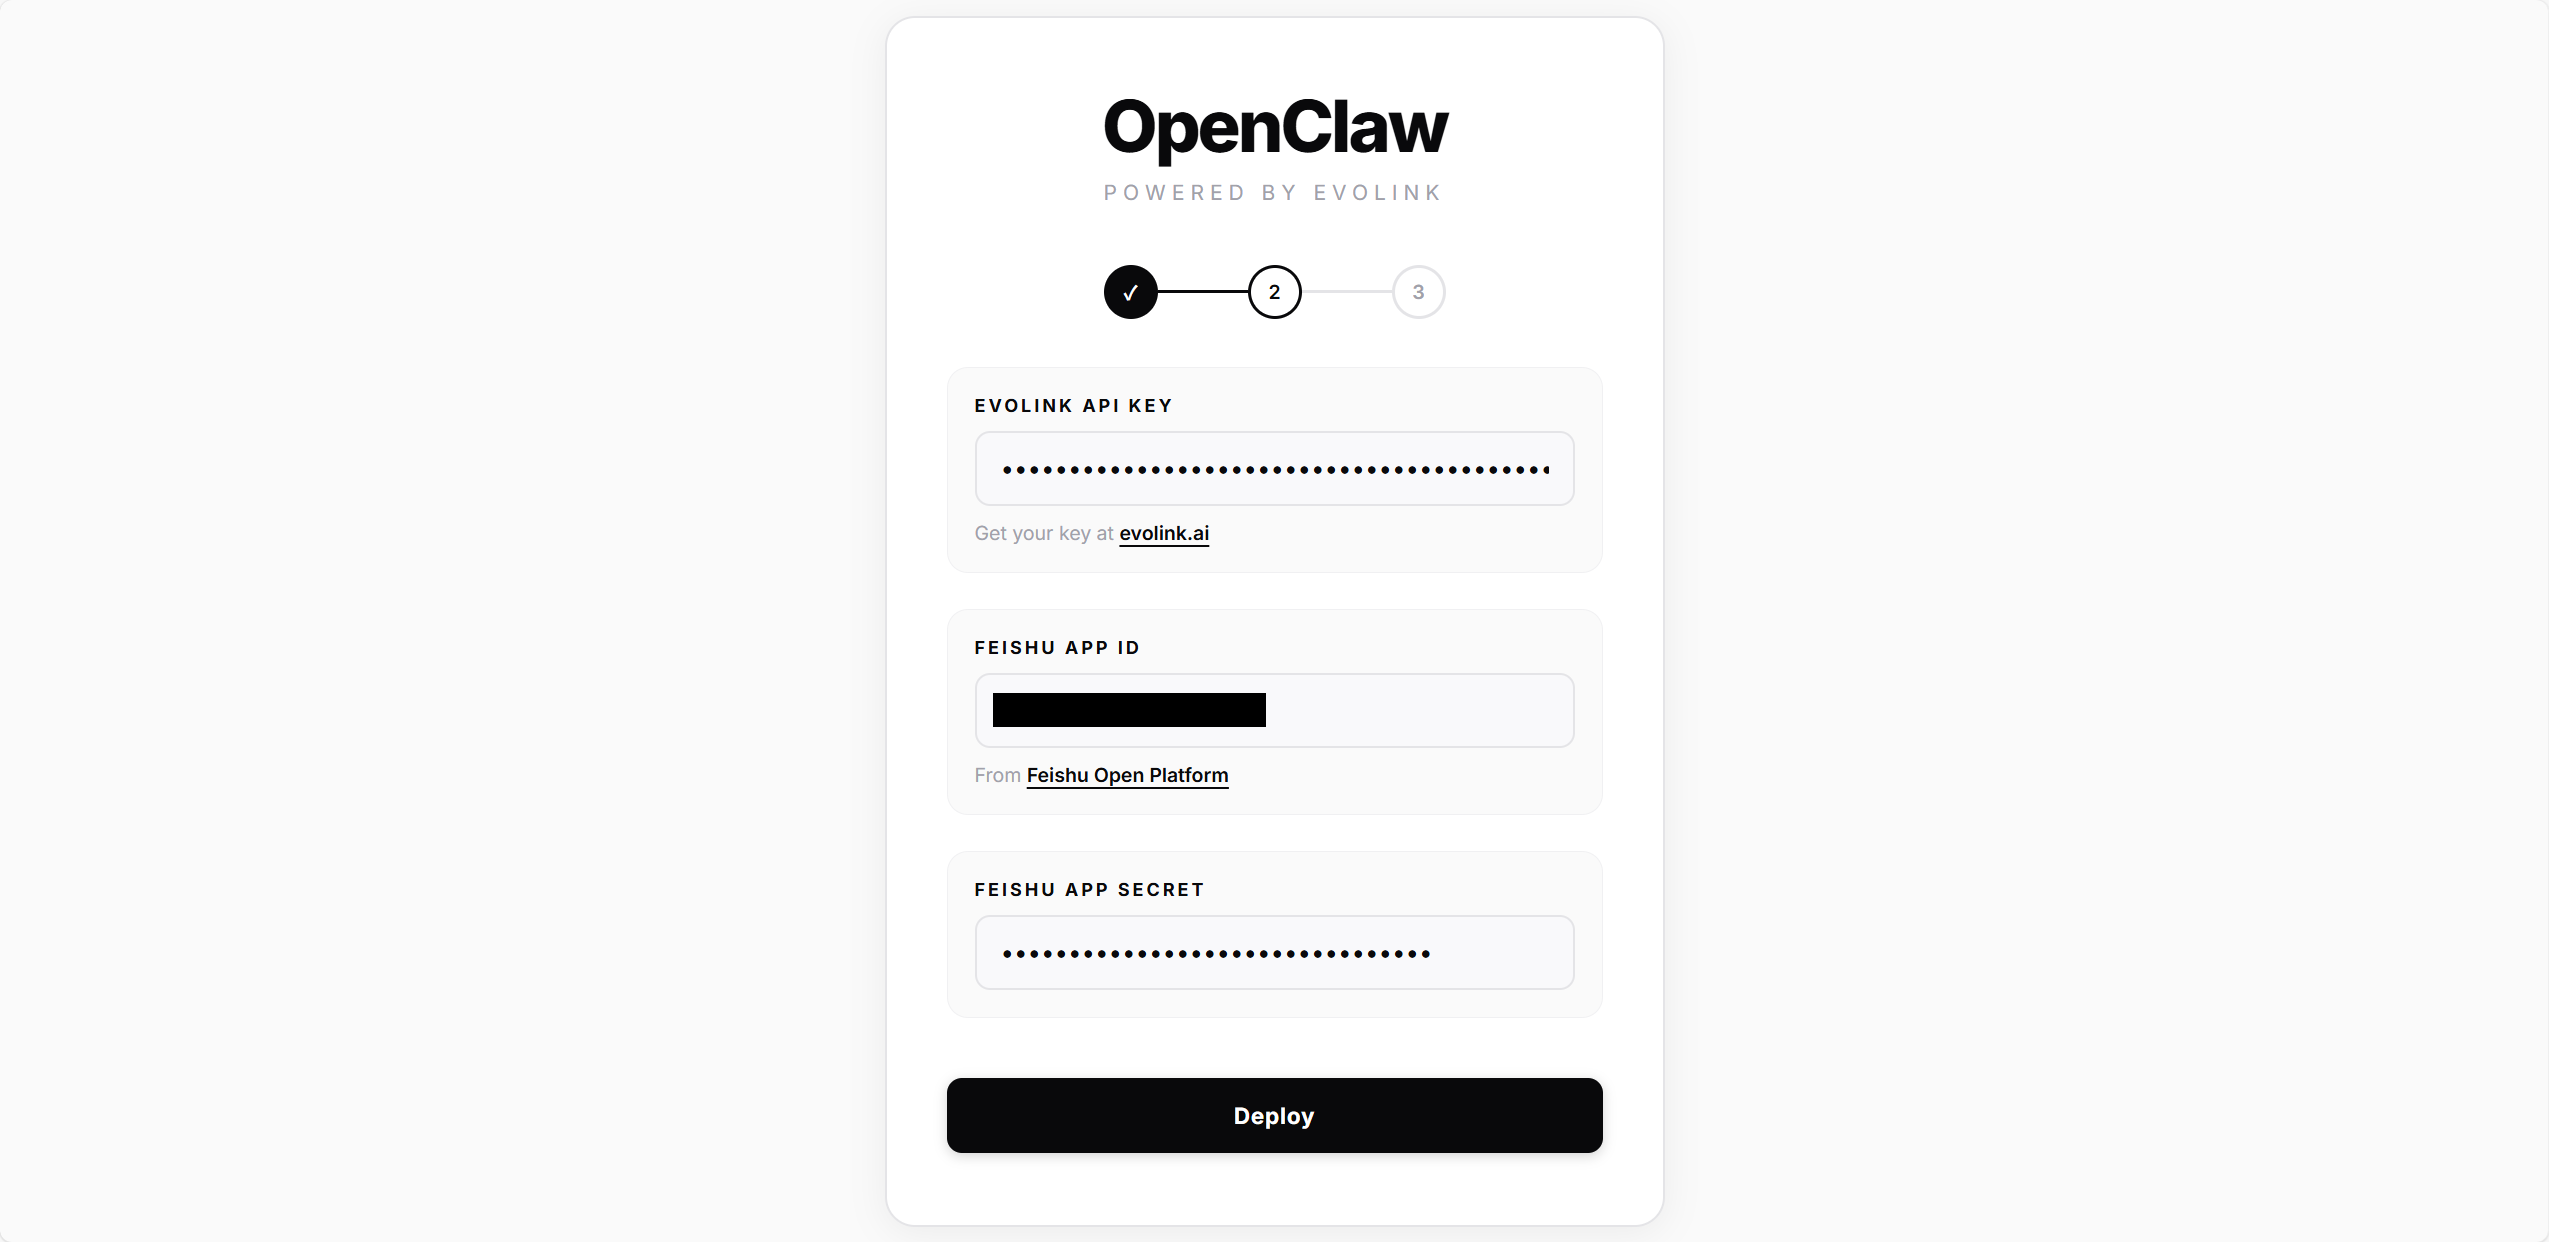 Wait for the progress bar to complete, then you'll advance to the next step automatically.
### 2.3 — Connect
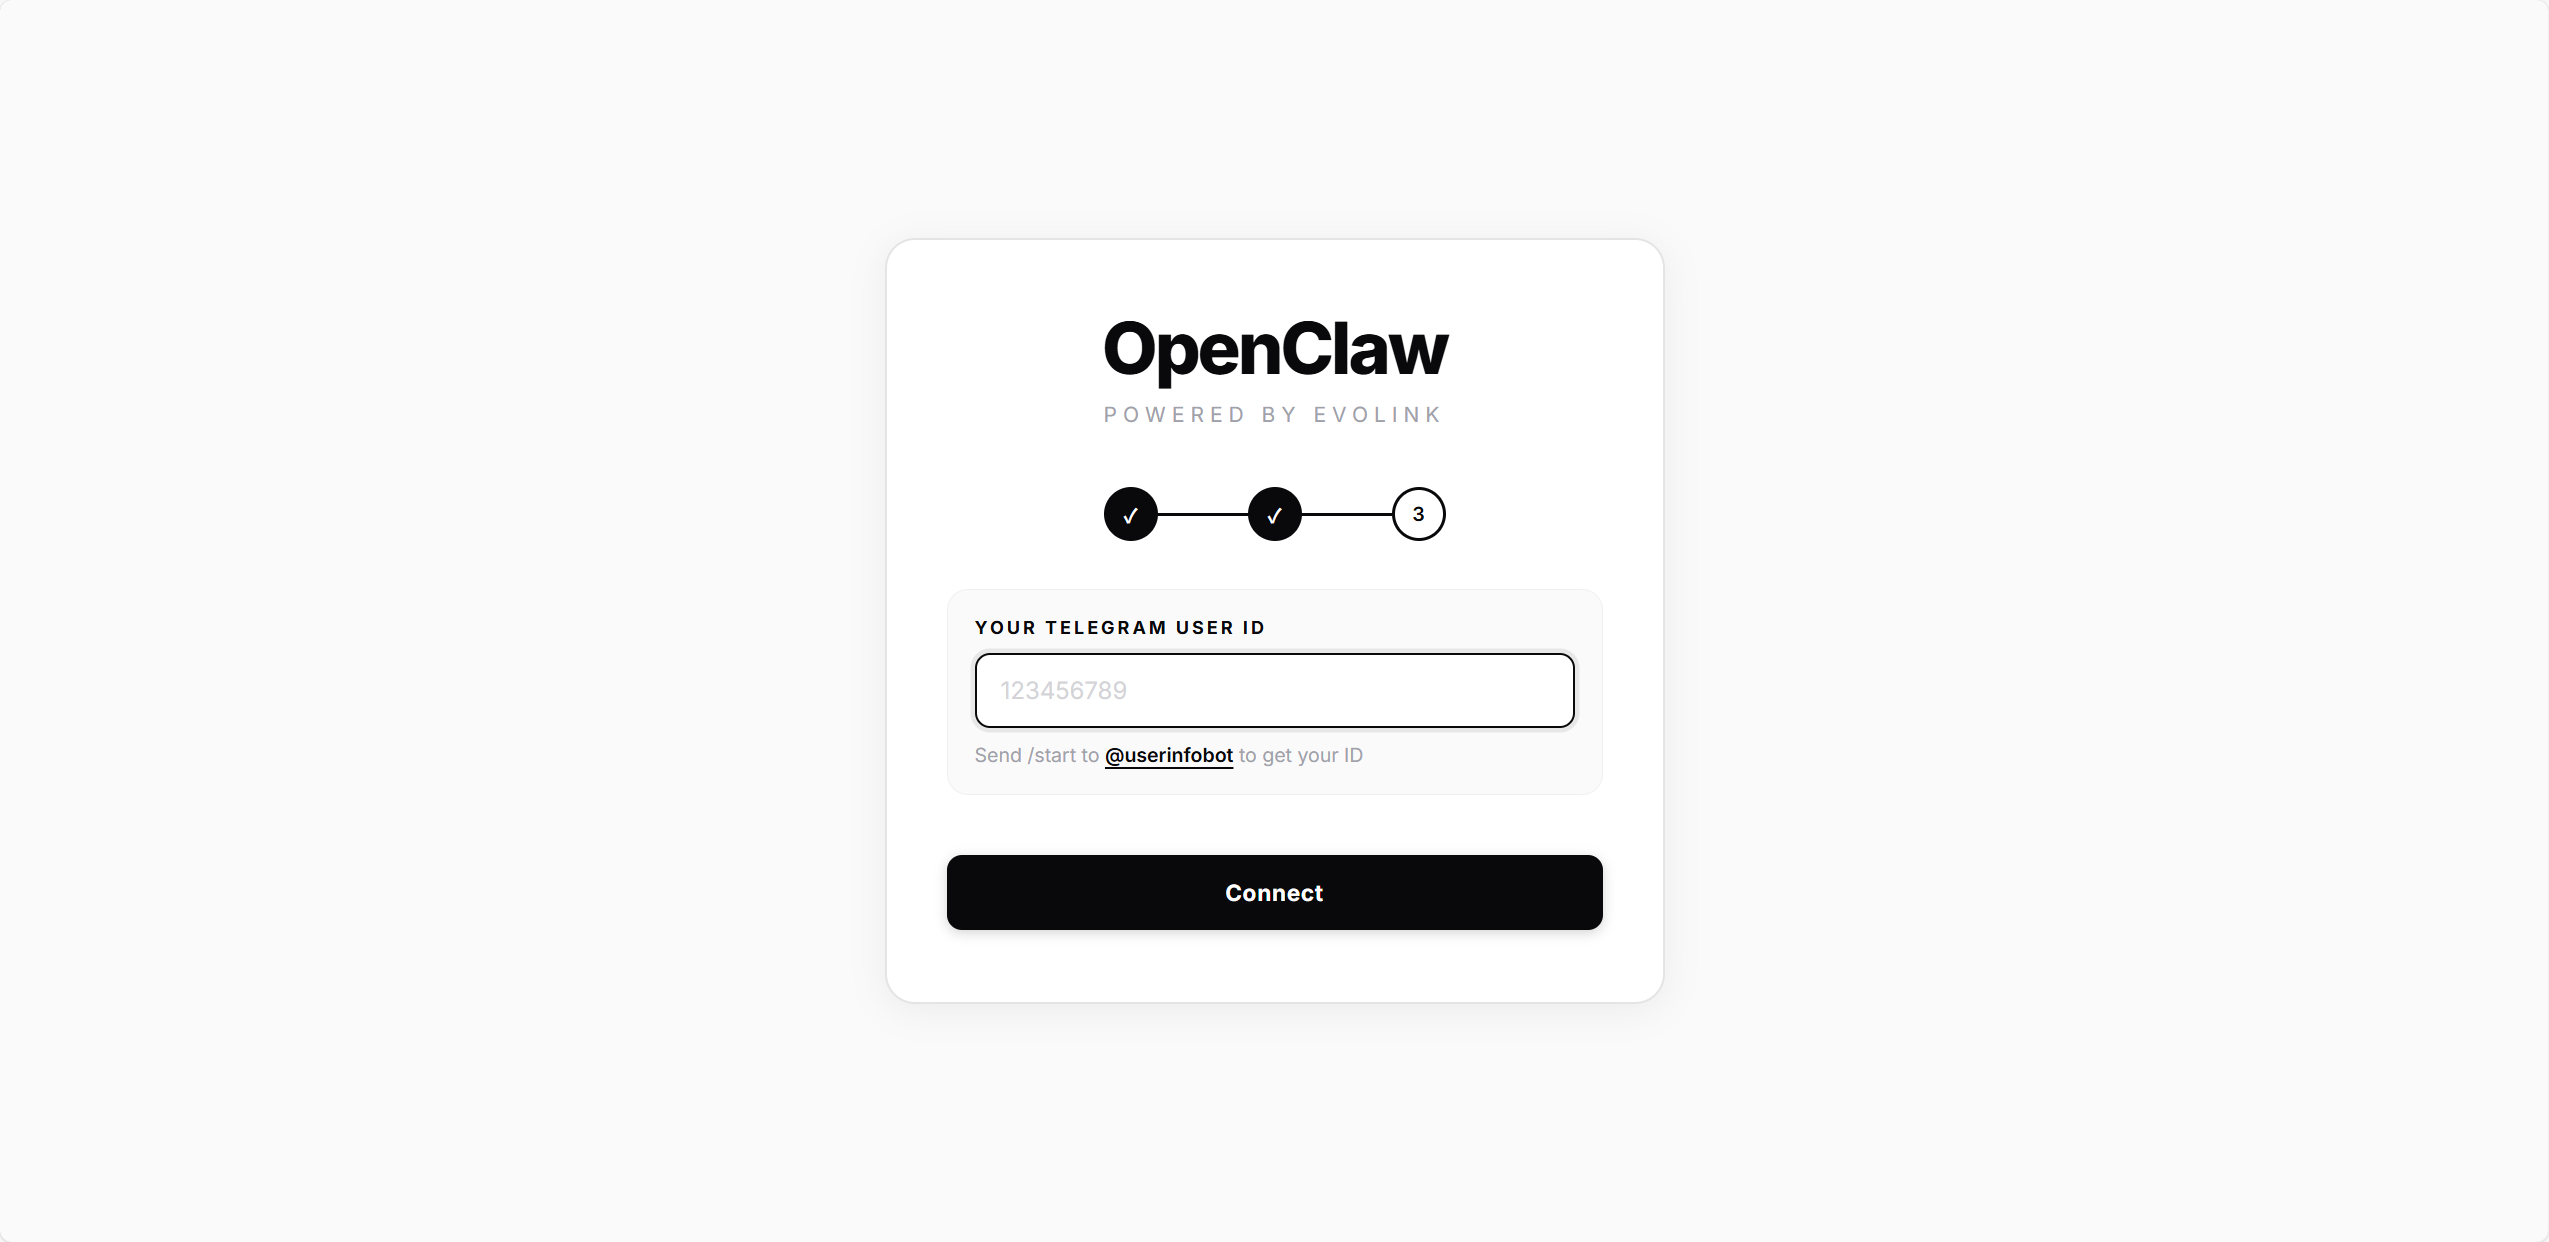
Enter your **Telegram User ID** (the numeric ID from @userinfobot), then click **Connect**.
The script writes this ID to the `allowedUsers` config — only this user will be able to chat with the Bot. Once connected, you'll be redirected to the home page.
Wait for the progress bar to complete, then you'll advance to the next step automatically.
### 2.3 — Connect
Enter your **Telegram User ID** (the numeric ID from @userinfobot), then click **Connect**.
The script writes this ID to the `allowedUsers` config — only this user will be able to chat with the Bot. Once connected, you'll be redirected to the home page.
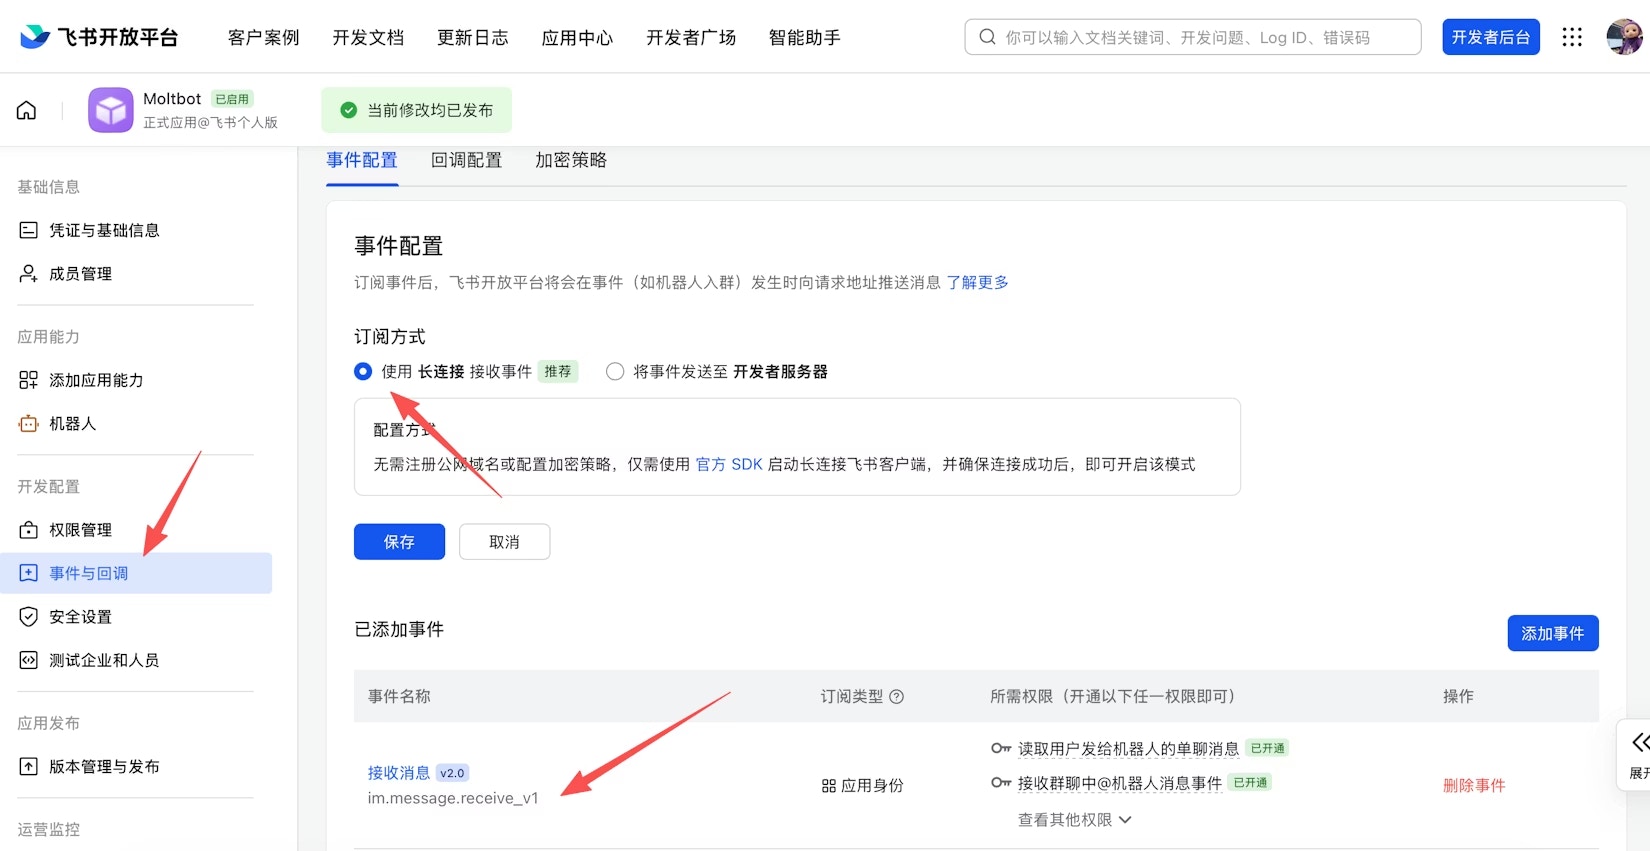
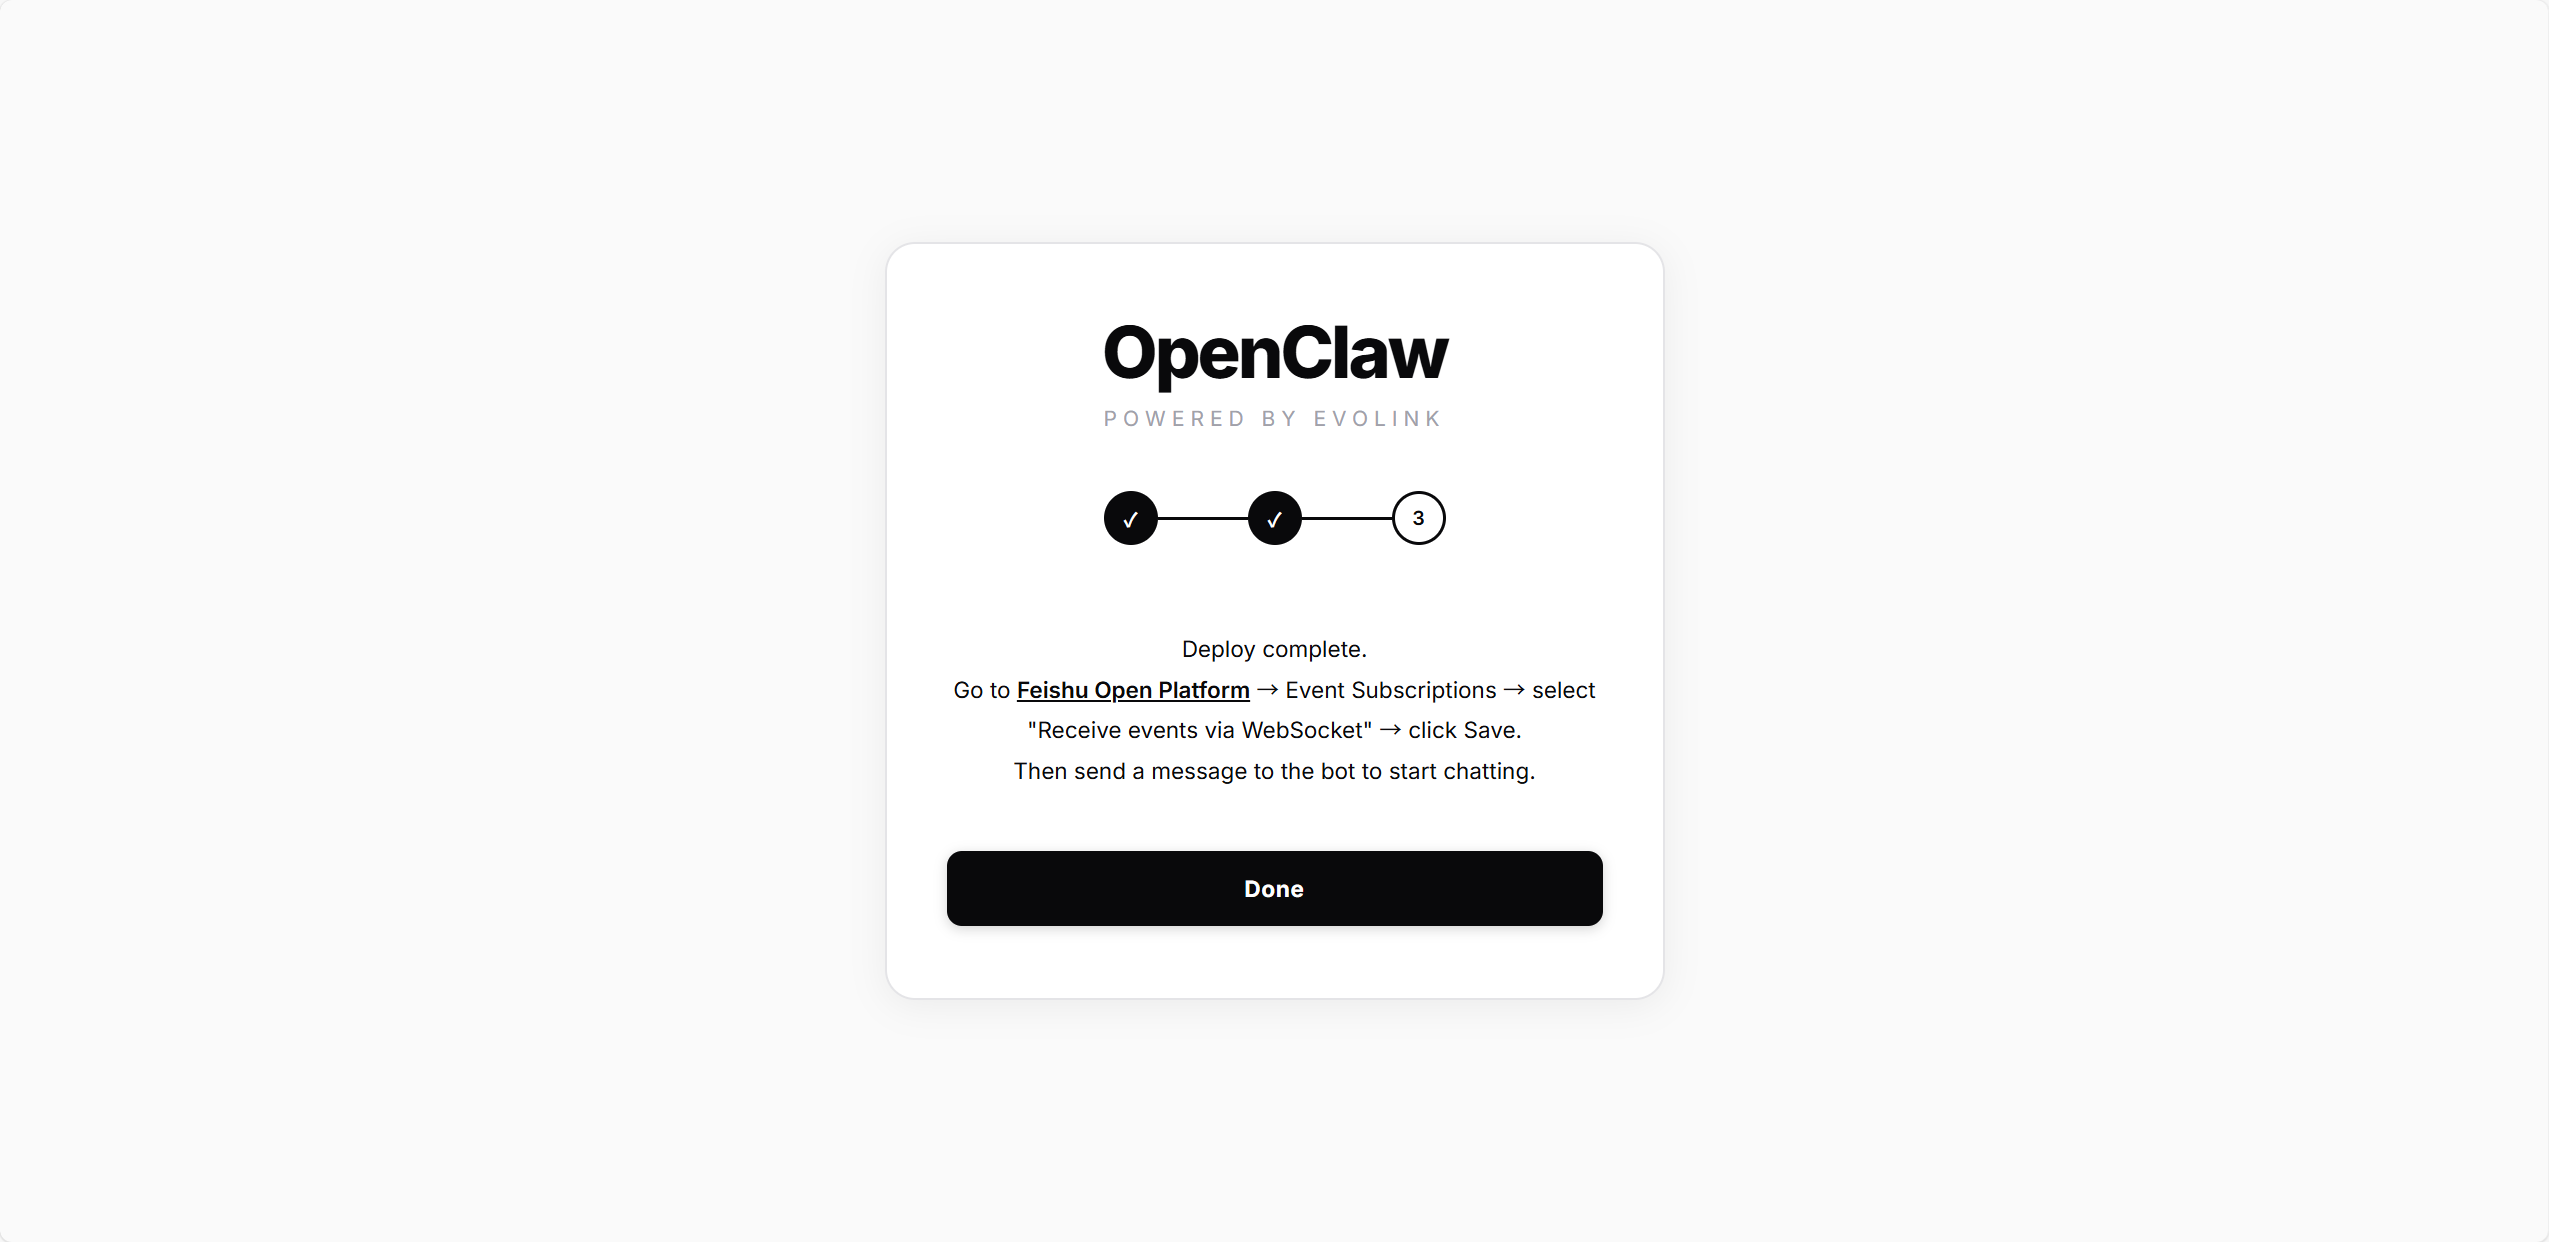
 Deployment is complete. Now return to Feishu Open Platform to configure event subscription.
Before configuring event subscription, make sure the following are done:
* Feishu channel configuration is complete (see Step 2 deployment)
* Gateway is running (check with `openclaw gateway status`)
On the **Event Subscription** page:
1. Select **Use long connection to receive events** (WebSocket mode)
2. Add event: `im.message.receive_v1` (receive messages)
If the gateway is not started or the channel has not been added, the long connection settings will fail to save.
Deployment is complete. Now return to Feishu Open Platform to configure event subscription.
Before configuring event subscription, make sure the following are done:
* Feishu channel configuration is complete (see Step 2 deployment)
* Gateway is running (check with `openclaw gateway status`)
On the **Event Subscription** page:
1. Select **Use long connection to receive events** (WebSocket mode)
2. Add event: `im.message.receive_v1` (receive messages)
If the gateway is not started or the channel has not been added, the long connection settings will fail to save.
 3. Under "Version Management & Release", create a version and submit for review
Feishu apps require admin approval before they can be used. Enterprise custom apps are usually approved automatically.
Click **Done** — the script will restart the gateway to establish the Feishu WebSocket connection. After redirecting to the home page, you can start messaging the Bot on Feishu.
3. Under "Version Management & Release", create a version and submit for review
Feishu apps require admin approval before they can be used. Enterprise custom apps are usually approved automatically.
Click **Done** — the script will restart the gateway to establish the Feishu WebSocket connection. After redirecting to the home page, you can start messaging the Bot on Feishu.
 ## Manage Instances
After deployment, the home page displays all instances:
## Manage Instances
After deployment, the home page displays all instances:
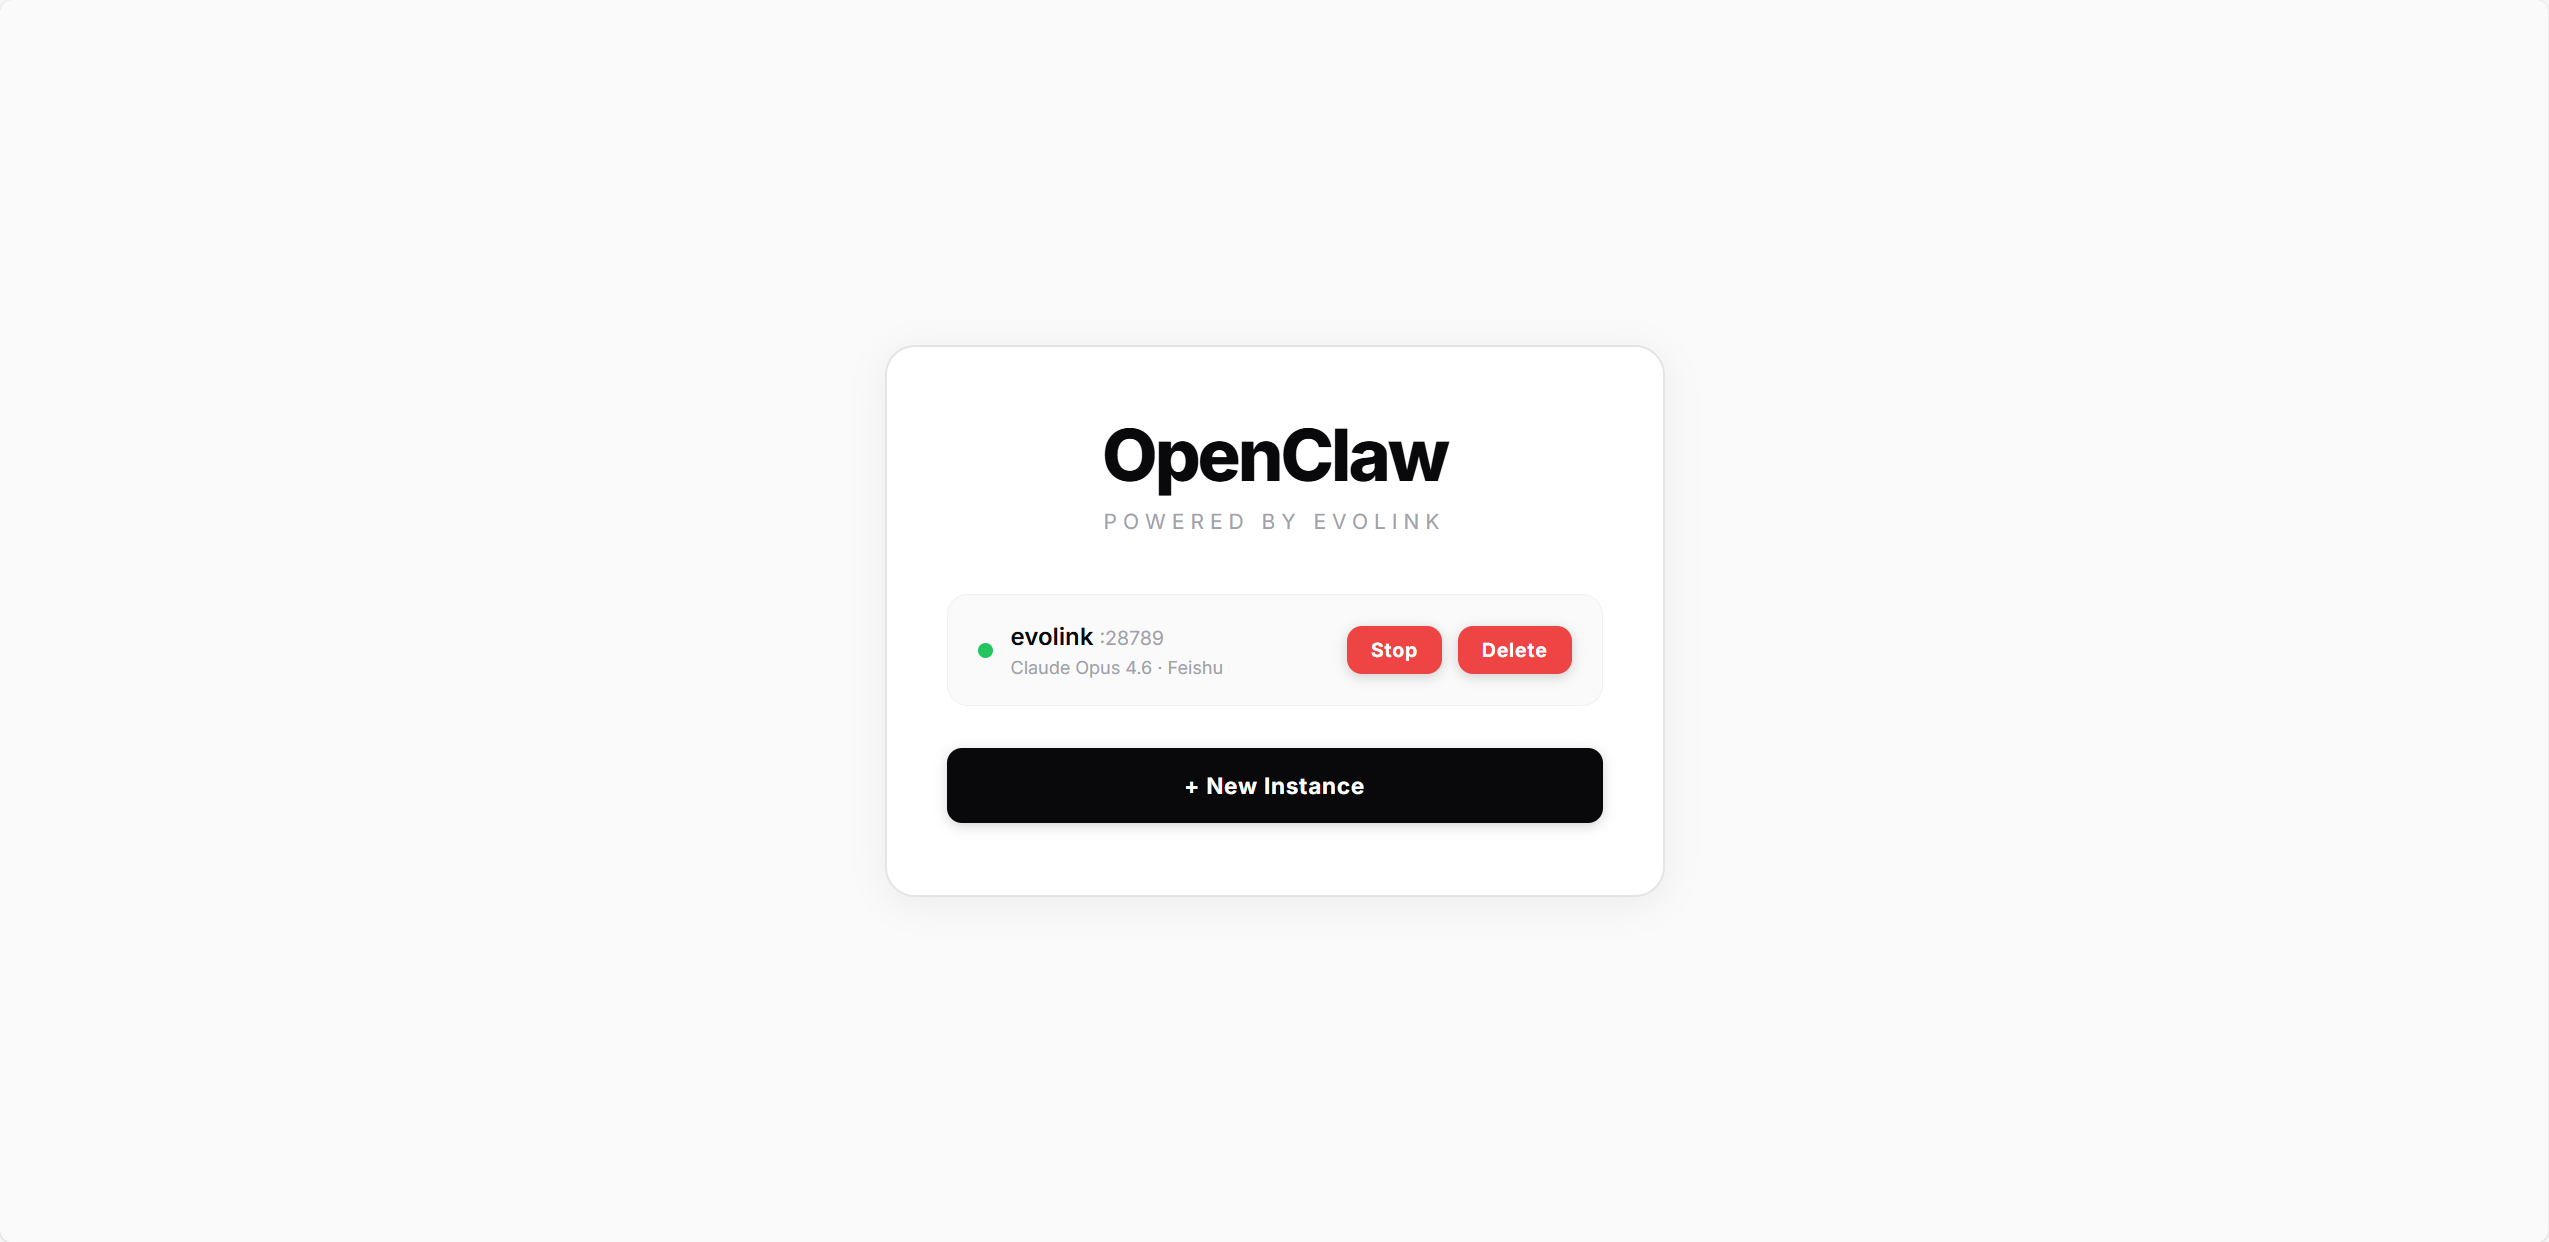 | Status | Description |
| -------- | --------------- |
| 🟢 Green | Gateway running |
| 🔴 Red | Gateway stopped |
Each instance card shows the model and channel in use. Available actions:
* **Start / Stop**: Start or stop the gateway service
* **Delete**: Remove the instance (stops the gateway and cleans up all config files)
Click **+ New Instance** to create multiple instances, each running independently on a different port.
| Status | Description |
| -------- | --------------- |
| 🟢 Green | Gateway running |
| 🔴 Red | Gateway stopped |
Each instance card shows the model and channel in use. Available actions:
* **Start / Stop**: Start or stop the gateway service
* **Delete**: Remove the instance (stops the gateway and cleans up all config files)
Click **+ New Instance** to create multiple instances, each running independently on a different port.