> ## Documentation Index
> Fetch the complete documentation index at: https://docs.evolink.ai/llms.txt
> Use this file to discover all available pages before exploring further.
# OpenClaw + Telegram
> Connect OpenClaw to EvoLink.AI
## Overview
OpenClaw is an open-source AI agent Gateway that acts as a bridge between chat applications and AI agents. Through a centralized Gateway process, it connects chat platforms like Telegram, WhatsApp, and Discord to AI coding agents, enabling direct AI programming interactions within chat windows.
By configuring **EvoLink API** as a custom model provider in OpenClaw and connecting a **Telegram Bot**, you can use EvoLink's Claude models (such as **Claude 4.6 Opus**, **Claude 4.5 Sonnet**, **Claude 4.5 Haiku**) for AI-assisted coding conversations directly in Telegram.
**This guide covers:**
* Installing and configuring OpenClaw Gateway
* Creating a Telegram Bot and connecting it to OpenClaw
* Setting up EvoLink API as a custom model provider
* Verifying the connection and getting started
## System Environment Check
Before installation, it's recommended to run the environment checker tool to ensure your system meets OpenClaw's requirements.
### Download Checker Tool
Download the checker tool for your platform from [GitHub Releases](https://github.com/suuuuuu-1/openclaw-env-checker/releases):
| Platform | Filename |
| --------------------- | ------------------------------ |
| Windows | `openclaw-checker-win-x64.exe` |
| macOS (Intel) | `openclaw-checker-macos-x64` |
| macOS (Apple Silicon) | `openclaw-checker-macos-arm64` |
| Linux | `openclaw-checker-linux-x64` |
### Check Items
The tool automatically checks the following:
* ✅ Node.js version (requires >= 22.12.0)
* ✅ npm available
* ✅ Git available
* ✅ Network connectivity (github.com, npmjs.org, evolink.ai)
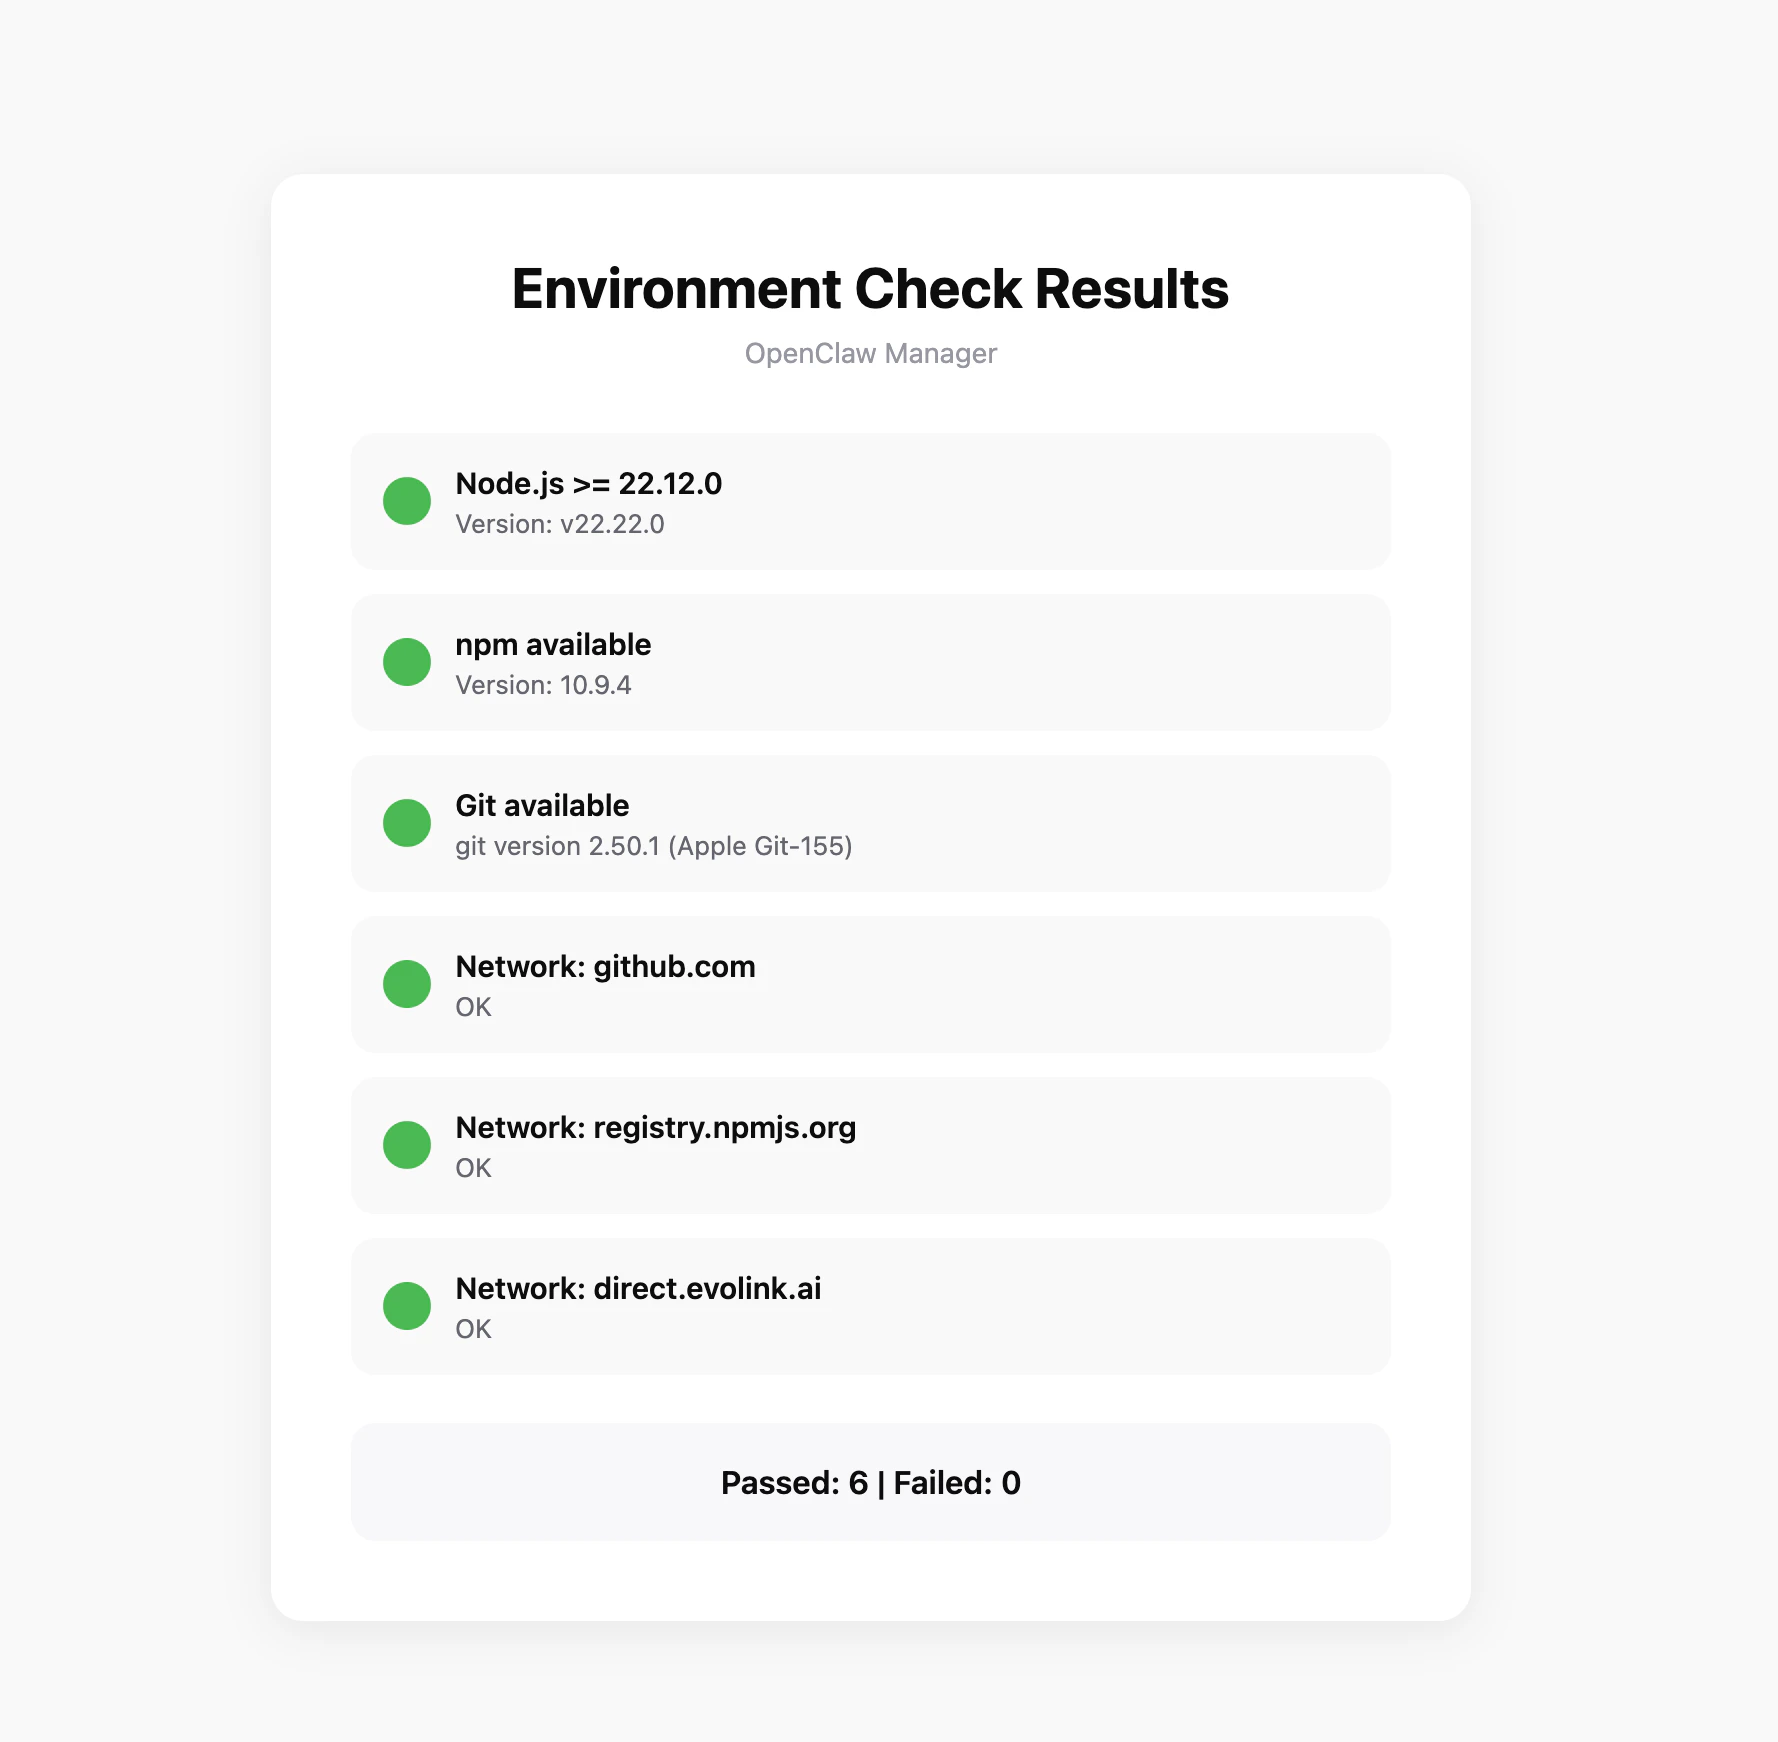 If the check fails, the tool will provide specific fix suggestions.
## Prerequisites
Before configuring, make sure you have:
### 1. Install Node.js
OpenClaw is installed via npm and requires Node.js 22 or higher.
Visit [Node.js official website](https://nodejs.org/en/download), download the Windows installer (.msi file), and run the installation program.
After installation, open PowerShell to verify:
```bash theme={null}
node --version
npm --version
```
It's recommended to run PowerShell as administrator to avoid permission issues during installation.
**Method 1: Using Installer**
Visit [Node.js official website](https://nodejs.org/en/download), download the macOS installer (.pkg file), and run the installation program.
**Method 2: Using Homebrew**
```bash theme={null}
brew install node
```
After installation, open Terminal to verify:
```bash theme={null}
node --version
npm --version
```
If you encounter permission issues during installation, you may need to add `sudo` before the command.
### 2. Get EvoLink API Key
* Log in to [EvoLink Dashboard](https://evolink.ai/dashboard)
* Find API Keys in the dashboard, click 'Create New Key' button, then copy the generated Key
* API Key usually starts with `sk-`
### 3. Prepare a Telegram Account
You will need it to create a Bot and test the integration.
## Step 1: Install OpenClaw
Run the following command in your terminal:
```bash theme={null}
npm install -g openclaw@latest
```
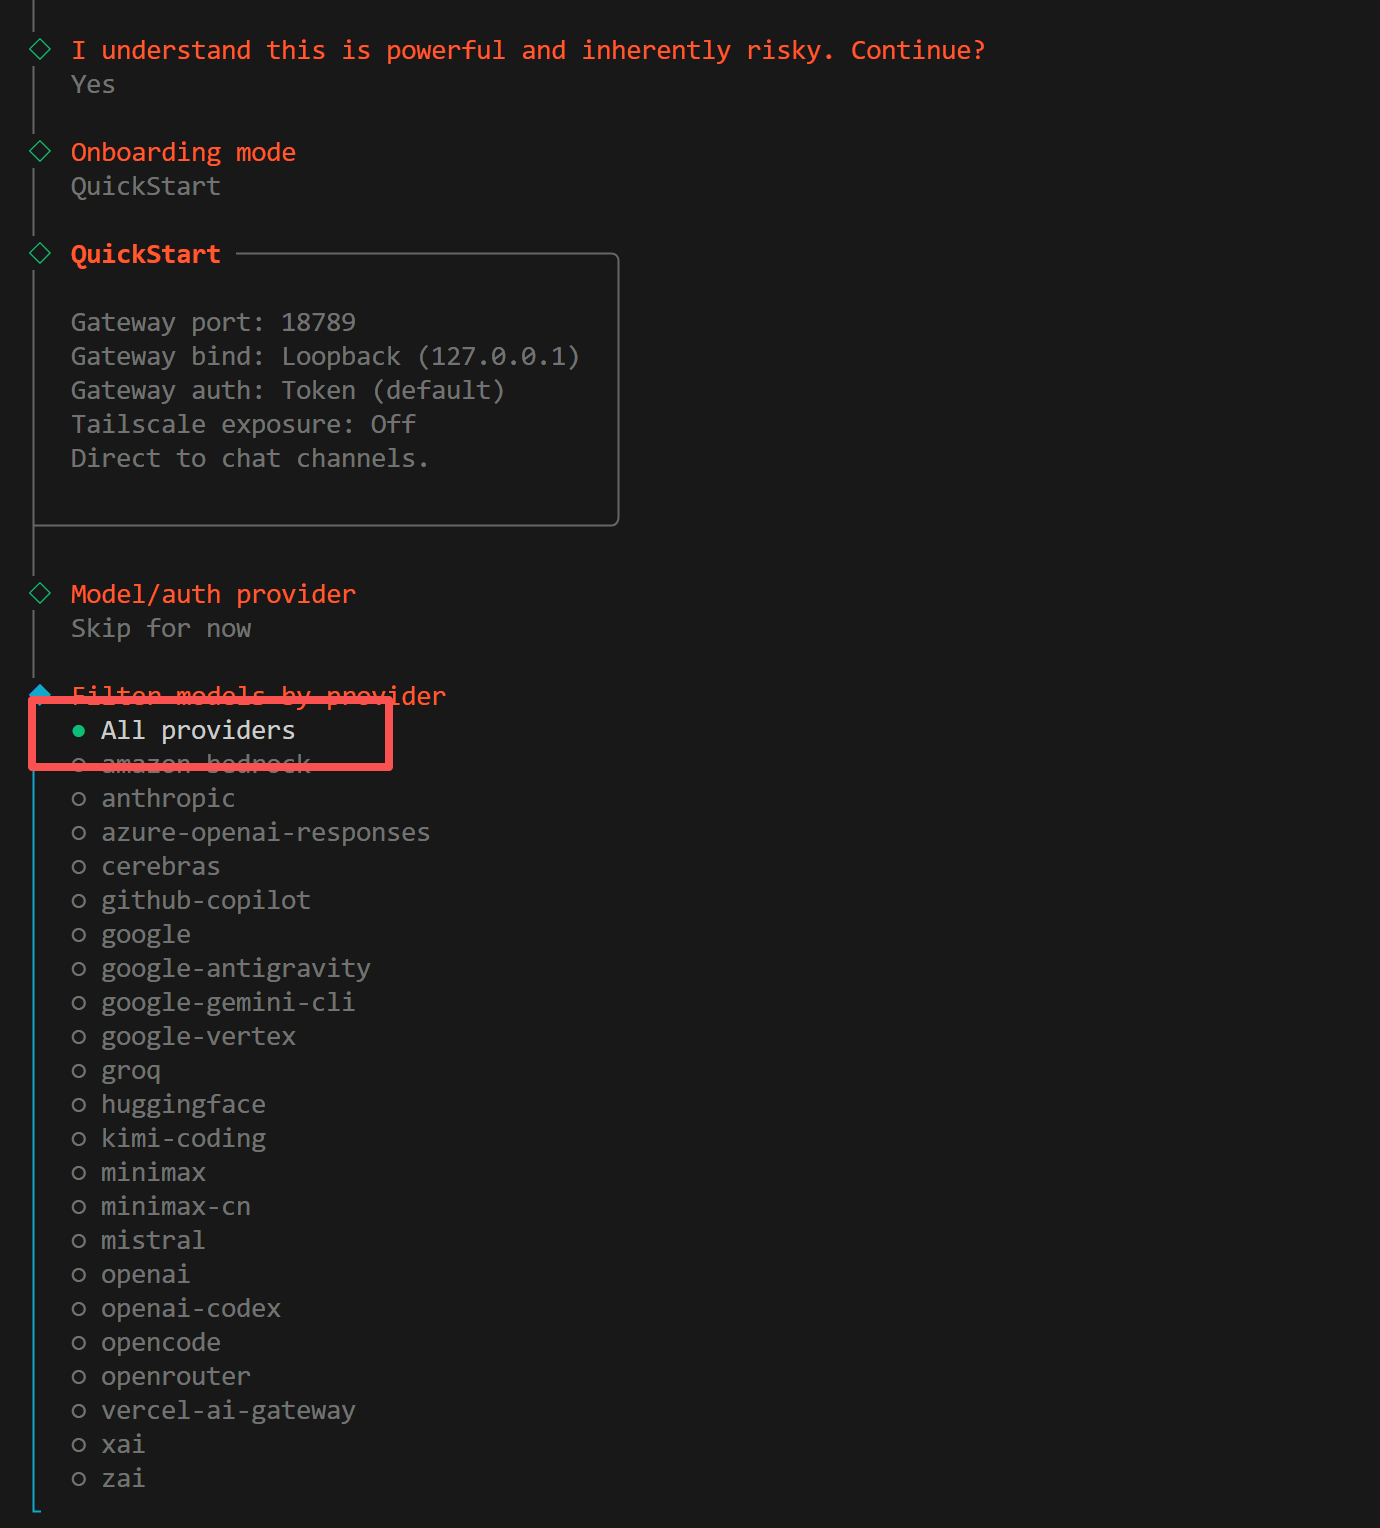
## Step 2: Onboarding
Run the onboarding command. OpenClaw will guide you through the initial setup and install the background daemon service:
```bash theme={null}
openclaw onboard --install-daemon
```
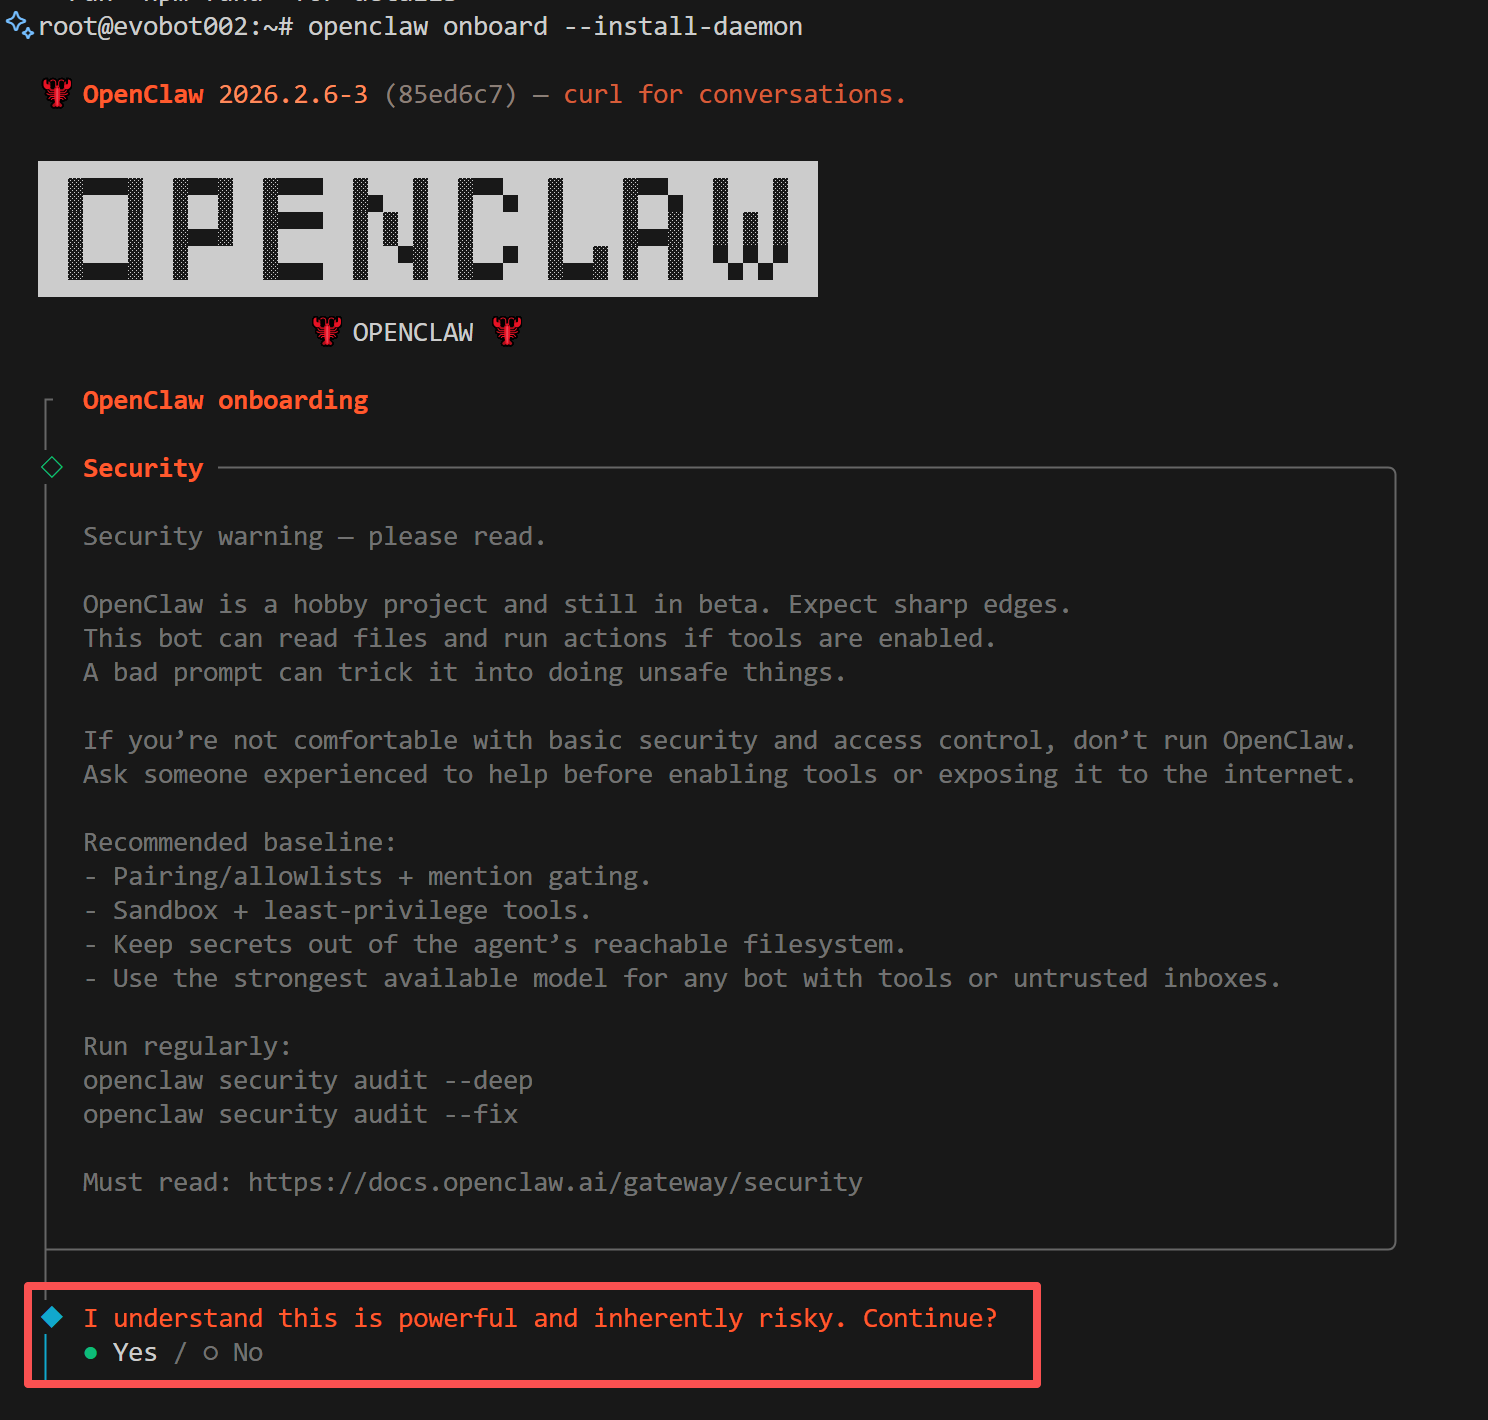
### 1. Confirm Installation
The system will display a risk disclaimer. Confirm to proceed:
If the check fails, the tool will provide specific fix suggestions.
## Prerequisites
Before configuring, make sure you have:
### 1. Install Node.js
OpenClaw is installed via npm and requires Node.js 22 or higher.
Visit [Node.js official website](https://nodejs.org/en/download), download the Windows installer (.msi file), and run the installation program.
After installation, open PowerShell to verify:
```bash theme={null}
node --version
npm --version
```
It's recommended to run PowerShell as administrator to avoid permission issues during installation.
**Method 1: Using Installer**
Visit [Node.js official website](https://nodejs.org/en/download), download the macOS installer (.pkg file), and run the installation program.
**Method 2: Using Homebrew**
```bash theme={null}
brew install node
```
After installation, open Terminal to verify:
```bash theme={null}
node --version
npm --version
```
If you encounter permission issues during installation, you may need to add `sudo` before the command.
### 2. Get EvoLink API Key
* Log in to [EvoLink Dashboard](https://evolink.ai/dashboard)
* Find API Keys in the dashboard, click 'Create New Key' button, then copy the generated Key
* API Key usually starts with `sk-`
### 3. Prepare a Telegram Account
You will need it to create a Bot and test the integration.
## Step 1: Install OpenClaw
Run the following command in your terminal:
```bash theme={null}
npm install -g openclaw@latest
```
## Step 2: Onboarding
Run the onboarding command. OpenClaw will guide you through the initial setup and install the background daemon service:
```bash theme={null}
openclaw onboard --install-daemon
```
### 1. Confirm Installation
The system will display a risk disclaimer. Confirm to proceed:
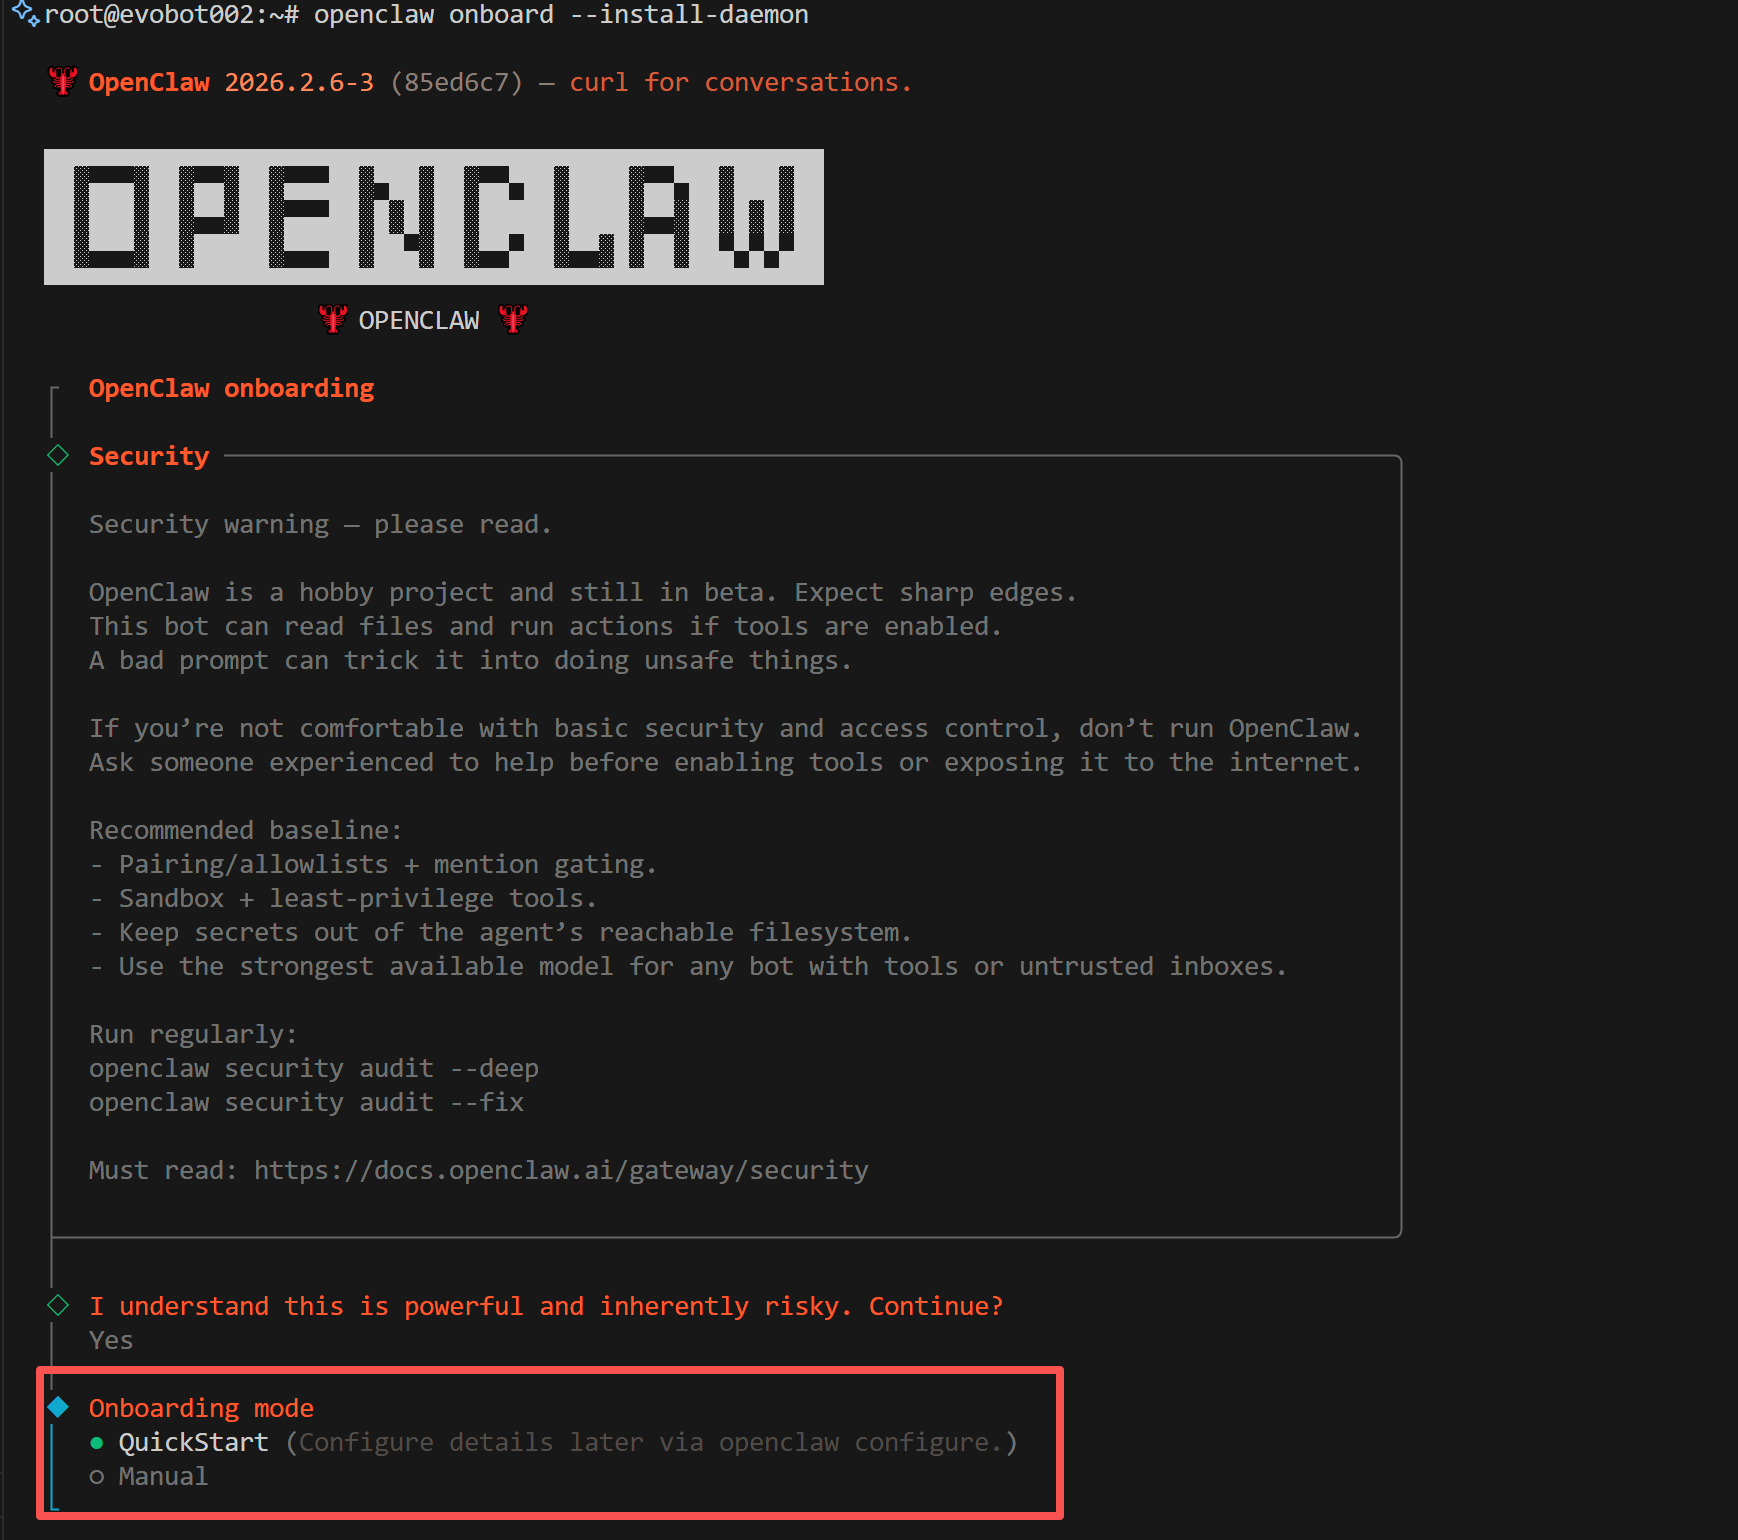
 ### 2. Select Installation Mode
When prompted to choose an installation mode, select **Quickstart**:
### 2. Select Installation Mode
When prompted to choose an installation mode, select **Quickstart**:
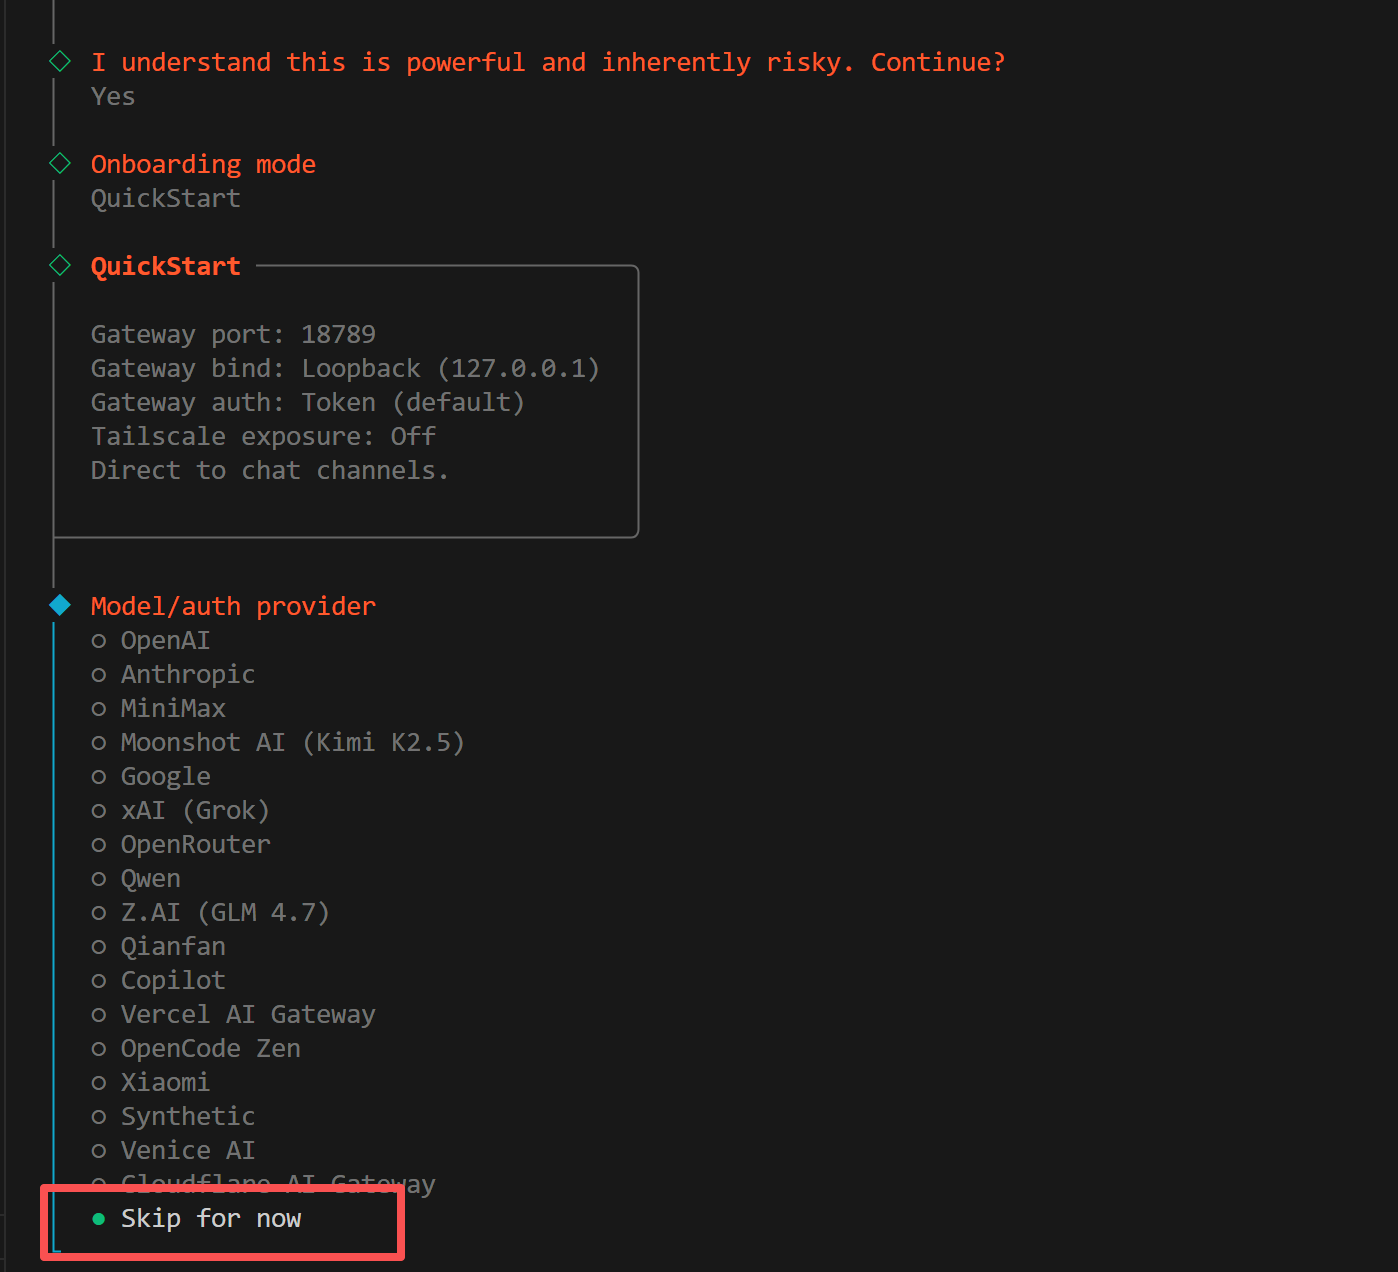
 ### 3. Select Provider
When prompted to choose a model provider, select **Skip**. We will manually configure EvoLink as a custom provider later:
### 3. Select Provider
When prompted to choose a model provider, select **Skip**. We will manually configure EvoLink as a custom provider later:
 ### 4. Select Models
When prompted to choose which models to enable, select **All**:
### 4. Select Models
When prompted to choose which models to enable, select **All**:
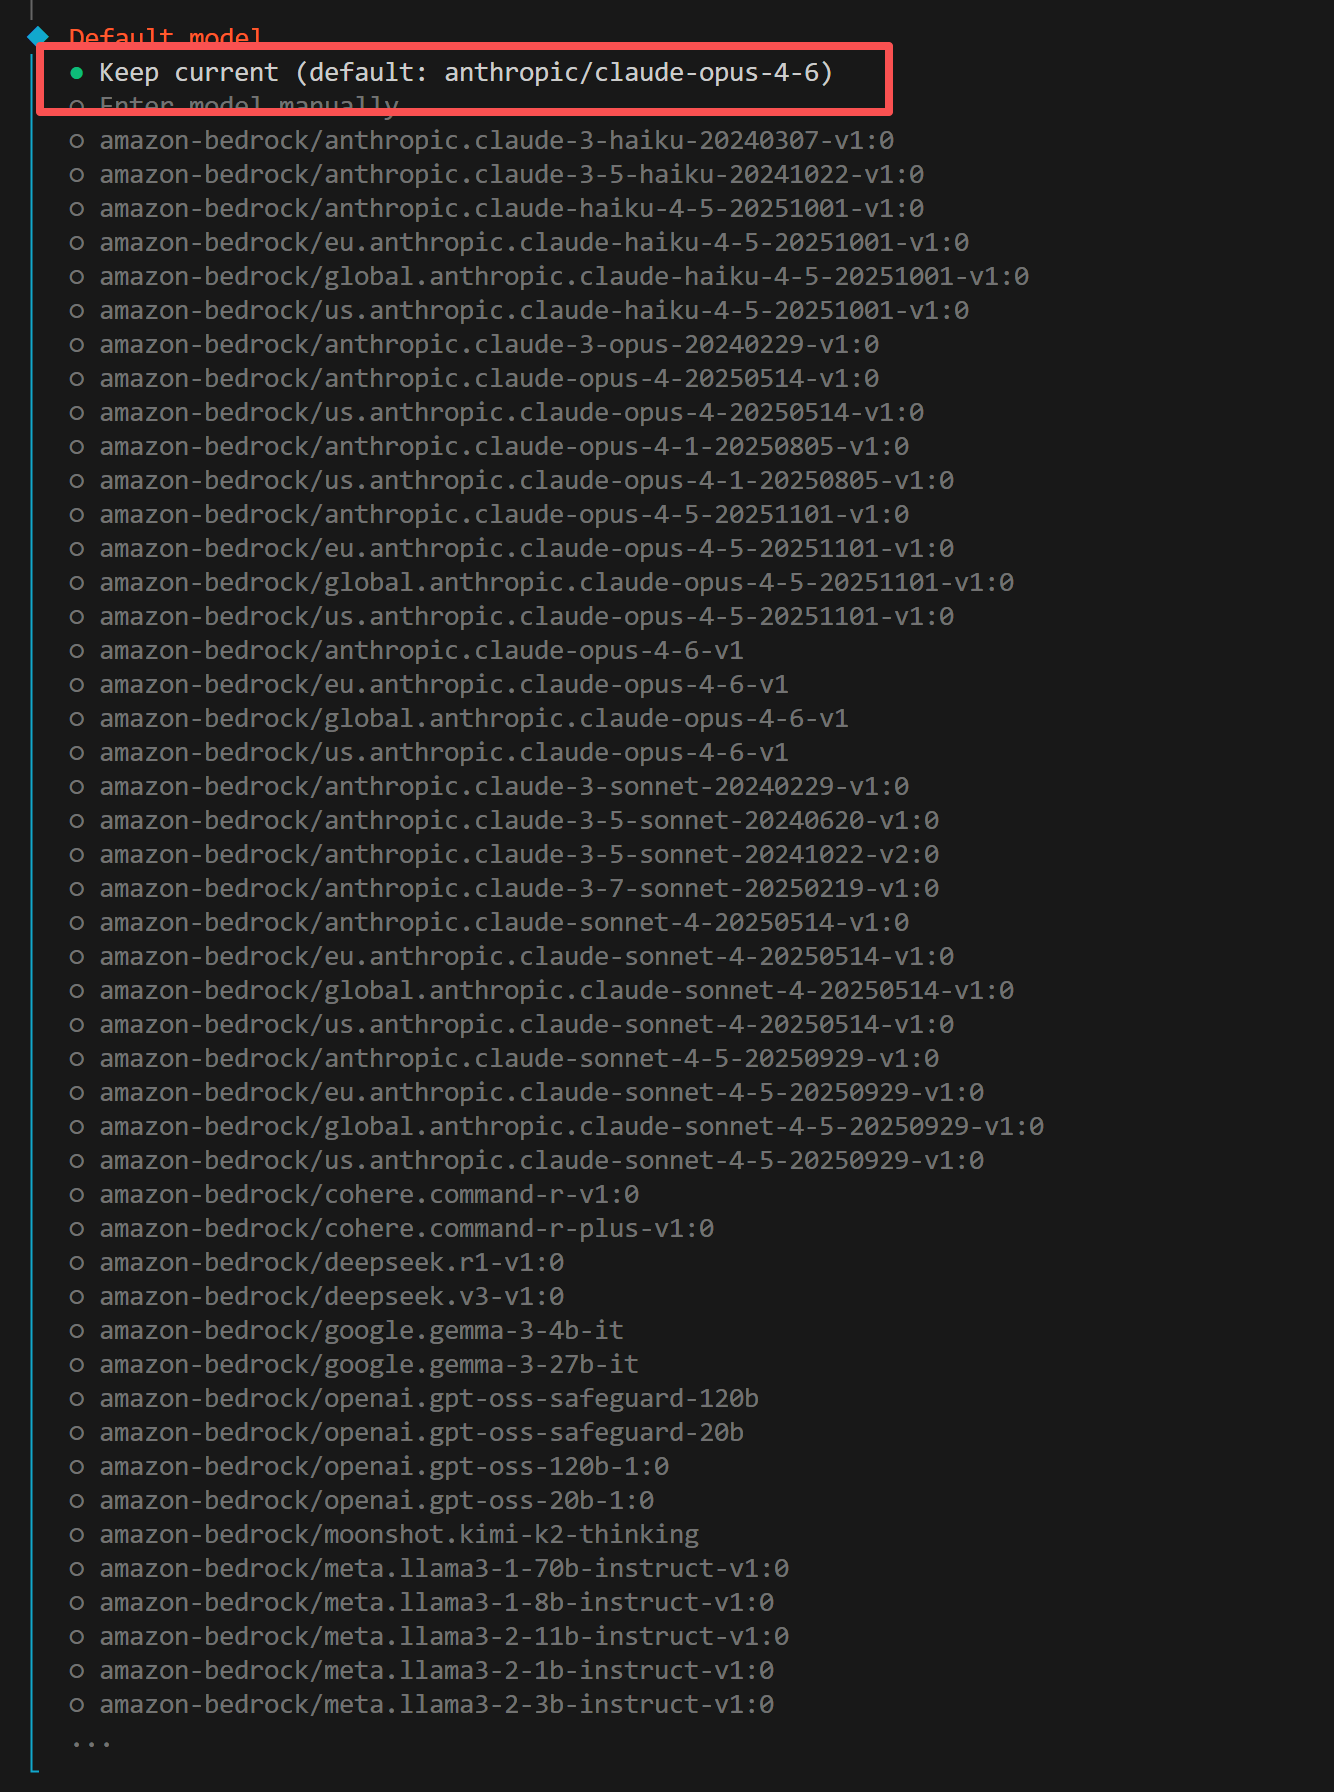
 ### 5. Select Default Model
When prompted to choose a default model, select **Keep current**:
### 5. Select Default Model
When prompted to choose a default model, select **Keep current**:
 ## Step 3: Create Telegram Bot
The onboarding flow will prompt you to select a chat channel. Select **Telegram (Bot API)**.
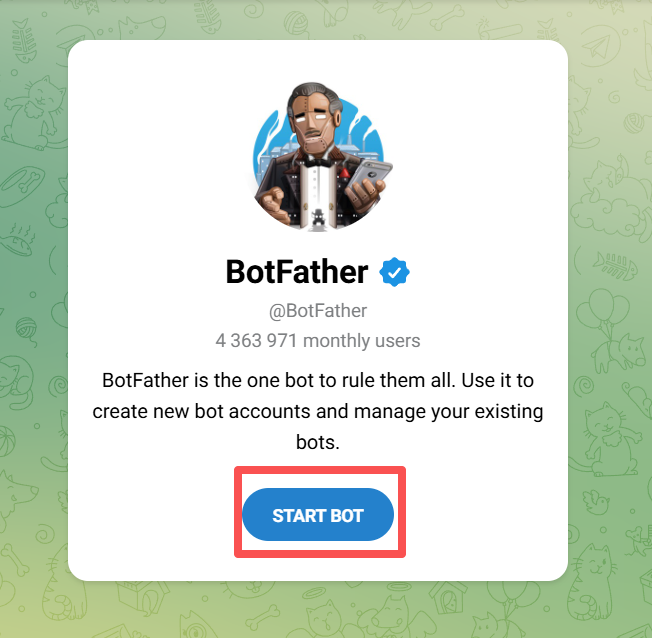
### 1. Visit BotFather
Open Telegram and visit [@BotFather](https://t.me/BotFather), then click **START BOT** to begin:
## Step 3: Create Telegram Bot
The onboarding flow will prompt you to select a chat channel. Select **Telegram (Bot API)**.
### 1. Visit BotFather
Open Telegram and visit [@BotFather](https://t.me/BotFather), then click **START BOT** to begin:
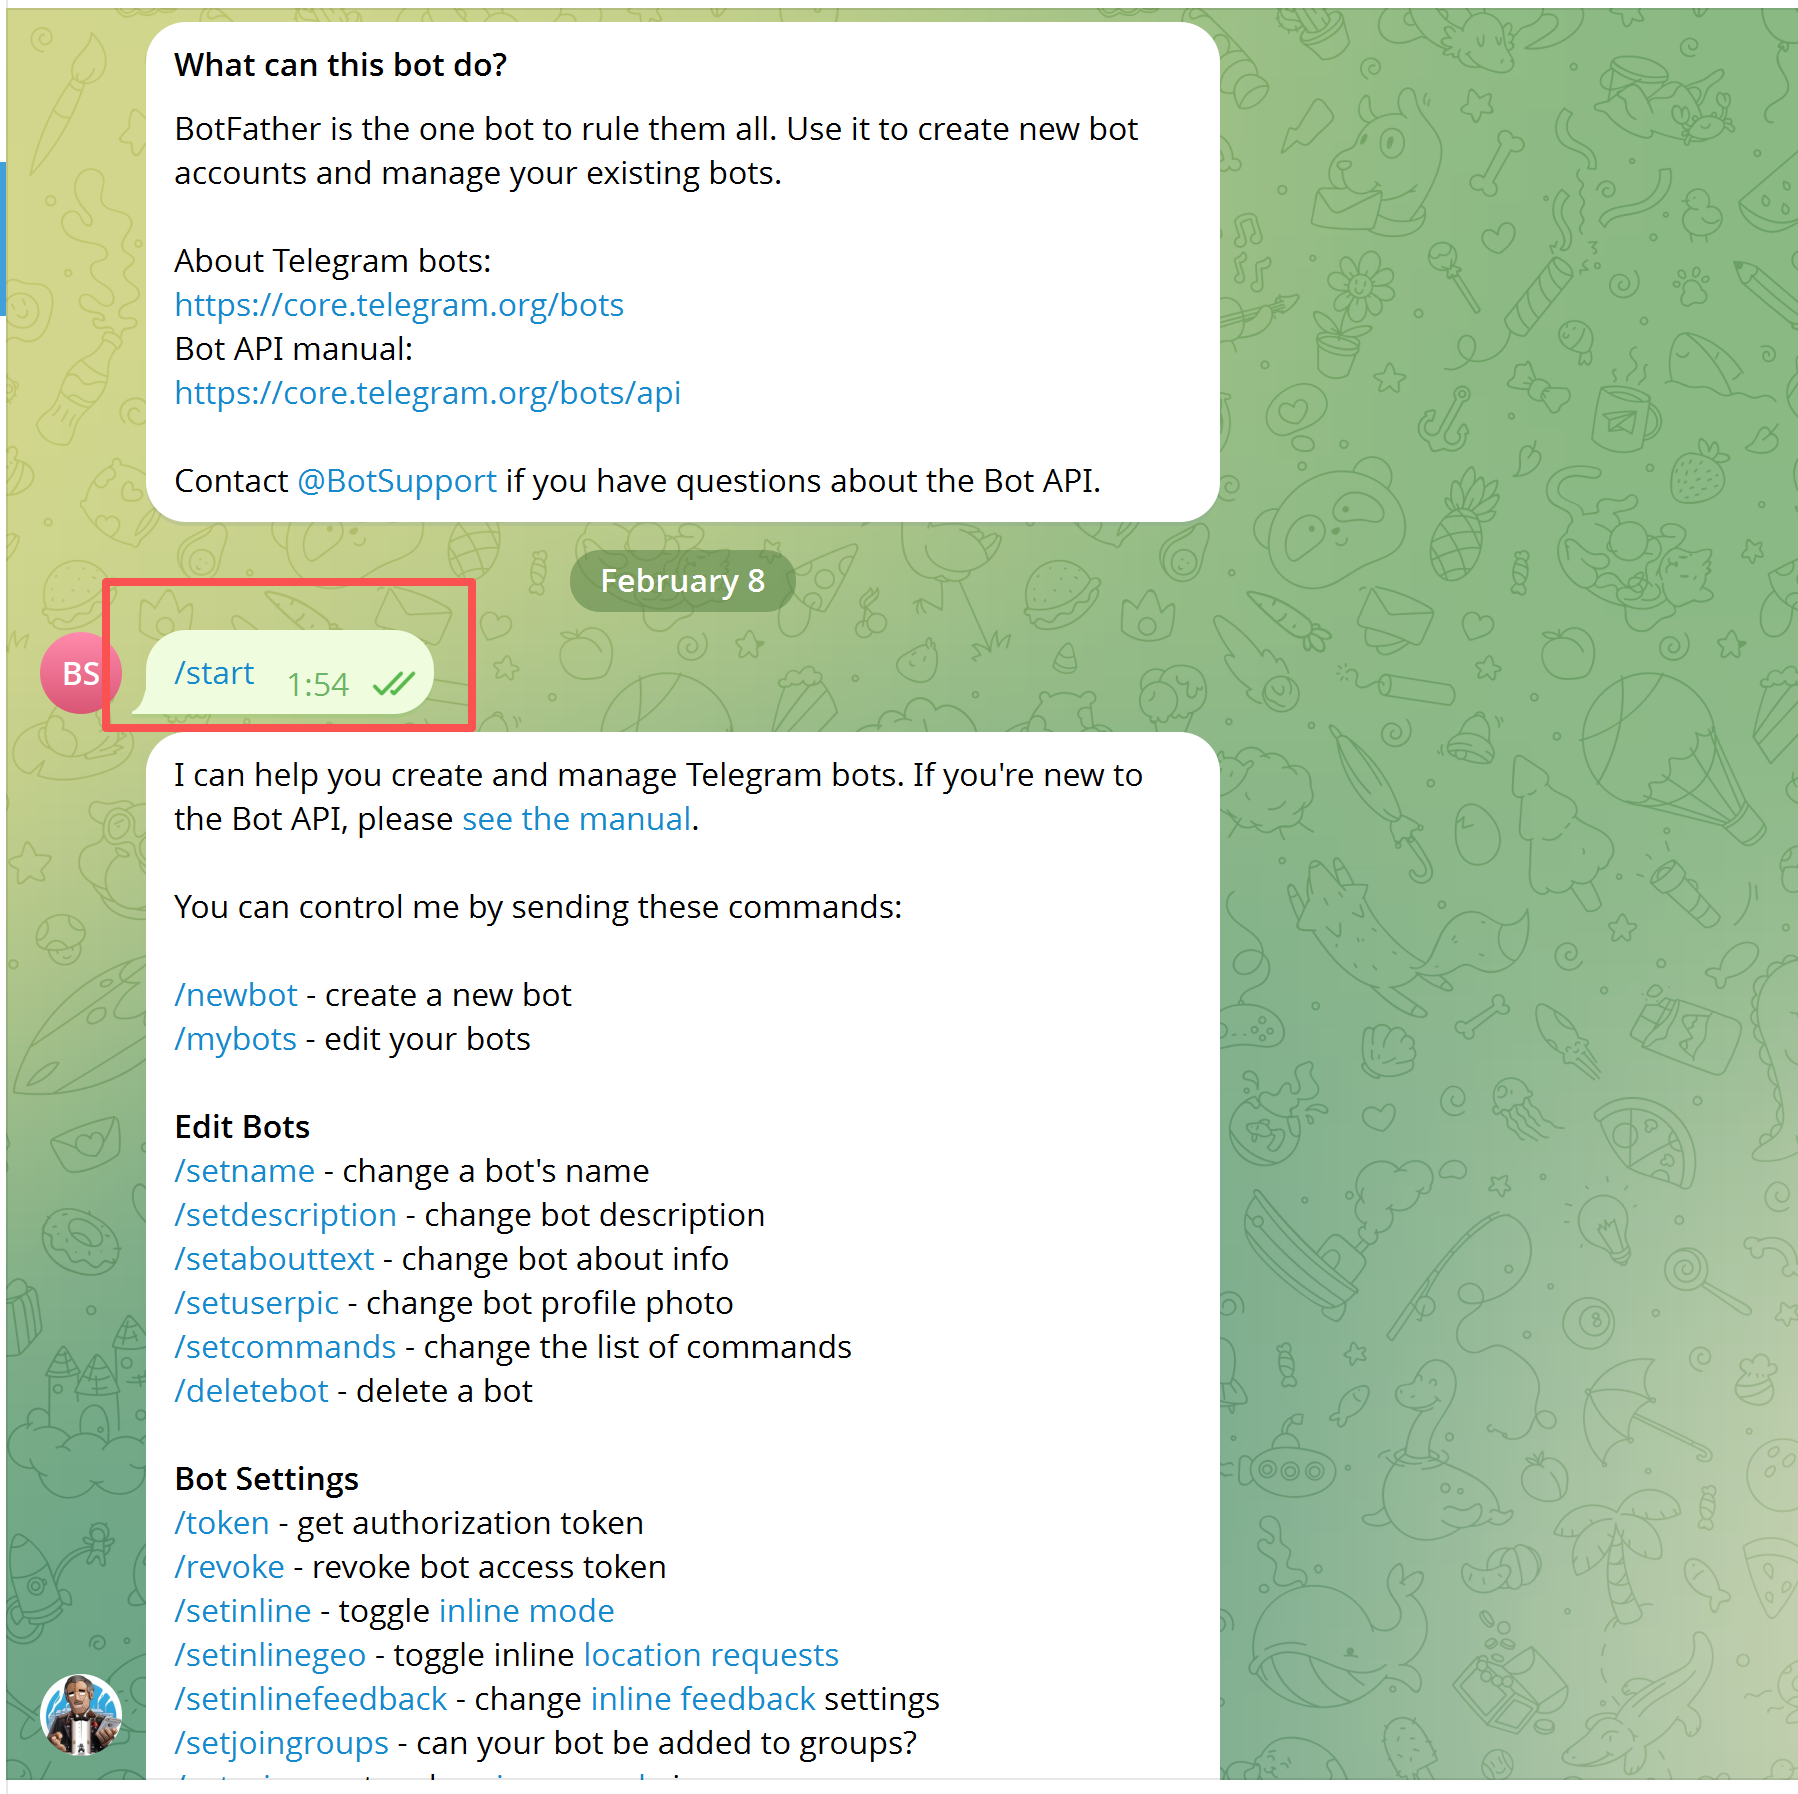
 ### 2. Create Bot
Type `/start` in the chat. BotFather will reply with a list of available commands:
### 2. Create Bot
Type `/start` in the chat. BotFather will reply with a list of available commands:
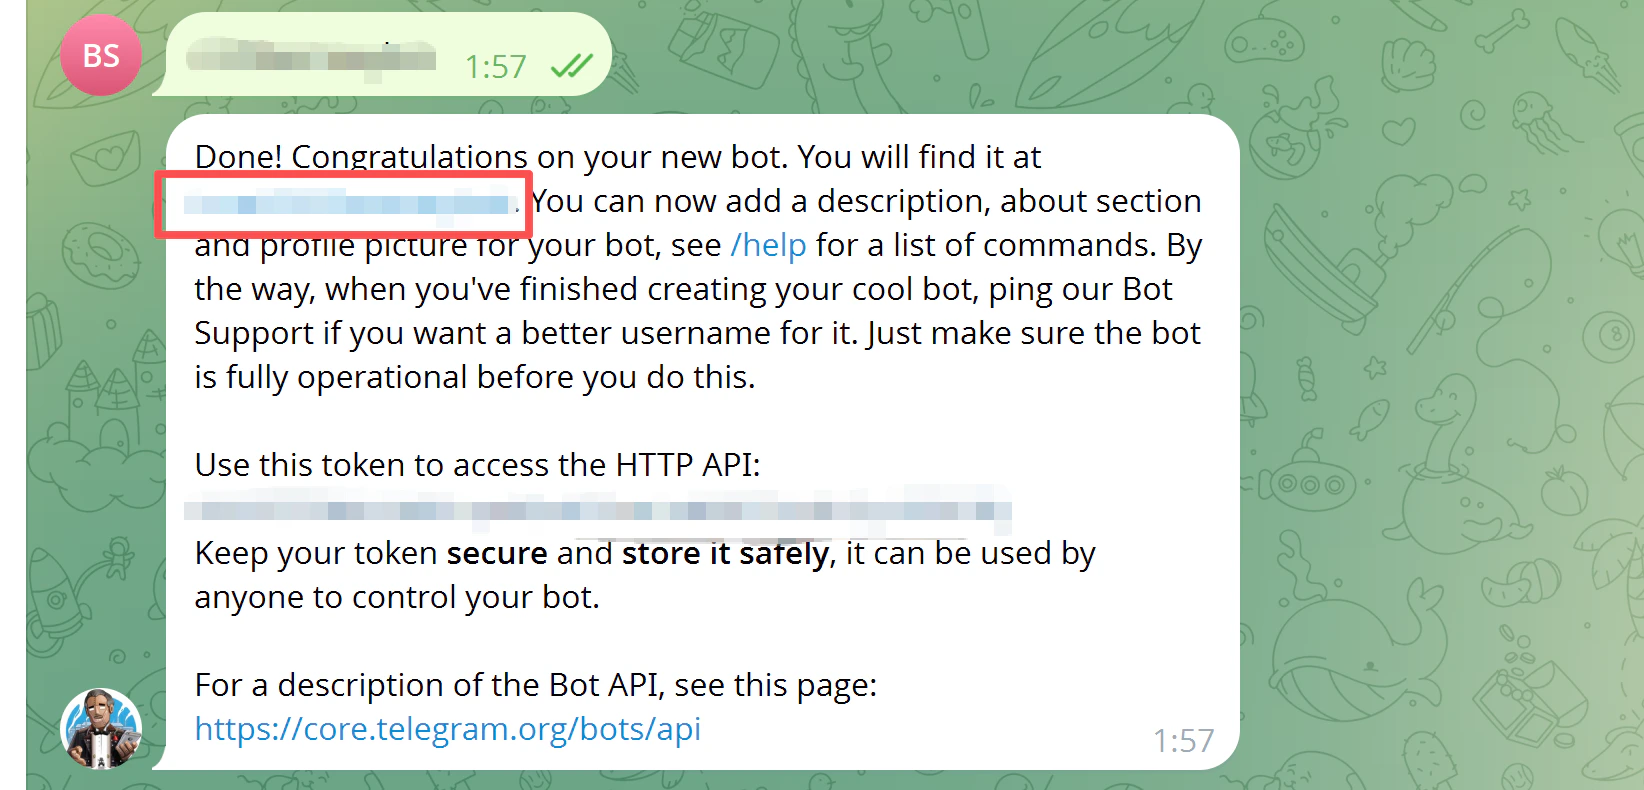
 Type `/newbot`. Follow the prompt to set a unique **Bot username** that must end with `bot` (e.g., `my_evolink_bot`).
Once created, BotFather will return a message containing a **Token** in this format:
```
123456789:ABCdefGHIjklMNOpqrsTUVwxyz
```
Copy and save this Token.
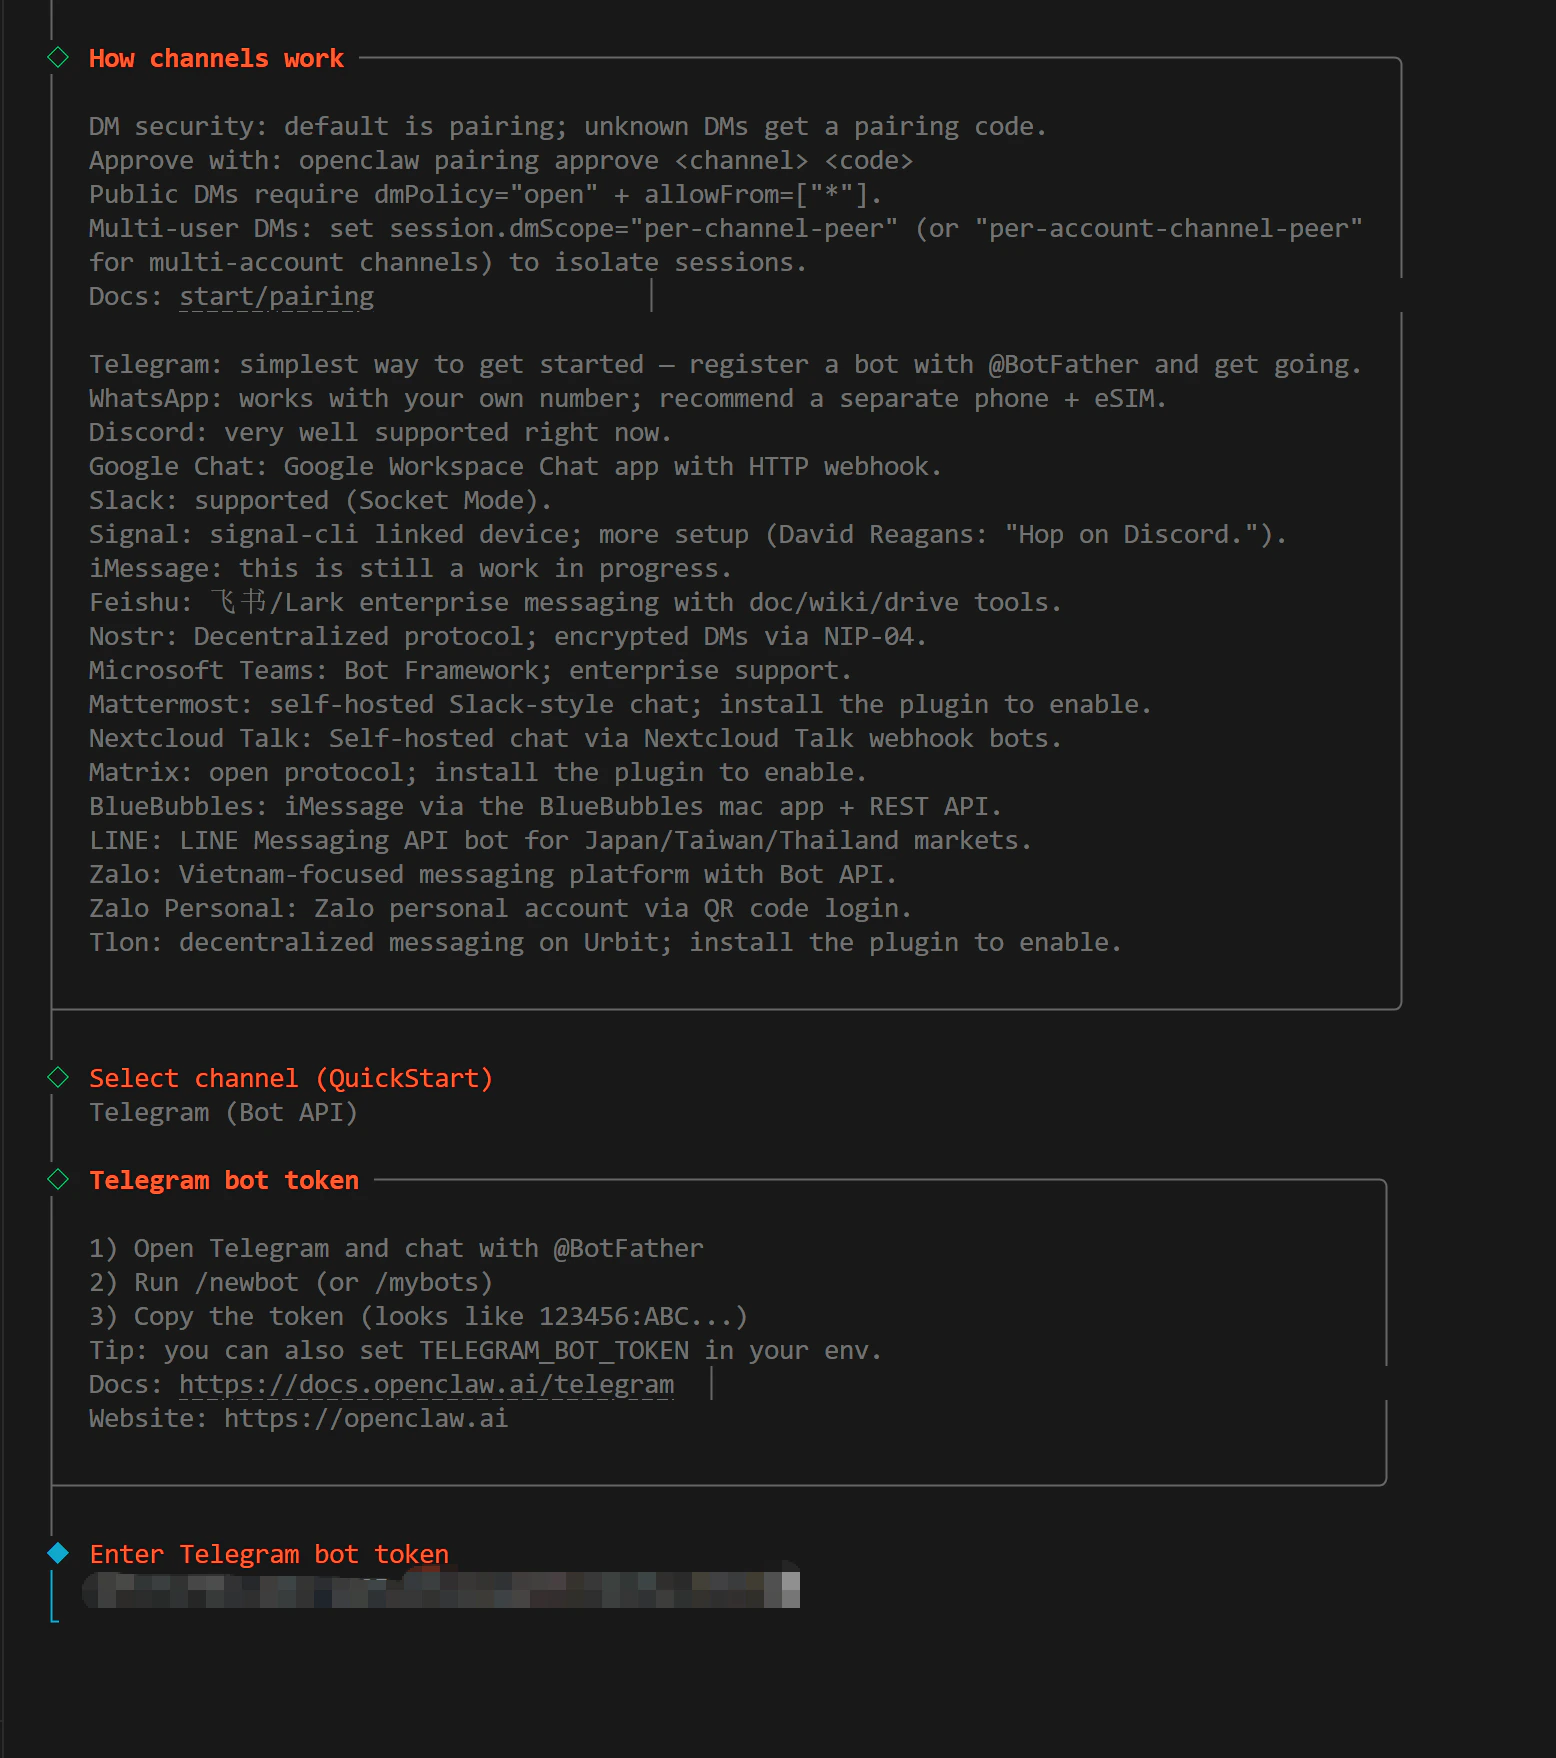
### 3. Enter Token
Go back to the terminal onboarding flow, paste the Bot Token into the prompt and confirm:
Type `/newbot`. Follow the prompt to set a unique **Bot username** that must end with `bot` (e.g., `my_evolink_bot`).
Once created, BotFather will return a message containing a **Token** in this format:
```
123456789:ABCdefGHIjklMNOpqrsTUVwxyz
```
Copy and save this Token.
### 3. Enter Token
Go back to the terminal onboarding flow, paste the Bot Token into the prompt and confirm:
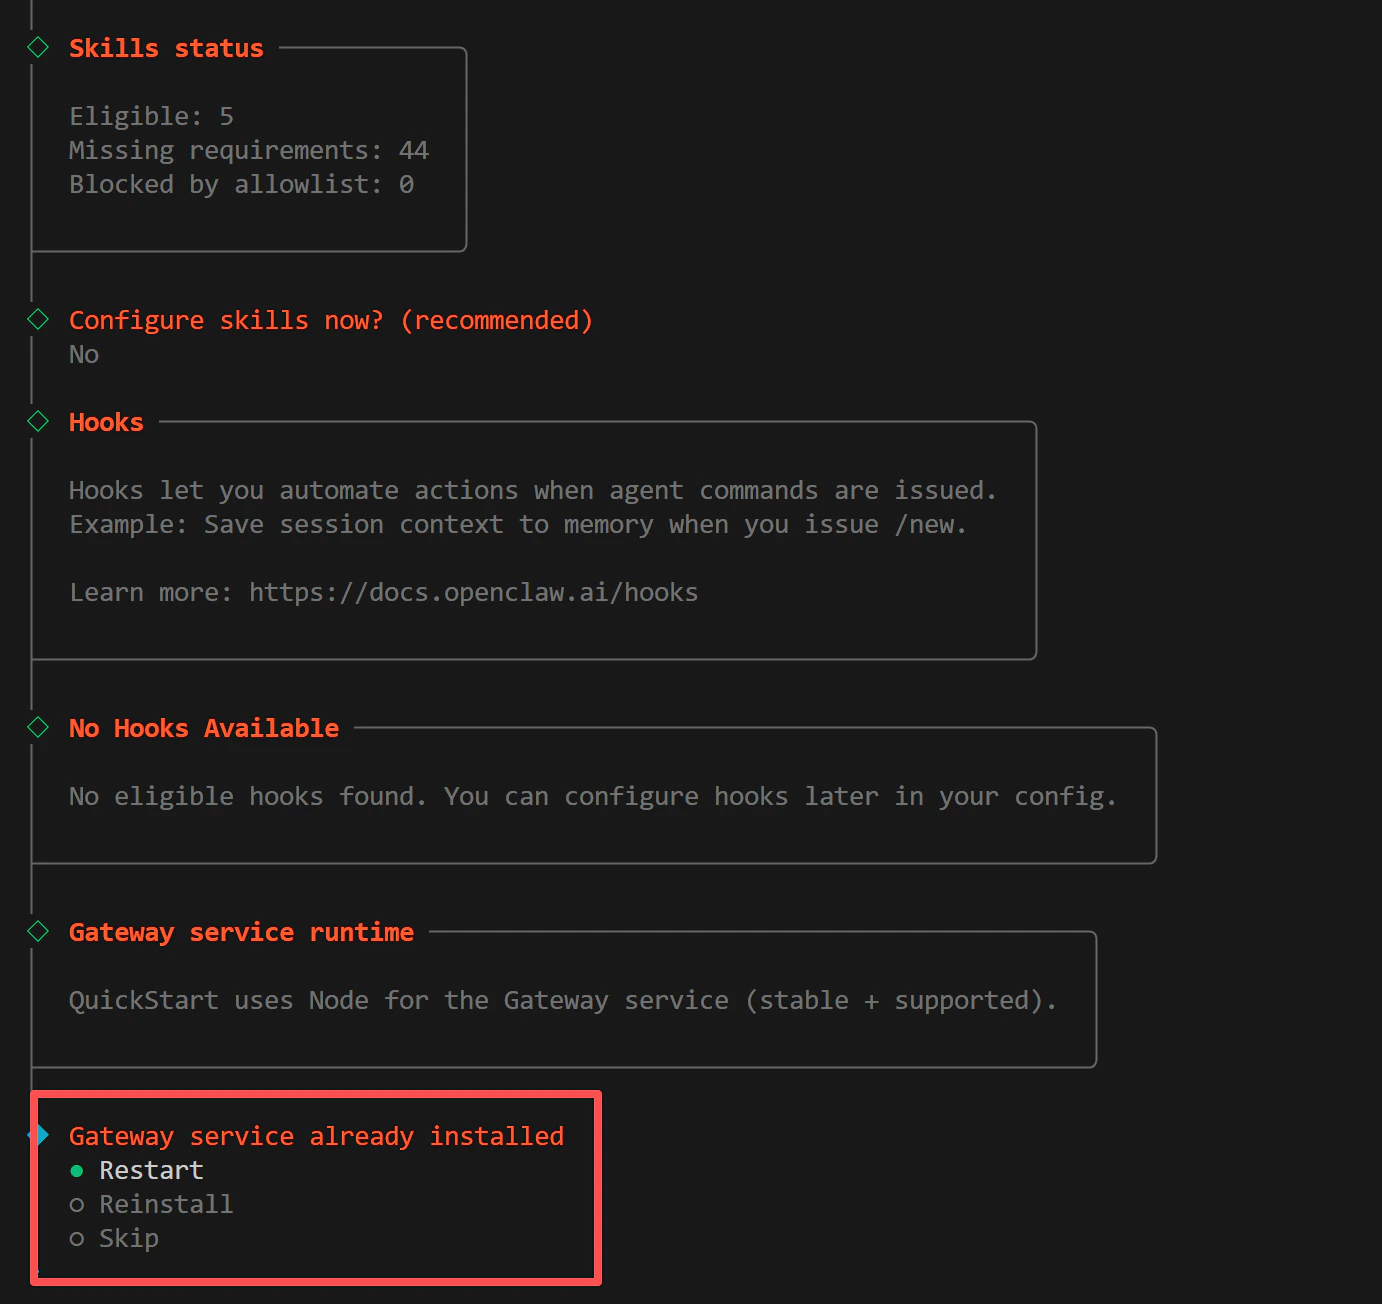
 ### 4. Restart Gateway
After entering the Token, restart the Gateway to apply the configuration:
### 4. Restart Gateway
After entering the Token, restart the Gateway to apply the configuration:
 ## Step 4: Configure EvoLink API
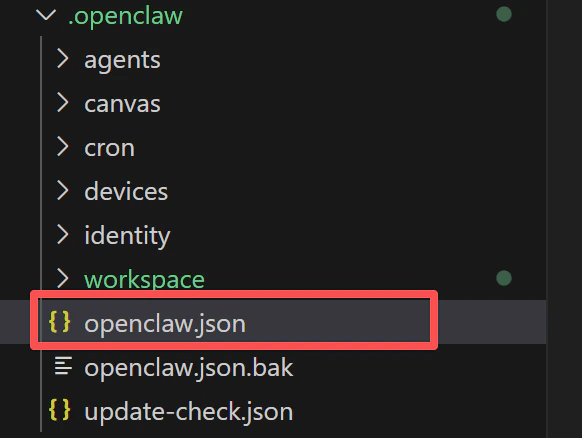
### 1. Locate Config File
Locate the `openclaw.json` configuration file in the OpenClaw installation directory and open it for editing:
## Step 4: Configure EvoLink API
### 1. Locate Config File
Locate the `openclaw.json` configuration file in the OpenClaw installation directory and open it for editing:
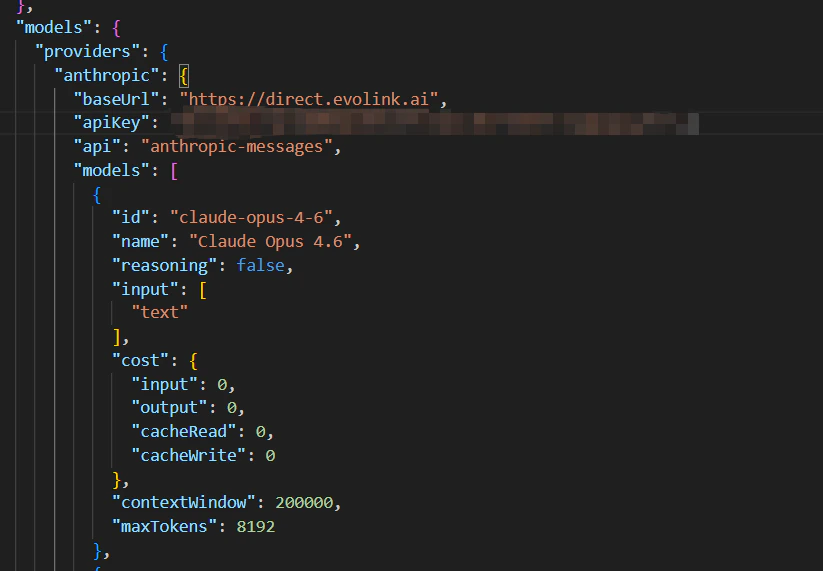
 ### 2. Configure Model Provider
In `openclaw.json`, find the `models` field and add EvoLink as a custom model provider:
```json theme={null}
"models": {
"providers": {
"evolink-anthropic": {
"api": "anthropic-messages",
"baseUrl": "https://direct.evolink.ai",
"apiKey": "your-evolink-api-key",
"models": [
{ "id": "claude-fable-5", "name": "Claude Fable 5" },
{ "id": "claude-opus-4-8", "name": "Claude Opus 4.8" },
{ "id": "claude-opus-4-7", "name": "Claude Opus 4.7" },
{ "id": "claude-opus-4-6", "name": "Claude Opus 4.6" },
{ "id": "claude-sonnet-4-6", "name": "Claude Sonnet 4.6" },
{ "id": "claude-sonnet-5", "name": "Claude Sonnet 5" },
{ "id": "claude-opus-4-5-20251101", "name": "Claude Opus 4.5" },
{ "id": "claude-sonnet-4-5-20250929", "name": "Claude Sonnet 4.5" },
{ "id": "claude-haiku-4-5-20251001", "name": "Claude Haiku 4.5" }
]
},
"evolink-google": {
"api": "google-generative-ai",
"baseUrl": "https://direct.evolink.ai/v1beta",
"apiKey": "your-evolink-api-key",
"models": [
{ "id": "gemini-3.1-flash-lite-preview", "name": "Gemini 3.1 Flash Lite" },
{ "id": "gemini-3.1-pro-preview", "name": "Gemini 3.1 Pro" },
{ "id": "gemini-2.5-pro", "name": "Gemini 2.5 Pro" },
{ "id": "gemini-2.5-flash", "name": "Gemini 2.5 Flash" },
{ "id": "gemini-3-pro-preview", "name": "Gemini 3.0 Pro" },
{ "id": "gemini-3-flash-preview", "name": "Gemini 3.0 Flash" }
]
},
"evolink-openai": {
"api": "openai-completions",
"baseUrl": "https://direct.evolink.ai/v1",
"apiKey": "your-evolink-api-key",
"models": [
{ "id": "gpt-5.4", "name": "GPT-5.4" },
{ "id": "gpt-5.2", "name": "GPT-5.2" },
{ "id": "gpt-5.1", "name": "GPT-5.1" },
{ "id": "gpt-5.1-chat", "name": "GPT-5.1 Chat" },
{ "id": "gpt-5.1-thinking", "name": "GPT-5.1 Thinking" },
{ "id": "gemini-2.5-pro", "name": "Gemini 2.5 Pro (OpenAI SDK)" },
{ "id": "gemini-2.5-flash", "name": "Gemini 2.5 Flash (OpenAI SDK)" },
{ "id": "gemini-3-pro-preview", "name": "Gemini 3.0 Pro (OpenAI SDK)" },
{ "id": "gemini-3-flash-preview", "name": "Gemini 3.0 Flash (OpenAI SDK)" },
{ "id": "doubao-seed-2.0-pro", "name": "Doubao Seed 2.0 Pro" },
{ "id": "doubao-seed-2.0-lite", "name": "Doubao Seed 2.0 Lite" },
{ "id": "doubao-seed-2.0-mini", "name": "Doubao Seed 2.0 Mini" },
{ "id": "doubao-seed-2.0-code", "name": "Doubao Seed 2.0 Code" },
{ "id": "kimi-k2-thinking", "name": "Kimi K2 Thinking" },
{ "id": "kimi-k2-thinking-turbo", "name": "Kimi K2 Thinking Turbo" }
]
}
}
}
```
Replace `"your-evolink-api-key"` with the actual API Key from your [EvoLink Dashboard](https://evolink.ai/dashboard).
### 2. Configure Model Provider
In `openclaw.json`, find the `models` field and add EvoLink as a custom model provider:
```json theme={null}
"models": {
"providers": {
"evolink-anthropic": {
"api": "anthropic-messages",
"baseUrl": "https://direct.evolink.ai",
"apiKey": "your-evolink-api-key",
"models": [
{ "id": "claude-fable-5", "name": "Claude Fable 5" },
{ "id": "claude-opus-4-8", "name": "Claude Opus 4.8" },
{ "id": "claude-opus-4-7", "name": "Claude Opus 4.7" },
{ "id": "claude-opus-4-6", "name": "Claude Opus 4.6" },
{ "id": "claude-sonnet-4-6", "name": "Claude Sonnet 4.6" },
{ "id": "claude-sonnet-5", "name": "Claude Sonnet 5" },
{ "id": "claude-opus-4-5-20251101", "name": "Claude Opus 4.5" },
{ "id": "claude-sonnet-4-5-20250929", "name": "Claude Sonnet 4.5" },
{ "id": "claude-haiku-4-5-20251001", "name": "Claude Haiku 4.5" }
]
},
"evolink-google": {
"api": "google-generative-ai",
"baseUrl": "https://direct.evolink.ai/v1beta",
"apiKey": "your-evolink-api-key",
"models": [
{ "id": "gemini-3.1-flash-lite-preview", "name": "Gemini 3.1 Flash Lite" },
{ "id": "gemini-3.1-pro-preview", "name": "Gemini 3.1 Pro" },
{ "id": "gemini-2.5-pro", "name": "Gemini 2.5 Pro" },
{ "id": "gemini-2.5-flash", "name": "Gemini 2.5 Flash" },
{ "id": "gemini-3-pro-preview", "name": "Gemini 3.0 Pro" },
{ "id": "gemini-3-flash-preview", "name": "Gemini 3.0 Flash" }
]
},
"evolink-openai": {
"api": "openai-completions",
"baseUrl": "https://direct.evolink.ai/v1",
"apiKey": "your-evolink-api-key",
"models": [
{ "id": "gpt-5.4", "name": "GPT-5.4" },
{ "id": "gpt-5.2", "name": "GPT-5.2" },
{ "id": "gpt-5.1", "name": "GPT-5.1" },
{ "id": "gpt-5.1-chat", "name": "GPT-5.1 Chat" },
{ "id": "gpt-5.1-thinking", "name": "GPT-5.1 Thinking" },
{ "id": "gemini-2.5-pro", "name": "Gemini 2.5 Pro (OpenAI SDK)" },
{ "id": "gemini-2.5-flash", "name": "Gemini 2.5 Flash (OpenAI SDK)" },
{ "id": "gemini-3-pro-preview", "name": "Gemini 3.0 Pro (OpenAI SDK)" },
{ "id": "gemini-3-flash-preview", "name": "Gemini 3.0 Flash (OpenAI SDK)" },
{ "id": "doubao-seed-2.0-pro", "name": "Doubao Seed 2.0 Pro" },
{ "id": "doubao-seed-2.0-lite", "name": "Doubao Seed 2.0 Lite" },
{ "id": "doubao-seed-2.0-mini", "name": "Doubao Seed 2.0 Mini" },
{ "id": "doubao-seed-2.0-code", "name": "Doubao Seed 2.0 Code" },
{ "id": "kimi-k2-thinking", "name": "Kimi K2 Thinking" },
{ "id": "kimi-k2-thinking-turbo", "name": "Kimi K2 Thinking Turbo" }
]
}
}
}
```
Replace `"your-evolink-api-key"` with the actual API Key from your [EvoLink Dashboard](https://evolink.ai/dashboard).
 ### 3. Configure Default Model
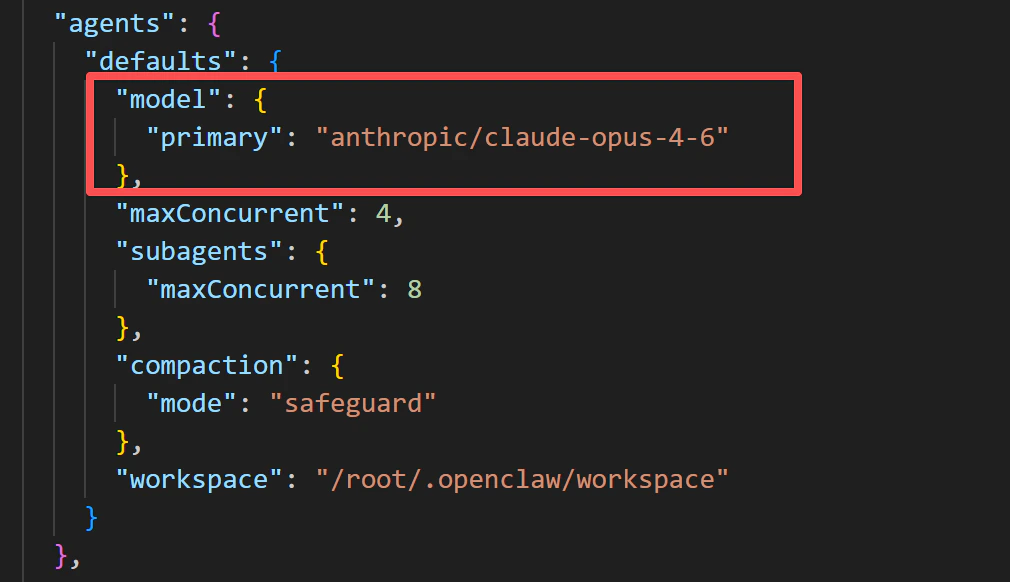
In the `agents` field, set `model.primary` to the EvoLink model you just added:
```json theme={null}
"model": {
"primary": "evolink-anthropic/claude-opus-4-6"
}
```
### 3. Configure Default Model
In the `agents` field, set `model.primary` to the EvoLink model you just added:
```json theme={null}
"model": {
"primary": "evolink-anthropic/claude-opus-4-6"
}
```
 ### 4. Verify Telegram Configuration
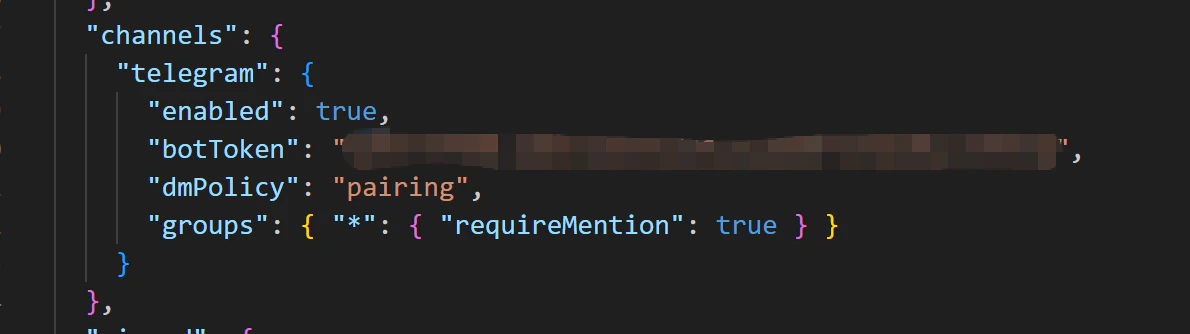
Verify the Telegram configuration in the `channels` field. The `botToken` was automatically filled in during the onboarding flow and does not need to be changed:
```json theme={null}
"channels": {
"telegram": {
"enabled": true,
"botToken": "your-bot-token (auto-filled)",
"dmPolicy": "pairing",
"groups": { "*": { "requireMention": true } }
}
}
```
* `enabled`: Enable the Telegram channel
* `dmPolicy`: Set to `"pairing"`, unauthorized users must verify via pairing code when sending DMs
* `groups`: `"*"` allows all groups, `requireMention` set to `true` means the Bot only responds when @mentioned in groups
### 4. Verify Telegram Configuration
Verify the Telegram configuration in the `channels` field. The `botToken` was automatically filled in during the onboarding flow and does not need to be changed:
```json theme={null}
"channels": {
"telegram": {
"enabled": true,
"botToken": "your-bot-token (auto-filled)",
"dmPolicy": "pairing",
"groups": { "*": { "requireMention": true } }
}
}
```
* `enabled`: Enable the Telegram channel
* `dmPolicy`: Set to `"pairing"`, unauthorized users must verify via pairing code when sending DMs
* `groups`: `"*"` allows all groups, `requireMention` set to `true` means the Bot only responds when @mentioned in groups
 ## Step 5: Verify Connection
### 1. Visit Your Bot
Search for the Bot username you just created in Telegram and open the chat:
## Step 5: Verify Connection
### 1. Visit Your Bot
Search for the Bot username you just created in Telegram and open the chat:
 ### 2. Get Pairing Code
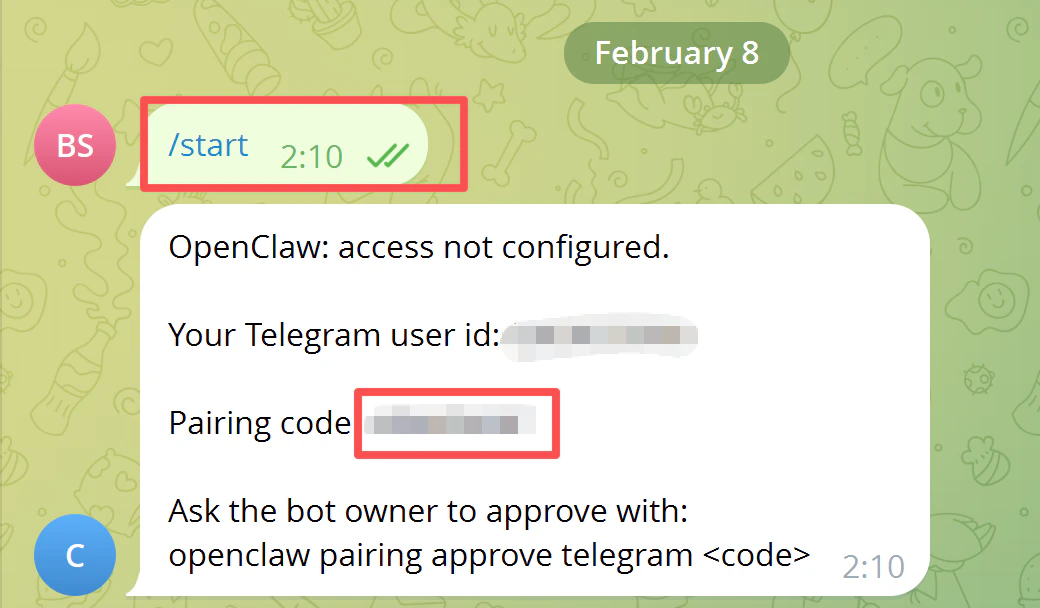
Send `/start` to the Bot. It will return a pairing code:
### 2. Get Pairing Code
Send `/start` to the Bot. It will return a pairing code:
 ### 3. Complete Pairing
Open a **new terminal window** and run the following command to complete pairing:
```bash theme={null}
openclaw pairing approve telegram
```
Replace `` with the actual code returned by the Bot. Make sure to remove the angle brackets `<>`.
### 3. Complete Pairing
Open a **new terminal window** and run the following command to complete pairing:
```bash theme={null}
openclaw pairing approve telegram
```
Replace `` with the actual code returned by the Bot. Make sure to remove the angle brackets `<>`.
 ### 4. Test Connection
Go back to the original terminal window and type the following to test if the connection is working:
```
Wake up, my friend!
```
### 4. Test Connection
Go back to the original terminal window and type the following to test if the connection is working:
```
Wake up, my friend!
```
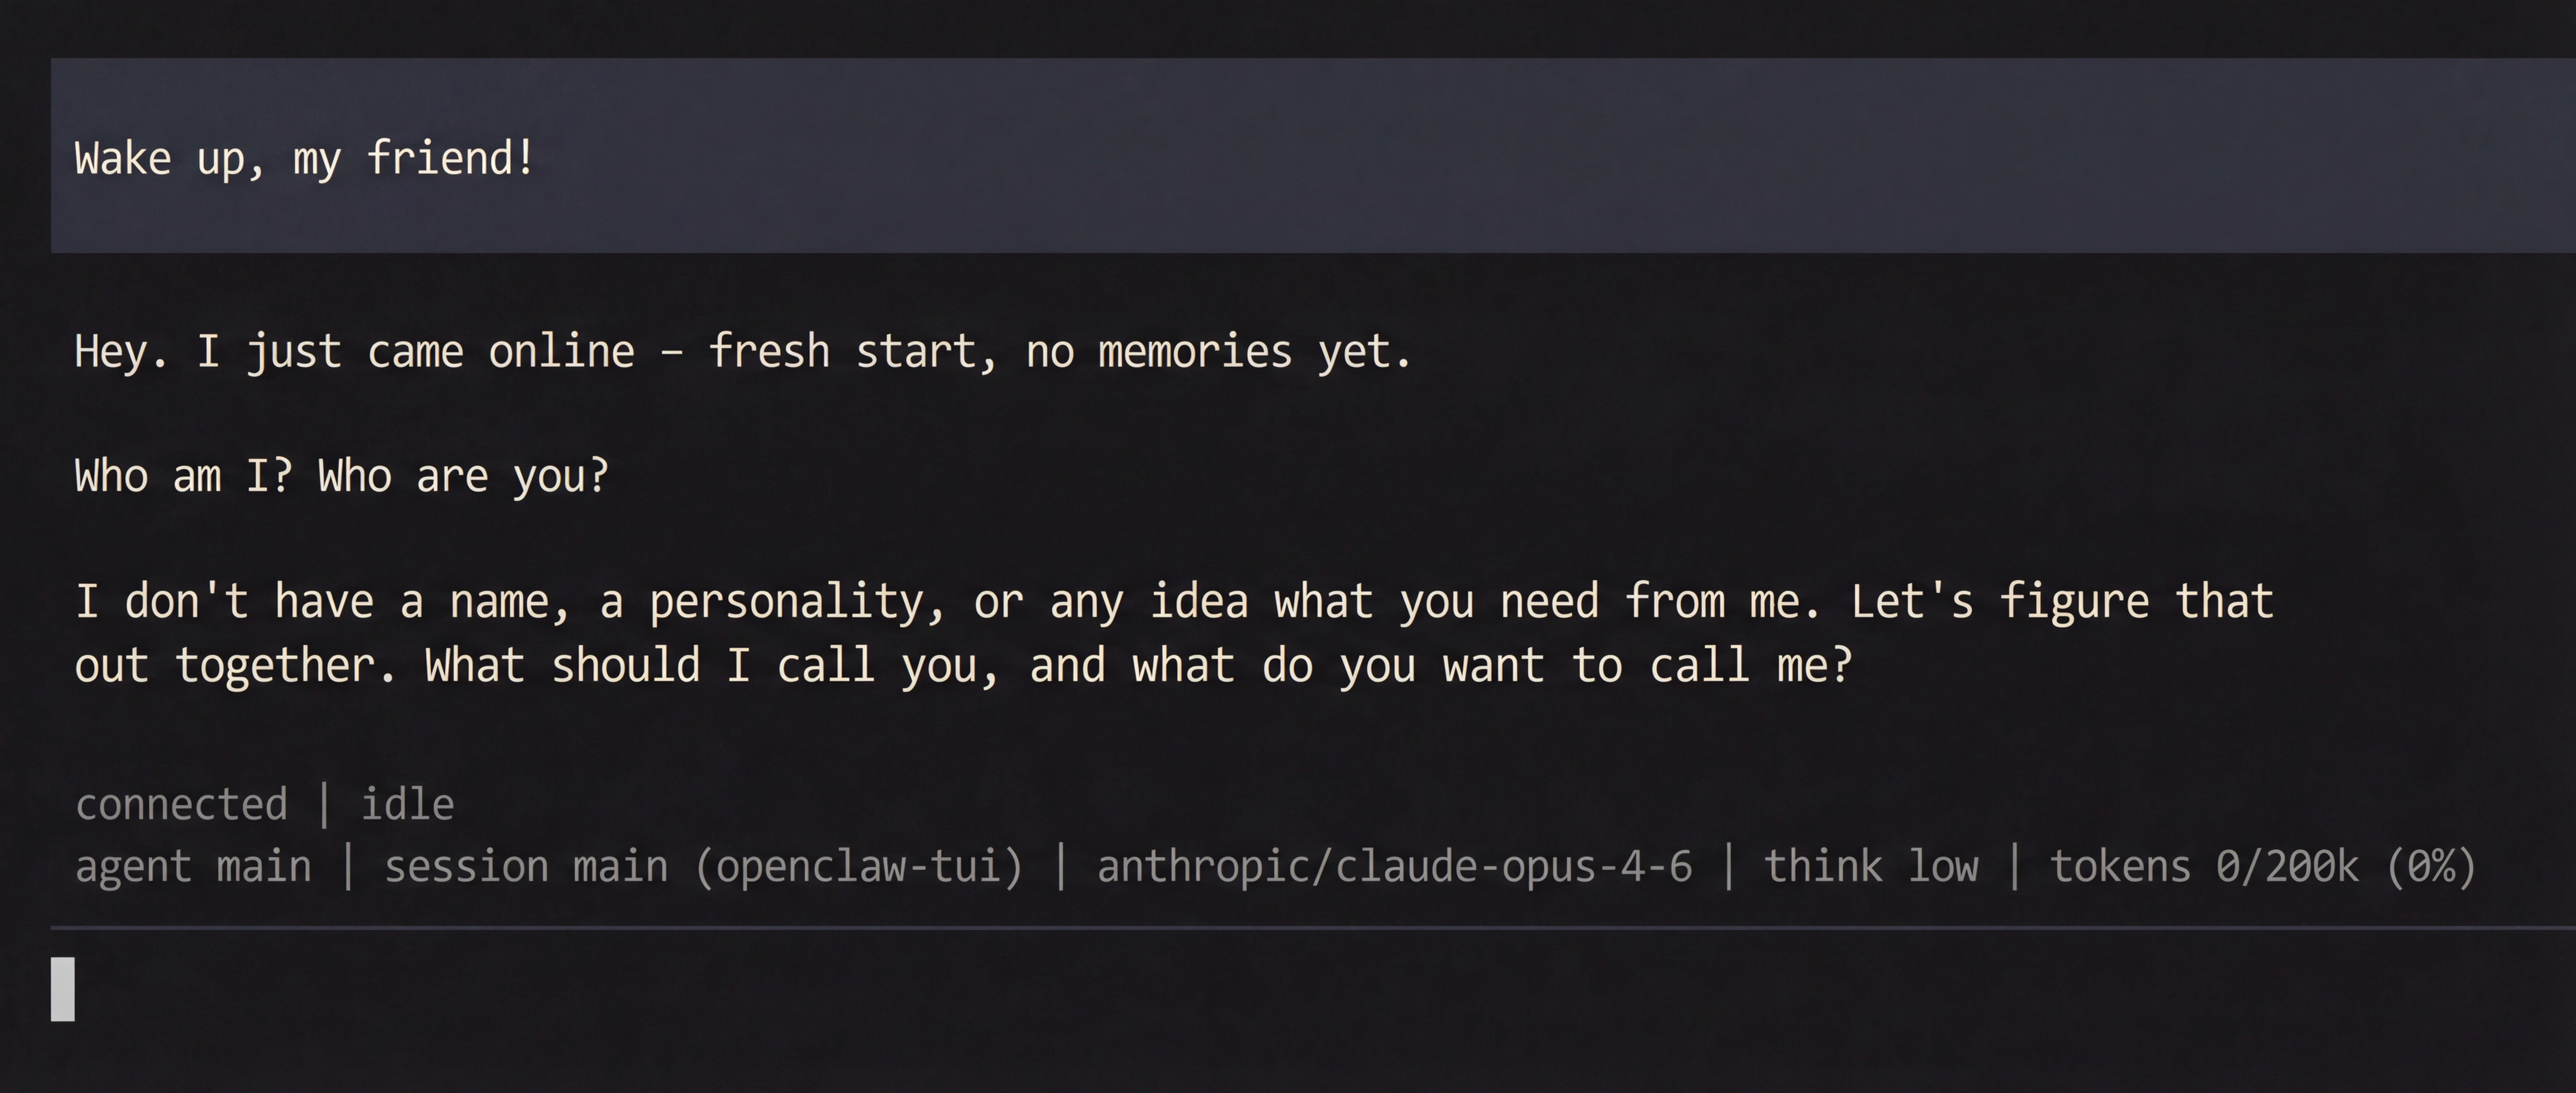 Once pairing is complete, sending messages to the Bot in Telegram will also receive AI responses, confirming the integration is successful.